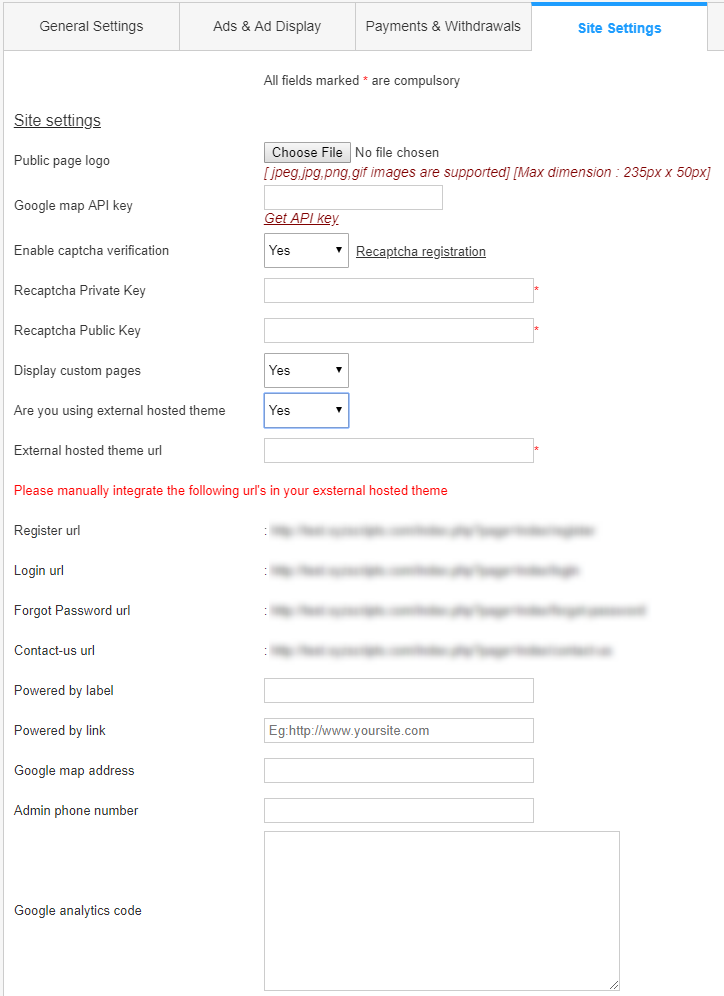
The site display settings, social media settings and email settings can be done here.
Site Settings

- Public Page Logo – We can upload the site logo here. This logo will display in public pages.
- Google map API key – Enter the google map API key to display the google map in the site reports. You can create the API ley from the link given.
- Enable Captcha Verification – We can enable captcha verification here. The captcha will display in the registration pages. We are using the famous recaptcha verification here. If you are enabling captcha, please enter the recaptcha private key and public key.
- Display Custom Pages – If you want to display custom pages, enable this option. Then in the “Site Content” section you can create custom pages and these pages will display in the home page header menu.
- Are you using external hosted theme – If you are using any external theme, please select it and then enter the External hosted theme url.
Note : If you are using an external theme, you need to enter the common links register, login, forgot password and contact us in the external theme. More details available in How can I configure external theme in XYZ Admarket? - Powered by Label – This is the powered by label displayed in the site footer
- Powered by Link – This is the powered by link.
- Google map address – You can enter the google map address here.
- Admin Phone Number – You can add your phone number for quick support to your clients.
- Google Analytics Code – You can enter your google analytics code here.
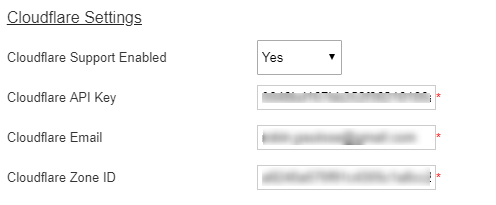
Cloudflare Settings

We can enable the cloudflare settings here.
- Cloudflare Support Enabled – We can enable/disable the cloudflare support here.
- Cloudflare API Key – Enter the cloudflare API key here
- Cloudflare Email – Enter the cloudflare Email
- Cloudflare Zone ID – Enter the cloudflare zone ID here.
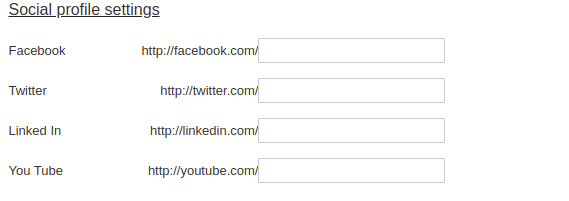
Social Profile Settings

We can add the social media links with the script. We can display the facebook, twitter and google plus links.
- Facebook – Enter the facebook profile name here.
- Twitter – Enter the twitter profile name here.
- Google Plus – Enter the google plus profile ID here.
- Linkedin – Enter the linkedin id here.
- Youtube – Enter the youtube id here.
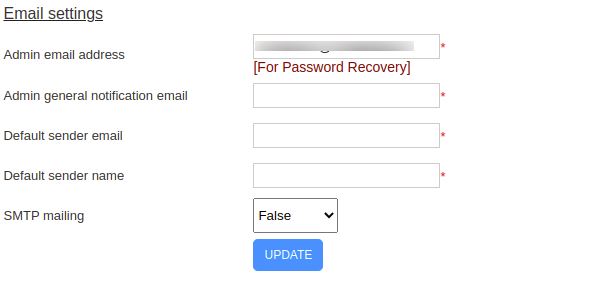
Email Settings

We can enter the email settings here.
- Admin Email Address – This is the email address of administrator. This email is used for password recovery.
- Admin General Notification Email – This is the email of admin where the admin gets email notification from users and system.
- Default Sender Email – This is the sender email address. This is used if the SMTP is off in the system.
- Default Sender Name – This is the sender name. This is used if the SMTP is off in the system
- SMTP Mailing – We can enable SMTP mailing here.
- SMTP Auth – We can set the SMTP authentication here. (In the authentication, we are using the password for authentication emails)
- SMTP Debug – Enable this to debug the SMTP errors if any.
- SMTP Host – Enter the SMTP host name here.
- SMTP User – Enter the SMTP user name here.
- SMTP Password – Enter the SMTP password here.
- SMTP Port – Enter the SMTP port here.
- SMTP Secure – Enter the SMTP security here.
You can see more details about SMTP Mailing in How can I use SMTP for sending emails?