Installation of Email Newsletter Addon:
- Upload the Email Newsletter addon to the “addons” folder in XYZ Admarket script.
- In the “Manage Addons” page please activate the Newsletter Addon.

- Now you can see the addons settings and update it.
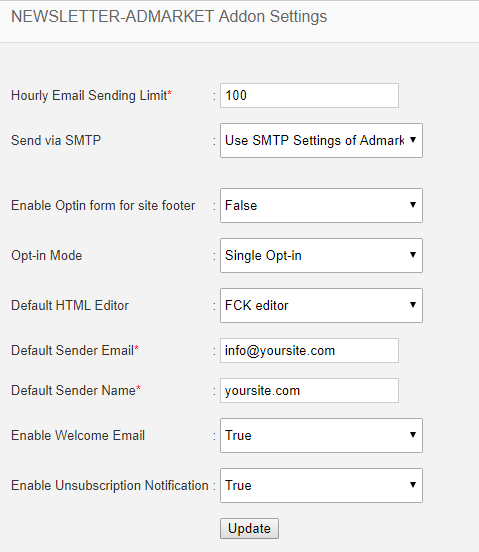
- Hourly Email Sending Limit – This is the email sending limit per hour. If your server allow to send 200 emails per hour, please use a value less than or equal to 200.
- Send via SMTP – We can send the emails using SMTP or basic phpmail function. Here we have 3 options.
- Use the SMTP settings of the Admarket – In the newsletter addon we can use the default SMTP of the admarket
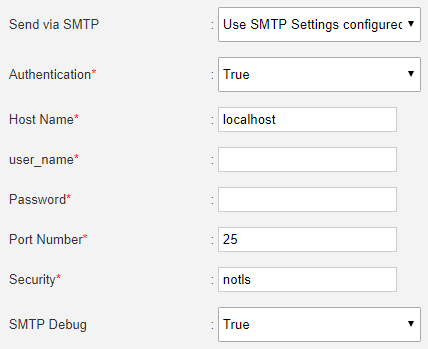
- Use SMTP settings for the newsletter addon – Here we can add separate SMTP details for the newsletter addon. If you are selecting this option, you need to enter the SMTP details.
- No – Means you are using the basic phpmail function to send newsletter.
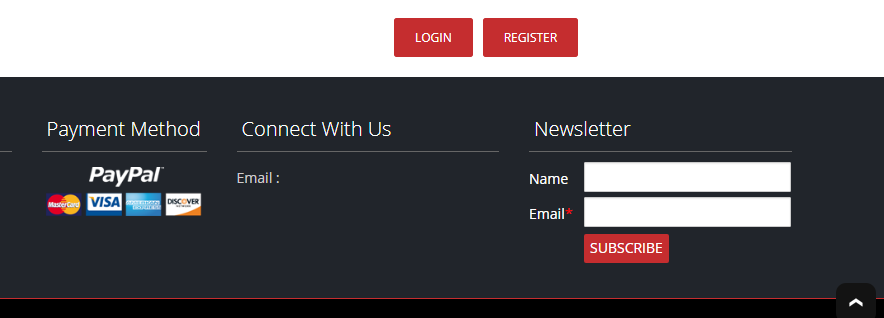
- Enable Optin form for site footer – We can display the optin form in the site footer. If we enable it, the form is displayed in footer as given below.
- Opt-in Mode – It is the email subscription method. We have 2 options, Single optin and double optin.
In the single optin, there is no confirmation required after subscription.
In the double optin, it will send a confirmation mail on subscription and user need to confirm the subscription. - Default HTML Editor – We can use “Text Area” or “FCK Editor” as default HTML editor.
- Default Sender Email – This is the email used to send emails in phpmail function.
- Default Sender Name – This is the email sender name in phpmail
- Enable Welcome Email – We can enable or disable the welcome mail to subscribers here.
- Enable Unsubscription Notification – If we enable this, it will send a mail on unsubscription.
After entering the details click the “Update” button.
- Now in the left menu, we can see the newsletter options
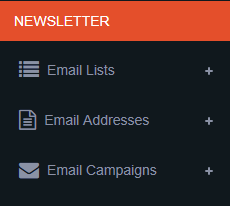
- Email Lists
Click the “Manage Lists” in the Email list section and you can see all the lists.
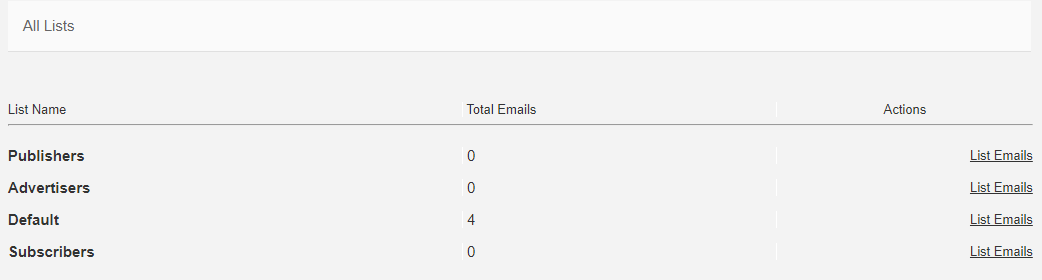
We have 4 lists here. Advertisers, Publishers, Subscribers and Default.
We can see the total number of emails in each list and click the list emails to see all the emails in the list.
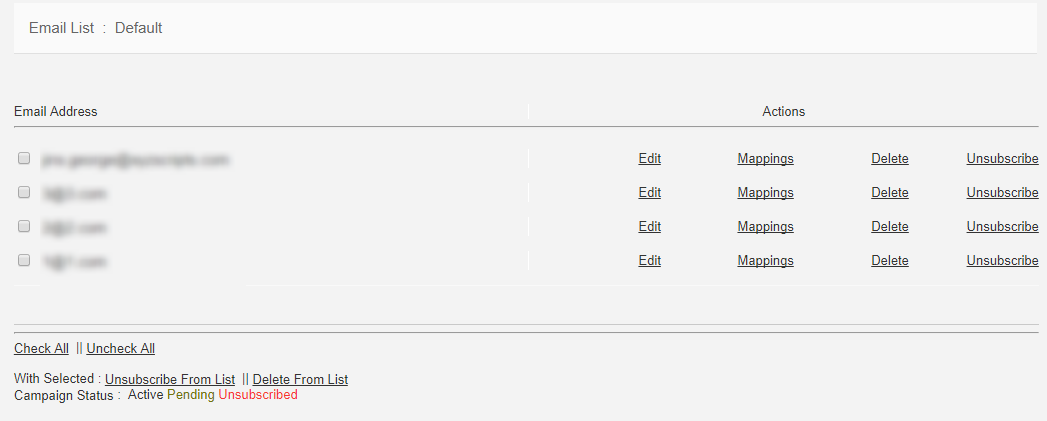
Here we can see all the emails in the list.
Click the “Edit” link to edit the email address.
We can “Delete” or “Unsubscribe” the email from the list.
Click the “Mappings” link to see the mapping of the email.
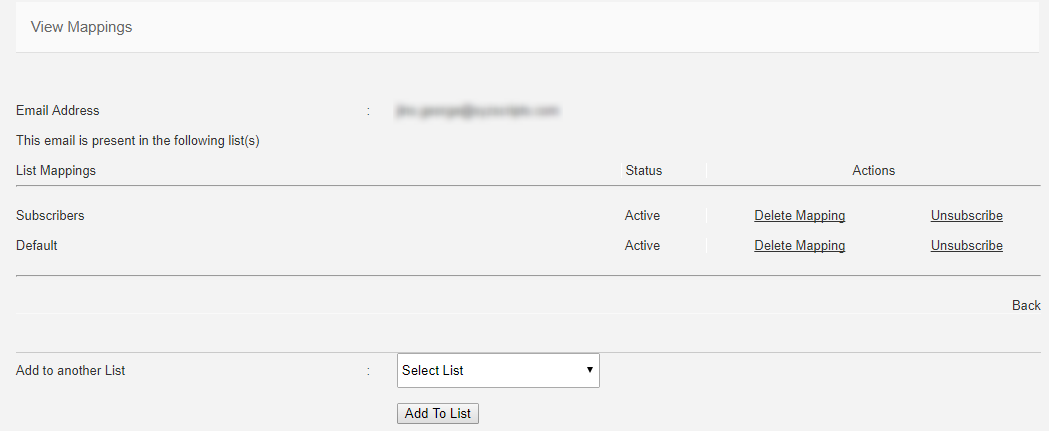
Here we can see the lists where the email is present.
We can add the email to another list here. - Email Addresses
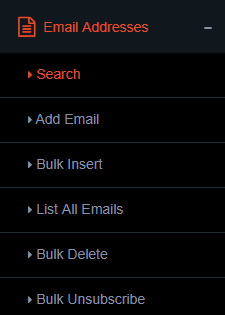
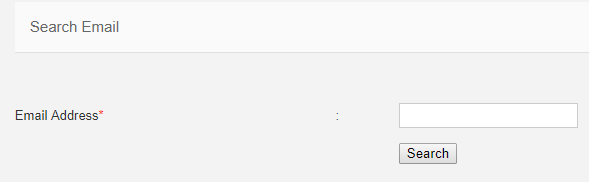
- Search – We can search an email address here.
- Add Email – We can add the emails manually here.
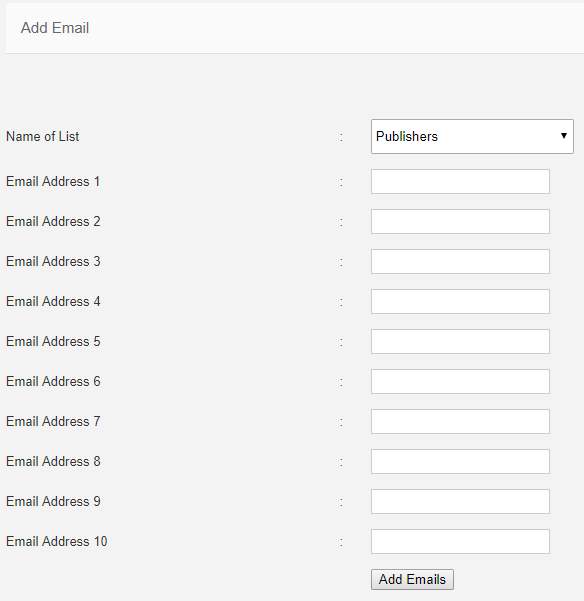
Here first select the list and enter emails addresses and click the “Add Emails” button. - Bulk Insert – In this section we can insert emails from text.
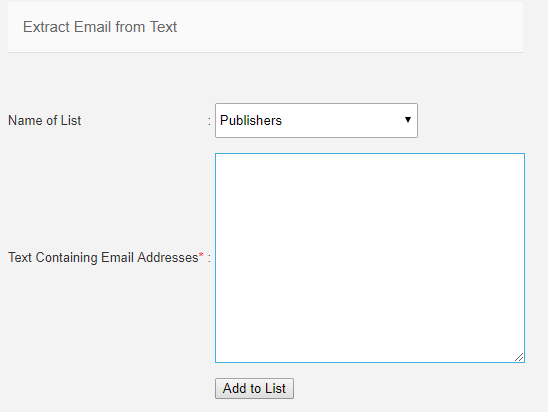
Here select the list and enter the text containing email addresses and click the “Add to List” button. It will add the email addresses to the list. - List all Emails – In this section we can see all the emails in the system.
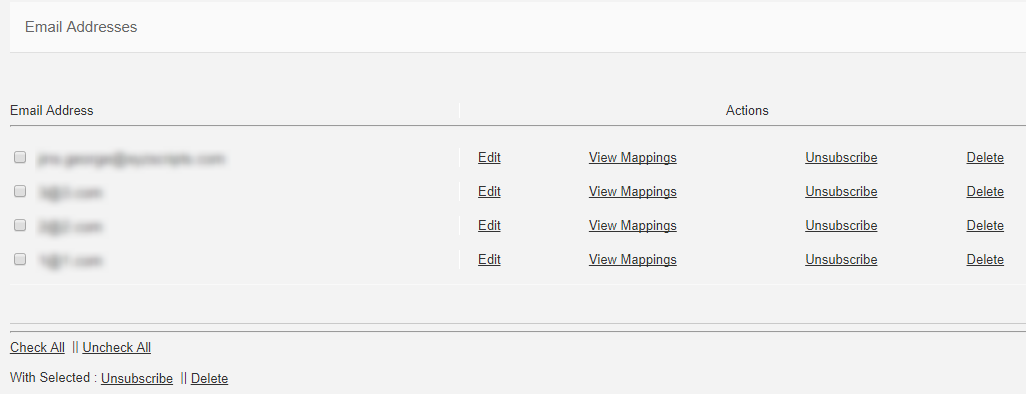
Here we can edit, unsubscribe or delete the email address.
Also we can see the mappings (the lists where the email address is present) by clicking the “View Mappings” link. - Bulk Delete – We can delete emails in bulk in this section.
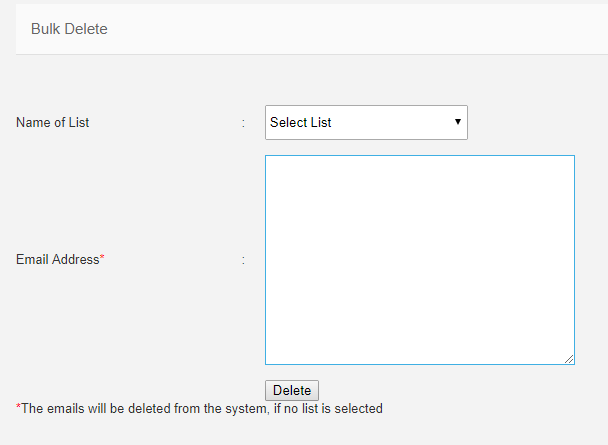
Here select the list and enter the email addresses. If no list is selected the emails will be deleted from the entire system. - Bulk Unsubscribe – Here we can bulk unsubscribe the emails.
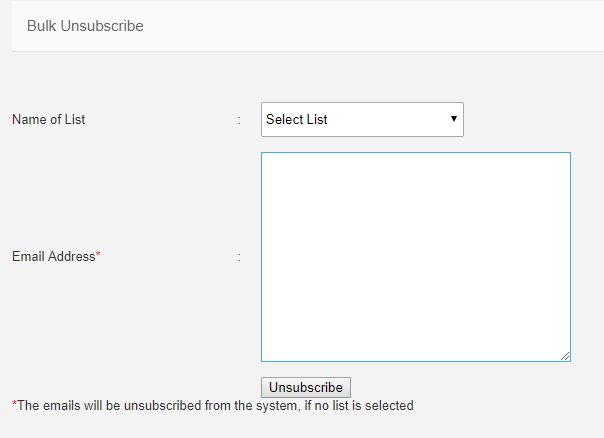
Select the list and add the email addresses to unsubscribe. If you have not selected any list, the emails will be unsubscribed from the entire system.
- Search – We can search an email address here.
- Email Campaigns
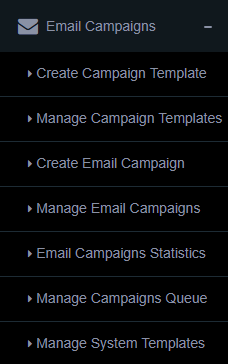
- Create Campaign Template
In this section we can create a new campaign template.
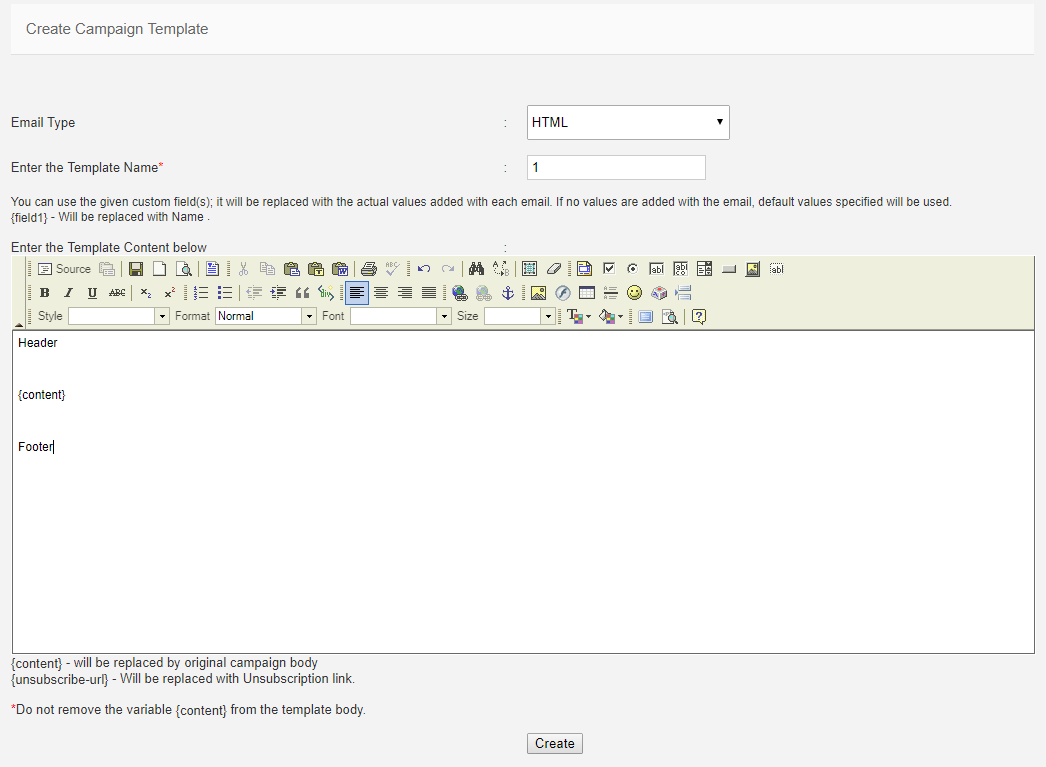
We can create a template for the newsletter campaign here.
Note : Please don’t remove the variable {content} from the template body. When we create a campaign using this template, the variable {content} is replaced by the campaign content.
To add the unsubscription link, please use {unsubscribe-url} in the template. It will be replaced by the unsubscribe url. - Manage Campaign Templates
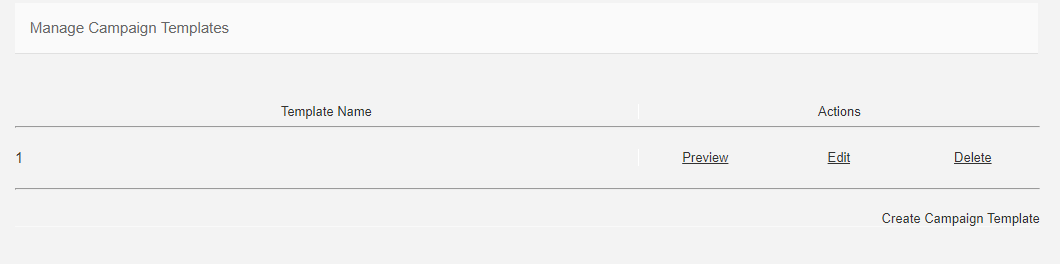
Here we can see all the campaign templates.
We can edit, delete and preview the template. - Create Email Campaign
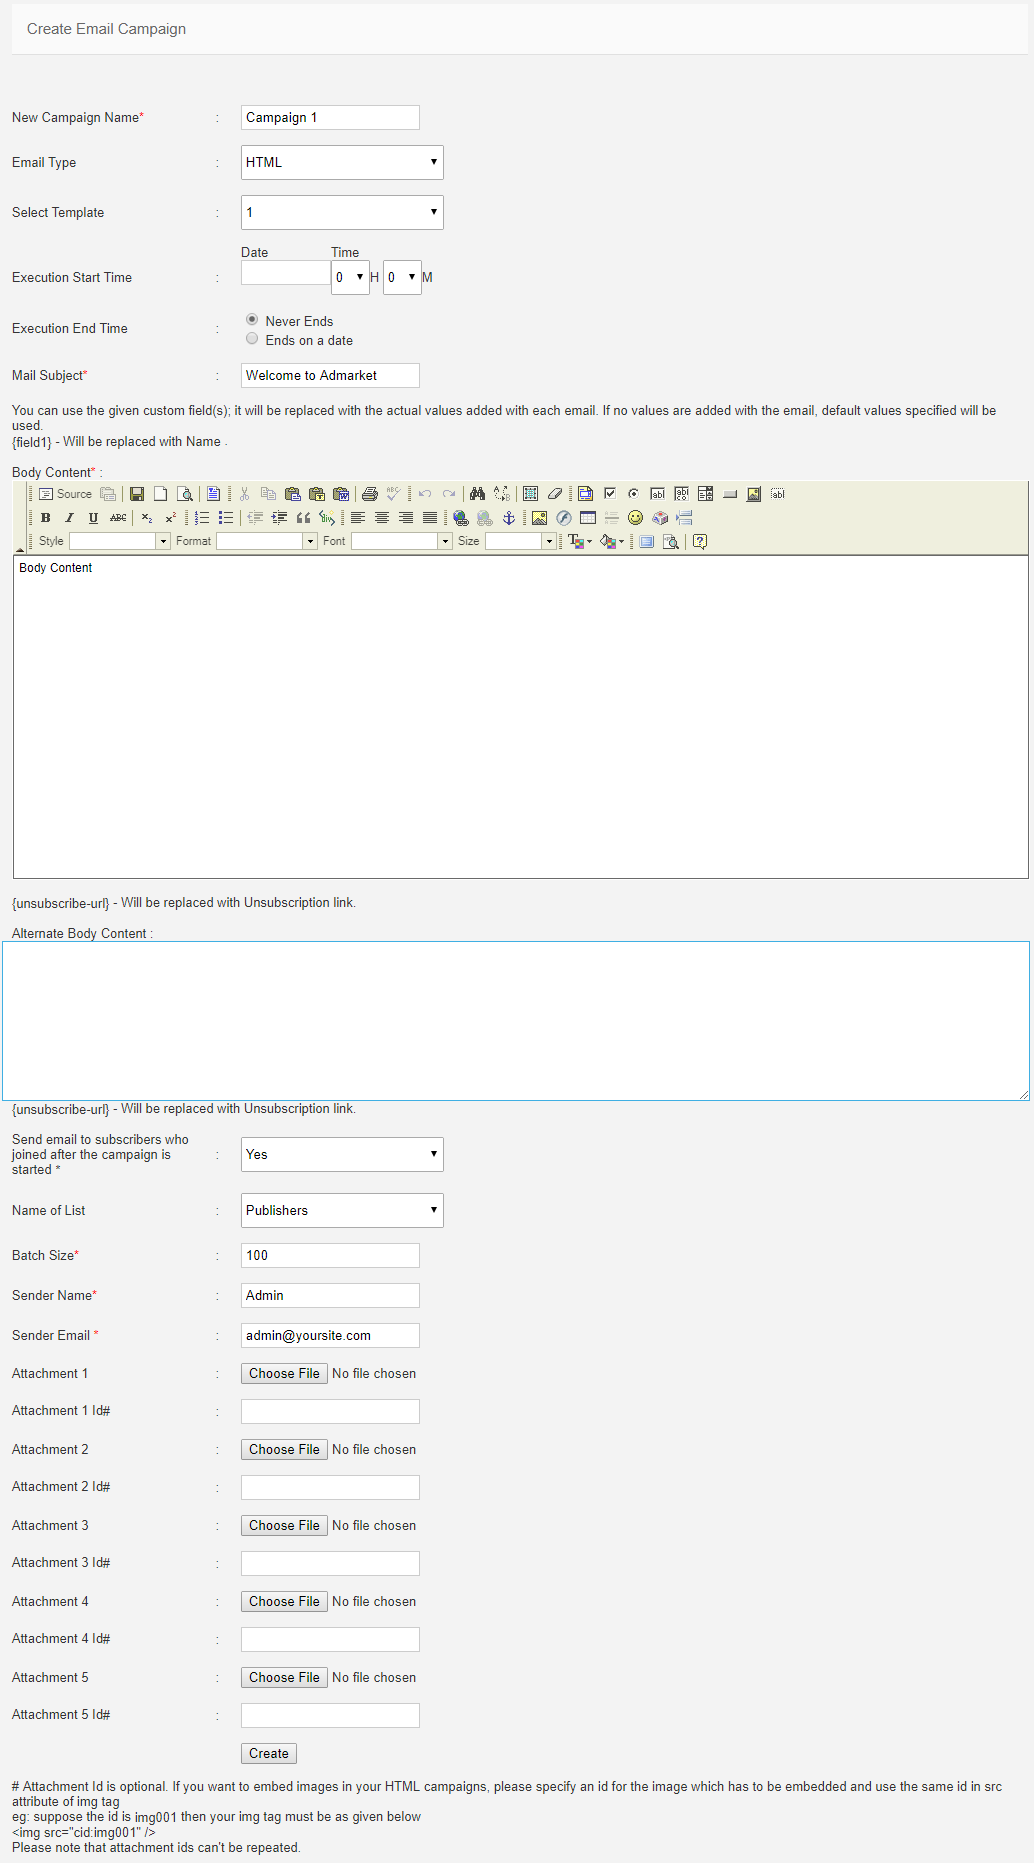
Here we can create a new campaign.
1. New Campaign Name – We can enter the campaign name here.
2. Email Type – We can create HTML or plain text email
3. Select Template – We can select the template from the list.
4. Execution Start Time – We can enter a start time if required.
5. Execution End Time – We can set an end time.
6. Mail Subject – This is the subject of the campaign.
7. Body Content – We can enter the campaign content here.
8. Send email to subscribers who joined after the campaign is started – We can select Yes or No here.
9. Name of List – Select the list where the campaign is sending.
10. Batch Size – This is the size of emails executed in a single email sending.
11. Sender Name – This is the name of the sender
12. Sender Email – This is the email of the sender
13. Attachment – We can attach upto 5 images with the campaign - Manage Email Campaigns
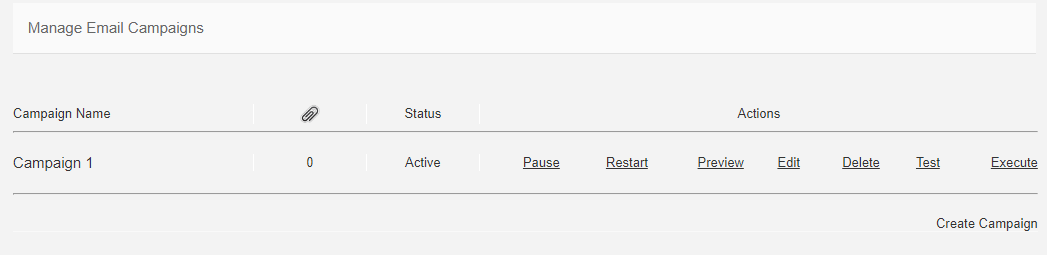
Here we can see all the campaigns and its status. The different actions are given below.
1. Pause – We can pause a campaign using this link.
2. Restart – Use this link to restart the campaign again. It will remove all the previous statistics and start the campaign again.
3. Preview – We can see the preview using this link.
4. Edit – To edit the campaign, click on the edit link.
5. Delete – We can delete the campaign on clicking the delete link.
6. Test – We can send a test mail for checking on clicking this test link.
7. Execute – Please click the execute link to execute the email campaign to users.To send the email automatically without clicking the execute link, we can set the cron job in the cpanel. In the “To Do” page we can see the newsletter cron command. Please set this cron command for every hour.
- Email Campaigns Statistics
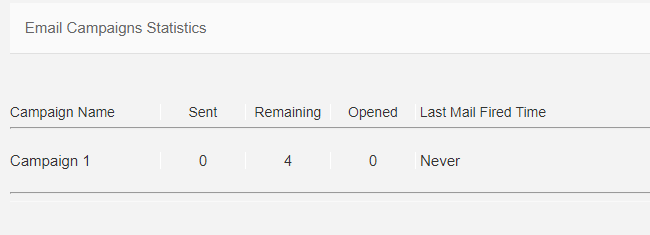
We can see the statistics of the email campaigns here.
It will display the sent count, remaining count and opened email count. We can also see the last mail fired time. - Manage Campaigns Queue
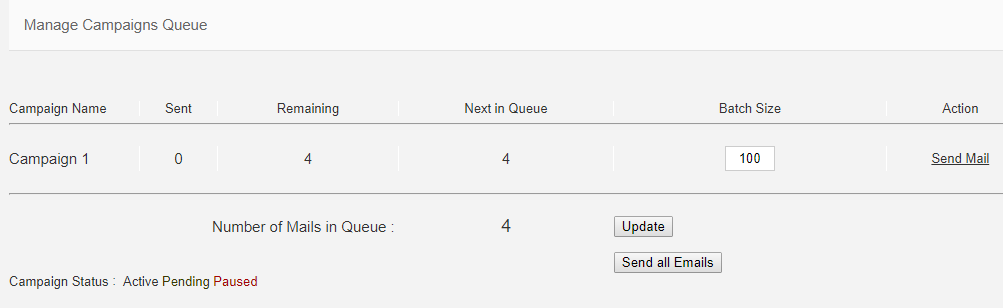
In this section we can see the campaigns queue. We can see the sent count, remaining count, next in queue and the batch size. - Manage System Templates
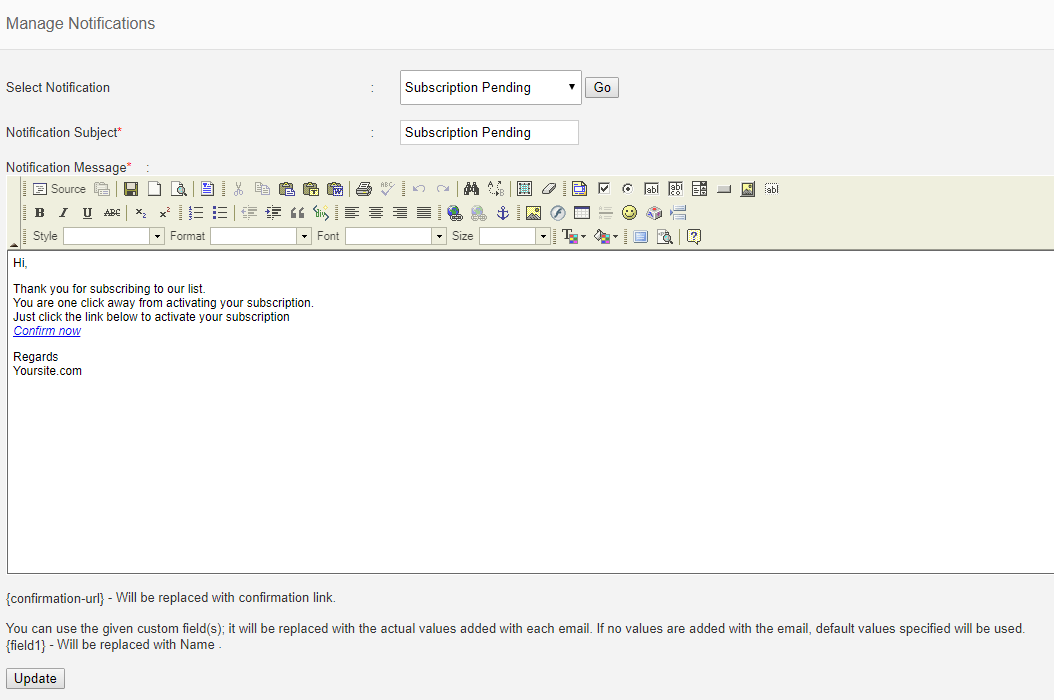
In this section we can see the system notification templates and can edit them.
- Create Campaign Template
Note : To send the emails automatically we can set the cron job in cpanel (server control panel). The cron command is present in “To Do” page and please set the cron for every hour.
More details available in Can I send emails automatically without click the send button?