The site contents settings are given here.
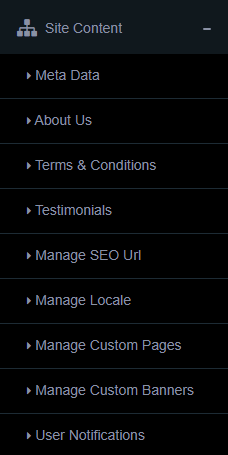
Meta Data
In this section we can add the page title, meta keywords and meta description (separate for all public pages).
We can add separate meta data for advertiser page, publisher page, contact page, FAQ page, Home page, Register page, Forgot password page, About Page and Terms page. Also we can display it in different languages.
About Us
In this page, admin can enter something about the site/company.
Here the variable {ADMARKETNAME} will be replaced with original site name in the public end.
You can add it in different languages.
Terms and Conditions
In this page admin can set the terms and conditions of the site.
Testimonials
Admin can see all testimonials and add new testimonial from users here.
To edit the testimonial, click on the “Edit” button.
To delete the testimonial, click on the “Delete” button.
Click the “Create Testimonial” link to add a new testimonial by the user.
Here first select the user from the drop down menu and then add the testimonial in the section and click “Create Testimonial”.
Manage SEO Url
In this section we can add the SEO friendly names to the urls.
Here we can add more seo friendly name to the pages.
Note 1: DON’T use advertiser and publisher as seo names.
Note 2: Please rename the _.htaccess file to .htaccess and place this file in the root folder. If there is any issue, please contact our support team.
Manage Locale
In this section we can see the languages in the system and manage them.

To add a new locale, click on the “Add Locale” link.
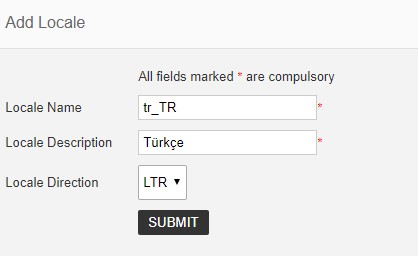
Here enter the Locale Name (code) , Locale Description (Language Name) and Locale Direction (Left to Right or Right to Left orientation).
Now in the server “locale” folder, please create a new folder with the same Locale Name and copy the labels.php and messages.php file from en_US folder and translate the labels and messages to your language.
More details available in How can I add new languages in the script?
Manage Custom Pages
In this section we can create extra pages for the site.

We can see all the custom pages here, change their priority to display in front end and take actions like edit, block, activate and delete.
To create a new page click on the “Create New Page” link.
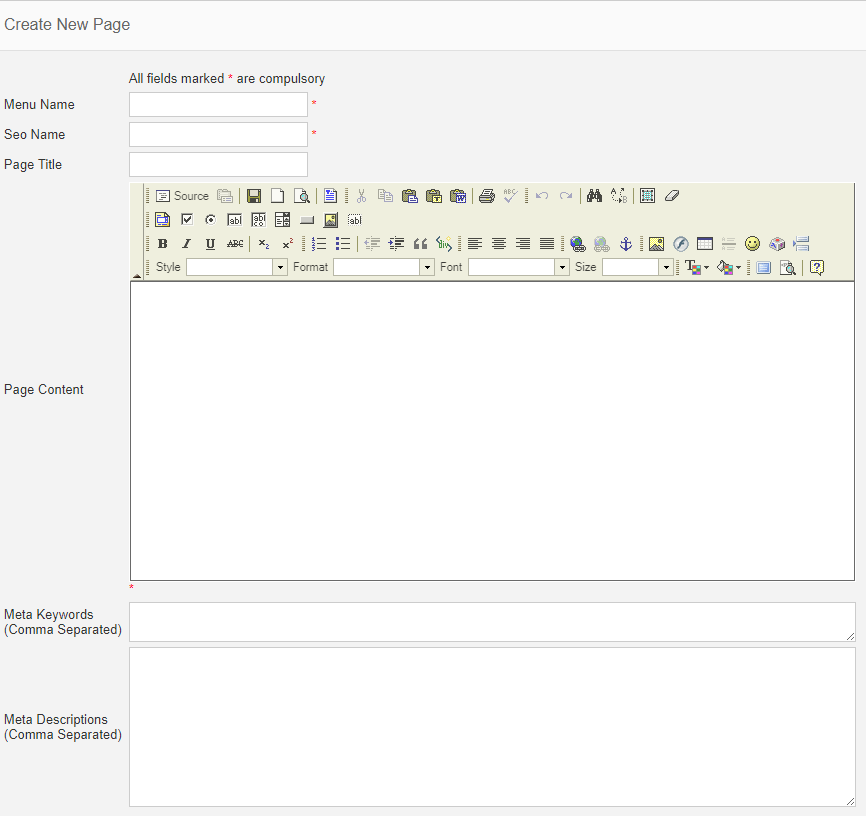
Here we can enter the Menu Name, SEO Name, Page Title, Page Description, Meta Keywords and Meta Descriptions.
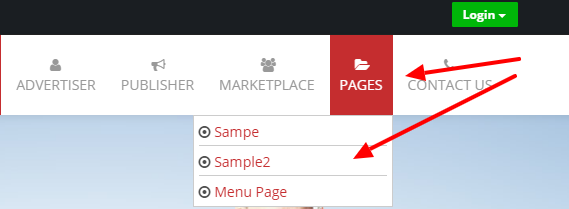
These added pages will be displayed in the front page header menu as dropdown.
Manage Custom Banners
In this section we can upload banner and content for the advertiser and publisher pages of the site.

Here we can see all the custom banner and manage them. We can also change the priority of the banners.
To create a new banner, click on the “Create Banner” link.
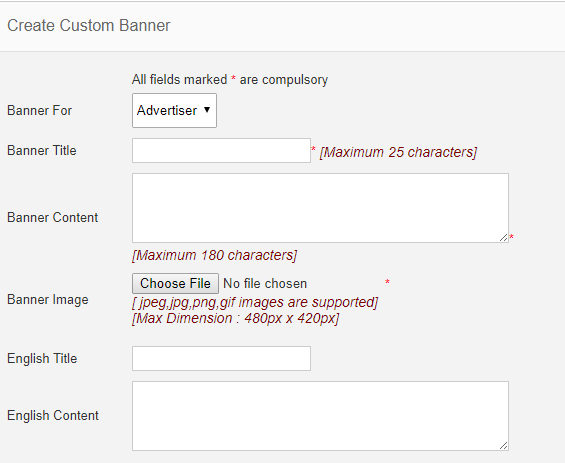
We can add the content in any language.
These uploaded banner will be displayed in the home page slider.
User Notifications
Admin can display the notification messages to advertisers, publishers and public. For this admin can create messages in this section.

Here we can see all the notifications, status and expiry. Admin can edit, block, activate or delete the message.
To create a new message, click on the “New Notification” link.
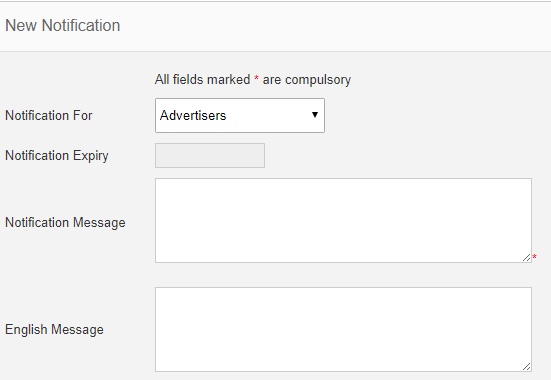
Here we can select the notification viewer, advertiser, publisher, advertiser & publisher, visitor.
Also we can set the notification expiry by selecting the date and enter the notification message. We can add the message in different languages.
Now the user will get a notification symbol in the header of the page.

Click on the notification icon and we can see the message.


