Installation of Native Ad Display Addon
- Click the “Install Now” button in the “Manage Addons” page.

If it is not working, please upload the Native Ad Display Addon to the “addons” folder in XYZ Admarket script. - Now activate the “Native Ad Display” addon.

- You can enter the settings here.

Here we can enter the following details.
1. Native ad header text – This is the header text of the native ad. Admin can use any text here.
2. Maximum ads allowed in responsive adcode – This is the maximum number of ads allowed in an adcode which is responsive. The responsive ad will display suited dimension as based on the screen size.
3. Maximum Rows – This is the maximum rows allowed in a native ad block.
4. Maximum Columns – This is the maximum columns allowed in a native ad block.
5. Credit Text – You can select the credit text. To add a new credit text, please go to adblocks > manage credi text page in the admin area. You can see details in https://help.xyzscripts.com/docs/xyz-admarket/user-guide/admin-section/adblocks/manage-credit-text/
6. Credit Text Alignment – This is the alignment of the credit text, left or right of the ad.
7. Credit Text Positioning – This is the position of the credit text, top or bottom.
Native Ad Layouts
In the admin menu, please go to “Adblocks > Ad Layouts” section.
You can see details in https://help.xyzscripts.com/docs/xyz-admarket/user-guide/admin-section/adblocks/ad-layouts/
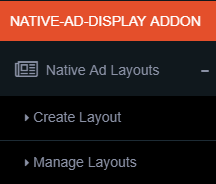
Click the “Create Layout” link to create a new layout.
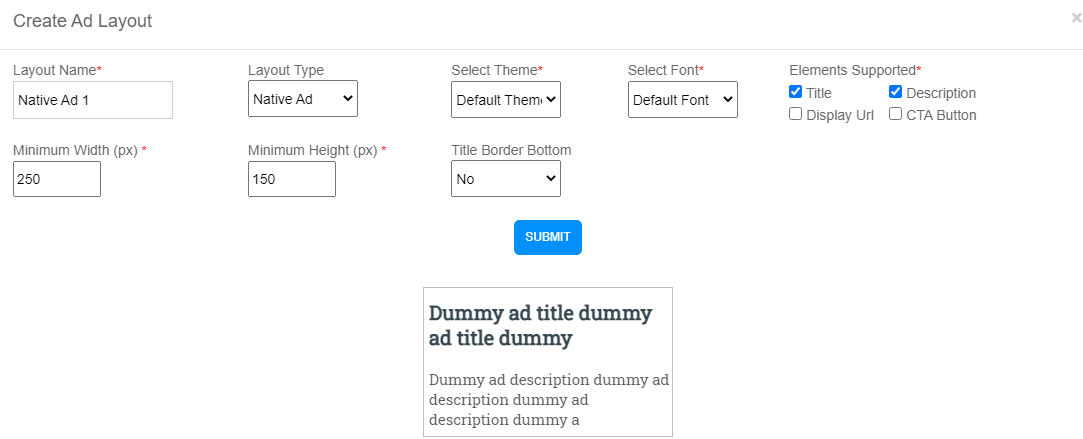
- Enter the Layout Name. You can add any name to recognize it.
- Select the “Layout Type : Native Ad”.
- Select the theme. If you want to create a new theme, please go to “Adblocks > Themes”. You can see the details in https://help.xyzscripts.com/docs/xyz-admarket/user-guide/admin-section/adblocks/themes/
- Select the font. If you want to create a new font, please go to “Adblocks > Fonts”. You can see the details in https://help.xyzscripts.com/docs/xyz-admarket/user-guide/admin-section/adblocks/fonts/
- Select the supported elements – If you want only the Title and Description for the native ad, use those elements only. After selecting the elements you can preview it. You can select, Title (title of the ad), Description (description of the ad), URL (display url of the ad) and CTA Button ( Call To Action Button – a button like Buy Now, Register etc.)
- Select the minimum width of the individual ad.
- Select the minimum height of the individual ad.
Based on the elements you have selected you can see different options.
- Title Border Bottom – If you want a border below the title, select this option.
- Description Border Bottom – To add a border below the description, select this option.
- CTA Button Position – We can select the position of the CTA button here.
- CTA Section Width (px) – This is the width of the CTA section.
- CTA Border Radius (px) – This is the border radius of the CTA button.
- CTA Padding Horizontal (px) – This is the padding of the CTA in horizontal direction.
- CTA Padding Vertical (px) – This is the padding of the CTA in vertical direction.
Publisher Section
In the publisher section when creating the adcode, we can select the native ad.
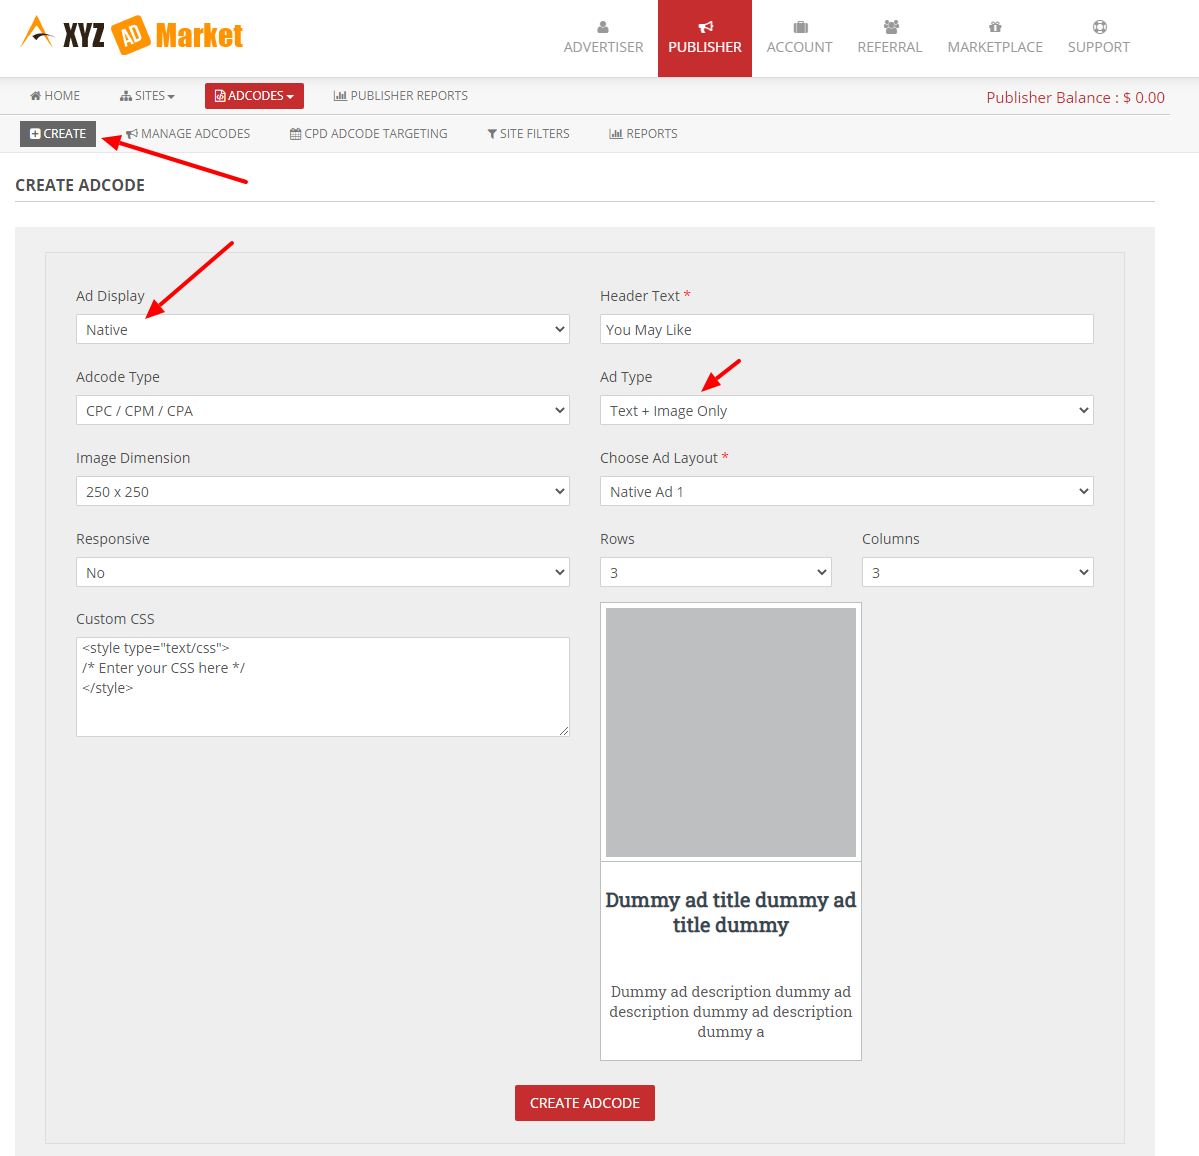
- Select the “Ad Display : Native“
- Enter Header Text
- Select Ad code type (CPC,CPM,CPA etc.)
- Select Ad type (Text only, Text+Image).
- Image Dimension (we can see this only if we select the ad type: text+image)
- Choose Ad Layout
- Choose whether the adcode is responsive or not.
- If the adcode is responsive, enter the allowed ads in the native adblock.
- If the adcode is not responside select the number of rows and colums of ad. If we select 3 rows and 3 colums, it will display 3 x 3 = 9 individual ads in the adblock.
- We can enter custom css if any and preview the layout of the individual ad.
- Now click on the create button and it will create the adcode.
- You can preview the ad display and make changes.
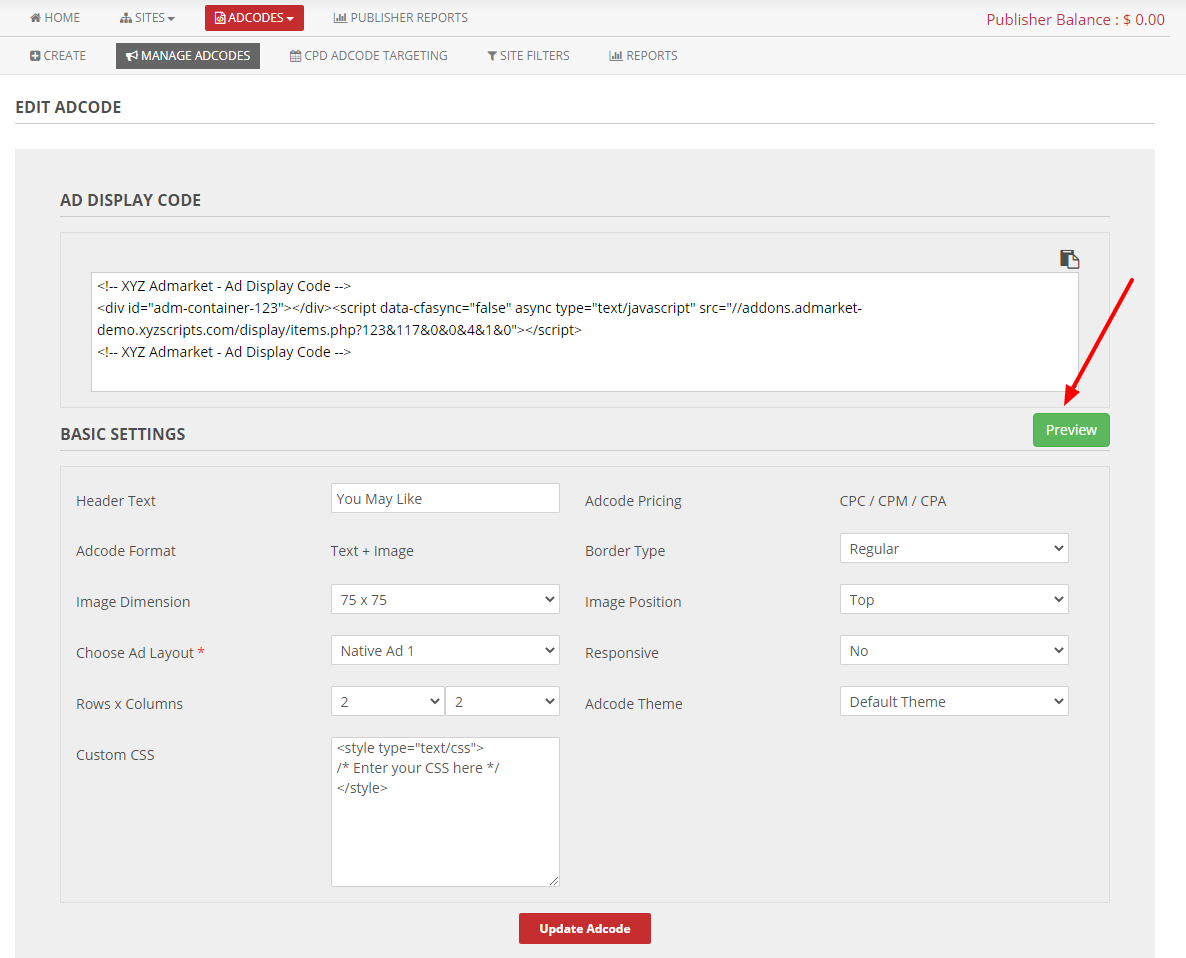
Now click on the preview button and you can see the preview of the native ad display.
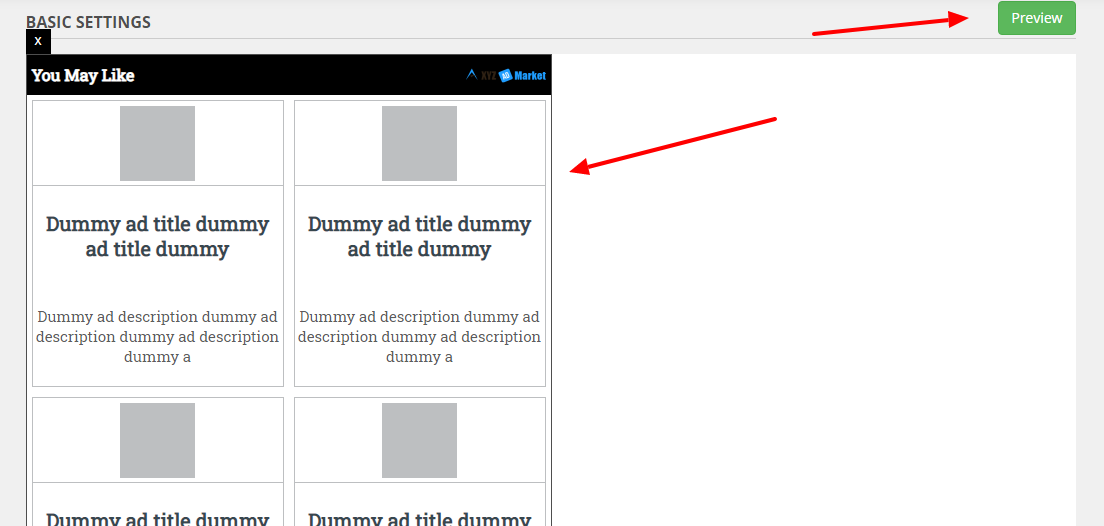
You can use the adcode in the webpage and the native ad will display there.