Installation of E-Commerce Ads Addon:
- In the “Manage Addons” section click on the “Install Now” button or upload the e-commerce ads addon to the “addons” folder in the script manually.
- Now in the “Manage Addons” section, please activate the addon.

- Now in the admin menu, we can see the E-Commerce Ad options like ad layout and display layout.
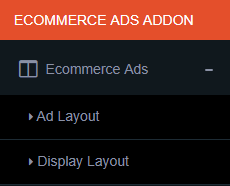
Ad Layout
Ad layout is the layout of a single ad.
- Click the “Ad Layout” to create a new ad layout and manage all the ad layouts.

- Click the “Create Layout” button to create a new ad layout.
- We can select 3 types of ads, text only, banner only and text/banner
Text Only Ad Layout
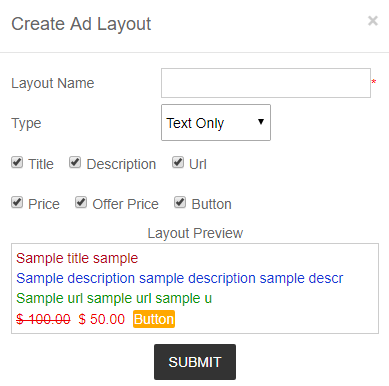
Here enter the Layout name, select the type and select the options you want to display in the ad.
We can see the layout preview.
Click the submit button to create the ad layout.
Banner Only Ad layout
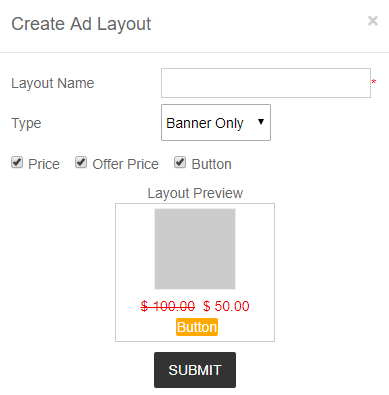
Here enter the layout name, type, and select the options.
Text and Banner Ad layout
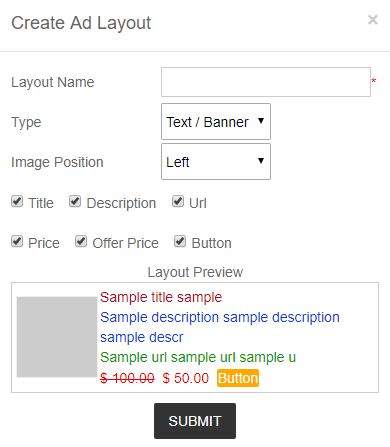
Here enter the layout name, select the type Text/Banner and select the image position.
Now select the options to display in the ad and submit it.
Display Layout
The display layout is the layout of the display of the ads.

Here we can see all the display layouts and edit or delete them.
To create a new layout, click the “Create Layout” button.
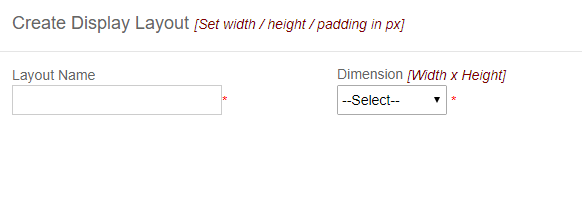
Here enter the layout name and select the dimension.
Note: If there is no dimension or the required dimension is missing, please go to adblocks > banner dimension in the admin area and select the eCommerce ad for the banner dimension.
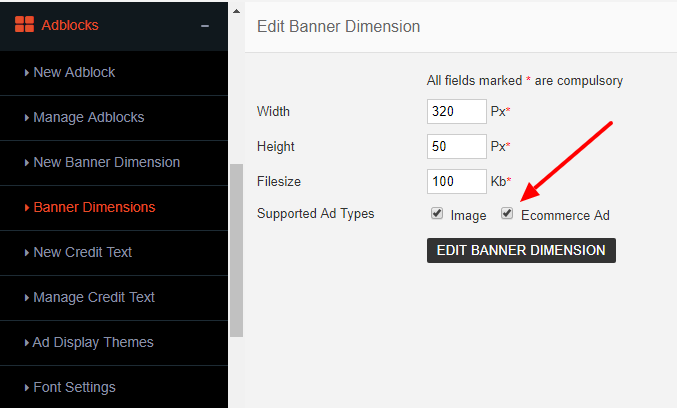
Now you can see this dimension in the eCommerce ads.
In the display layout, we can select the dimension and see the display options.
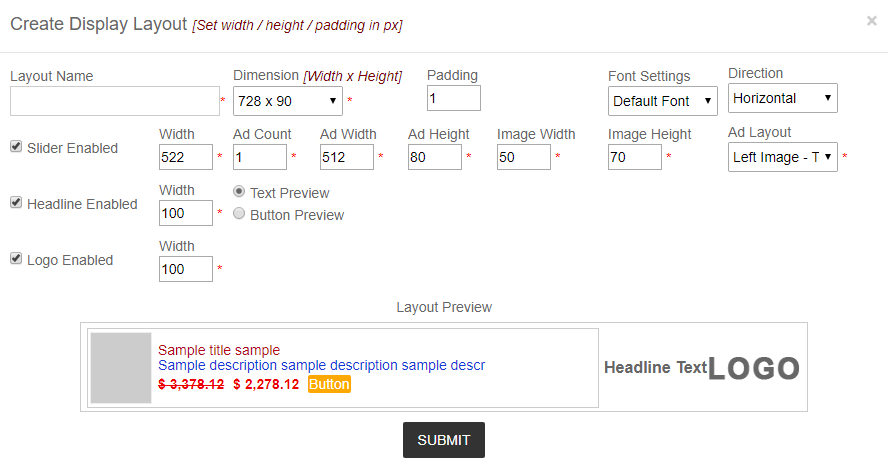
We can set the padding of the ad display, and the direction of the ad.
Now select the slider and you can set up the slider width, ad counter, ad width, ad height, image width and image height and select the ad layout. If there is no ad layout, please create the ad layout first.
If you want to show the headline text or button, please enable this feature and set the width.
Also, you can display the logo in the layout.
Now click the submit button to save this layout.
Now the e-commerce ad is now ready to use.
Advertiser Section:
In the advertiser section when we create a new ad we can select the e-commerce ad.
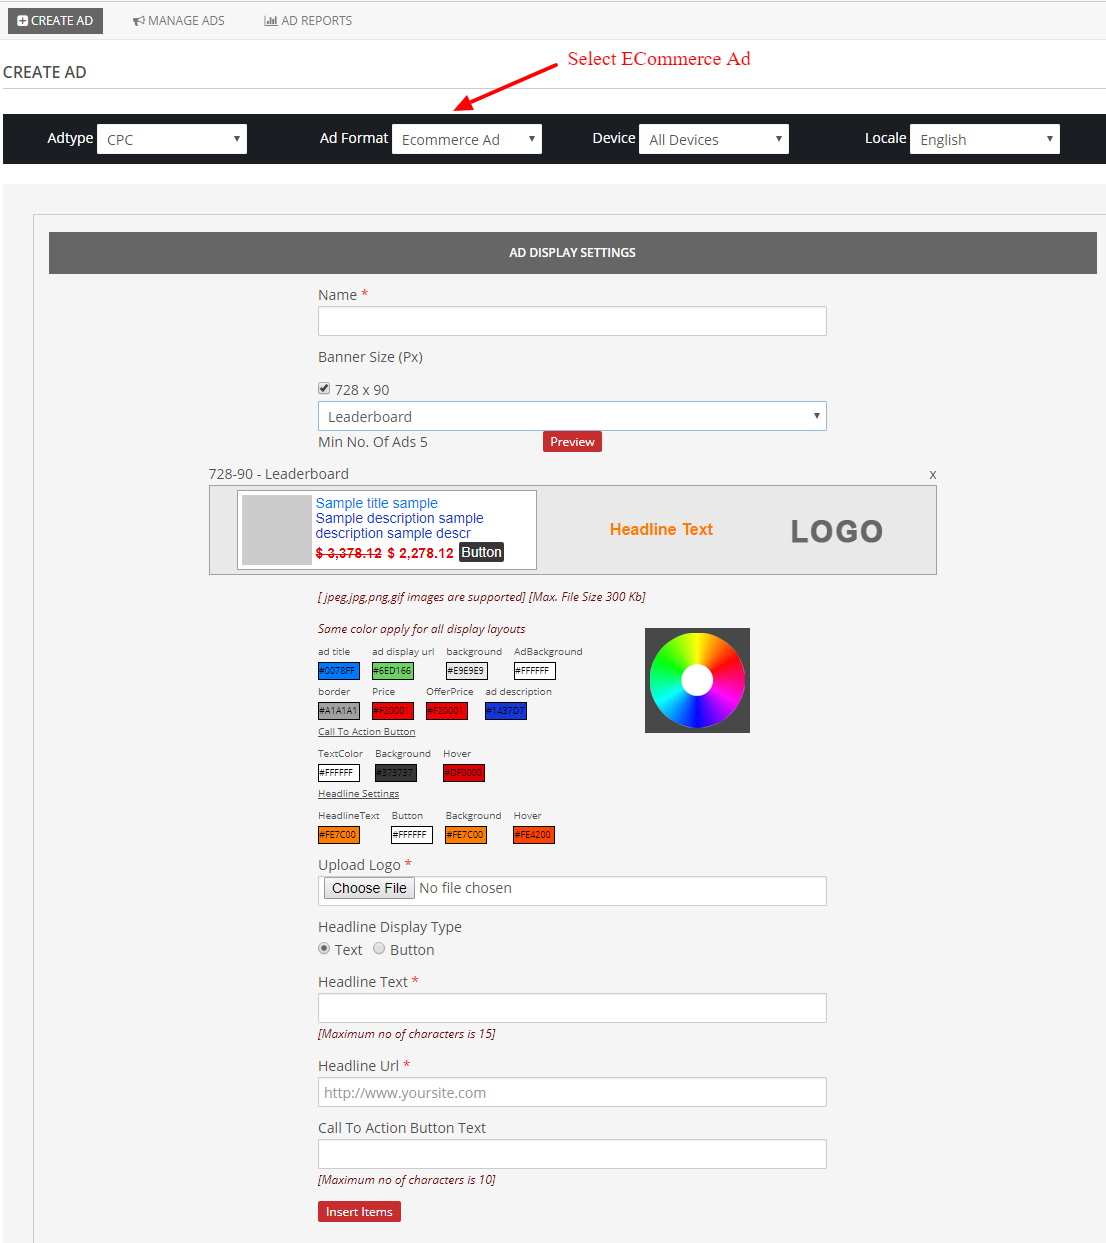
First, select the Ad format “E-Commerce Ad”.
Now enter the name, select banner size and then select layout.
Now you can see the preview of the ad.
Here advertisers can change the color of the ad display.
Now upload the logo and select “Headline Display Type”.
We can use the text format or a button like Headline display.
When it is button type, there is a background color and we can adjust the background color and hover color.
Now enter the Headline Text, Headline URL and Call To Action Button Text.
After entering the details, click the “Insert Items” button.
We can now insert the ad items.

Here enter the title, description, display URL, landing page, image path, sale price and offer price.
In the image path section, you can add the image URL of your ad.
You can add more rows by clicking the ‘add’ button.
After entering the ads, click the “Save” button.
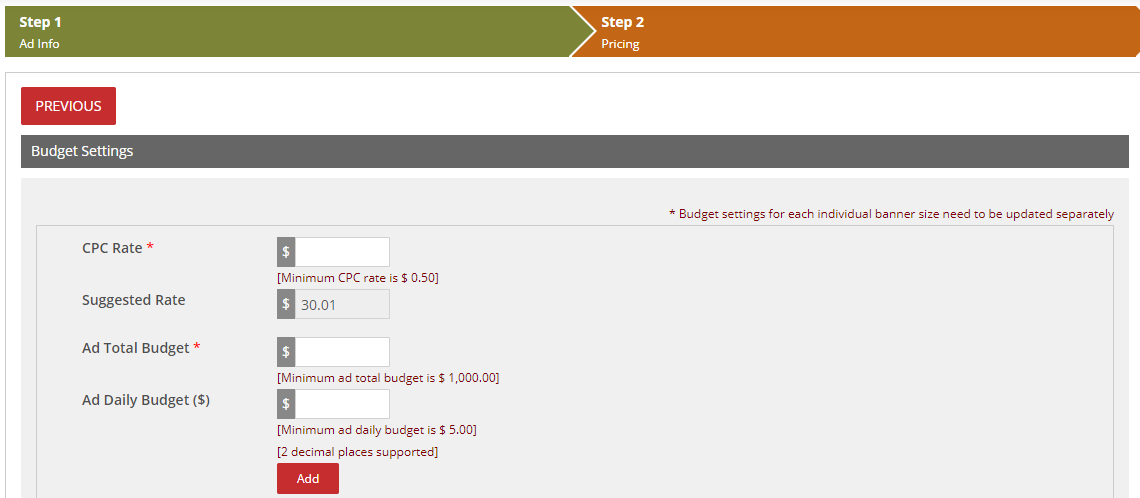
Then advertiser can set the click rate and create the ad.
Note: If you are using an e-commerce ad in CPA logic, the advertiser will get the click tracking code and conversion tracking code. Here place the click tracking code on the landing page and the conversion tracking code on the post-sale success page.
When we edit an e-commerce ad, we can see 2 edit options on the left and right of the ad name.

The left section is for editing the child ads or the items added to the e-commerce ad.
The right section is for editing the parent e-commerce ad.