Ads
In the ‘Ads’ section we can ‘Create a new Ad’, ‘Manage the existing ads’ and can view the ‘Ad Reports’.
To create a new ad, click on the link ‘Create Ad’.
To manage the existing ads, click on the ‘Manage Ads’ link.
To view the ad reports, click on the ‘Ad Reports’ link.
Create Ad
In the ‘Create Ad’ section, the advertiser can create a new ad.
We can create 3 types of ads, Text Ads, Banner Ads, and Text+Image Ads.
Step 1: Ad Info
TEXT AD
To create a ‘Text Ad’, choose the Pricing and Ad Type and enter the ad info in step 1.
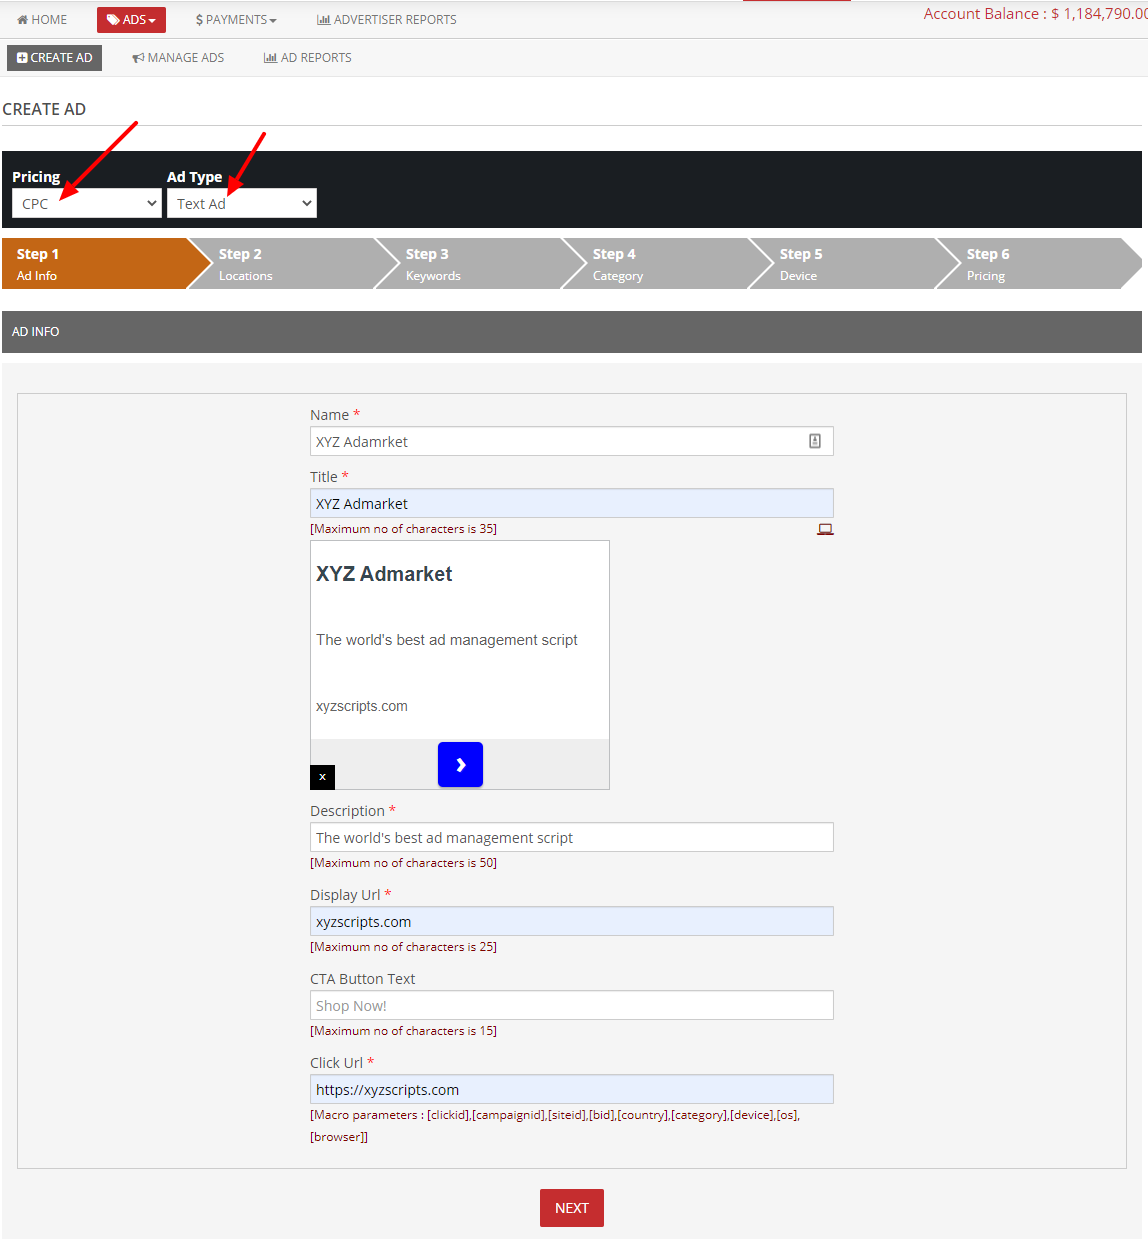
Name: This is the name given to the ad. This name is displayed in the advertiser section and admin section for future references.
Title: This is the title of the ad. You can see the title in the ‘Ad Demo’ section.
Description: This is the description of the Ad. In the ‘Ad Demo’ section, we can see the description.
Display URL: This is the URL displayed in the ad. The display URL is visible in the ‘Ad Demo’ section.
CTA Button Text: This is the “Call To Action” button text.
Click URL: This is the URL loaded when we click on the ad. In the click URL we are supporting some macro parameters.
You can see the “Ad Preview” when entering the details.
BANNER AD
To create a banner ad, choose the ad type ‘Banner Ad’ in the create ad section in step 1.
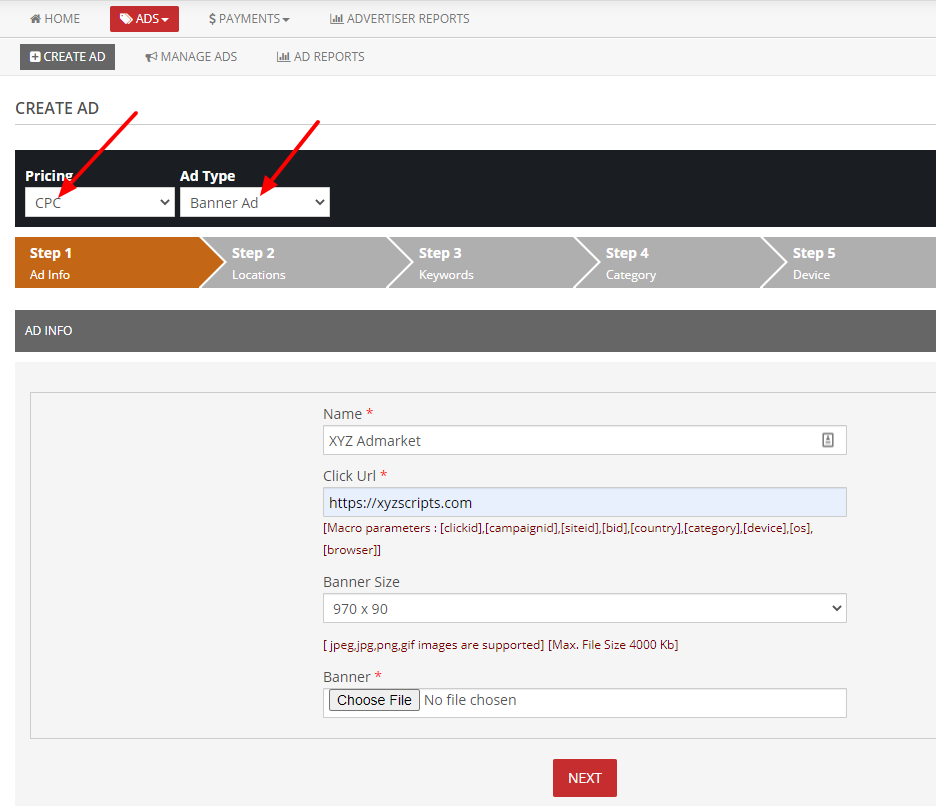
Name: This is the name given to the ad. This name is displayed in the advertiser section and admin section for future references.
Click URL: This is the URL loaded when we click on the ad.
Banner Size: This is the size of the banner ad. You can select the size from the drop-down menu.
Banner: You can upload the banner here.
Click the “Next” button to go to the next step.
TEXT + IMAGE AD
To create a ‘Text + Image Ad’, choose the Pricing and Ad Type and enter the ad info in step 1.
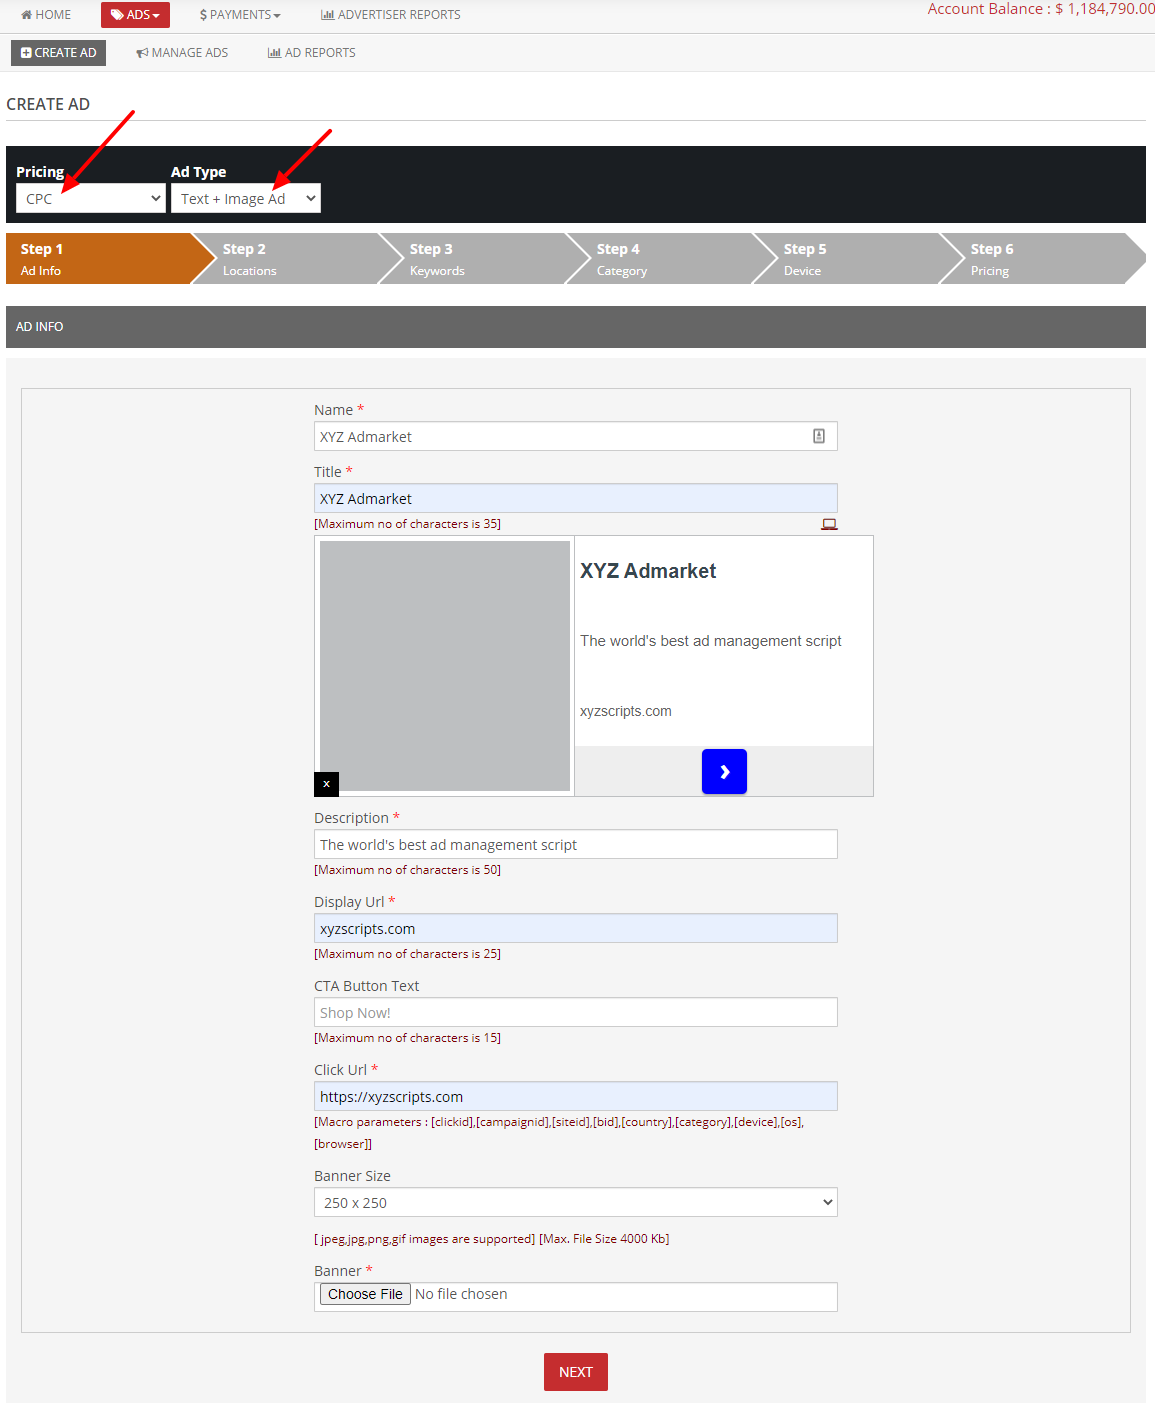
Name: This is the name given to the ad. This name is displayed in the advertiser section and admin section for future references.
Title: This is the title of the ad. You can see the title in the ‘Ad Demo’ section.
Description: This is the description of the Ad. In the ‘Ad Demo’ section, we can see the description.
Display URL: This is the URL displayed in the ad. The display URL is visible in the ‘Ad Demo’ section.
CTA Button Text: This is the “Call To Action” button text.
Click URL: This is the URL loaded when we click on the ad. In the click URL we are supporting some macro parameters.
Banner Size: This is the size of the text+image ad. You can select the size from the drop-down menu.
Banner: You can upload the banner here.
You can see the “Ad Preview” when entering the details.
Click the “Next” button to go to the next step.
Step 2: Location
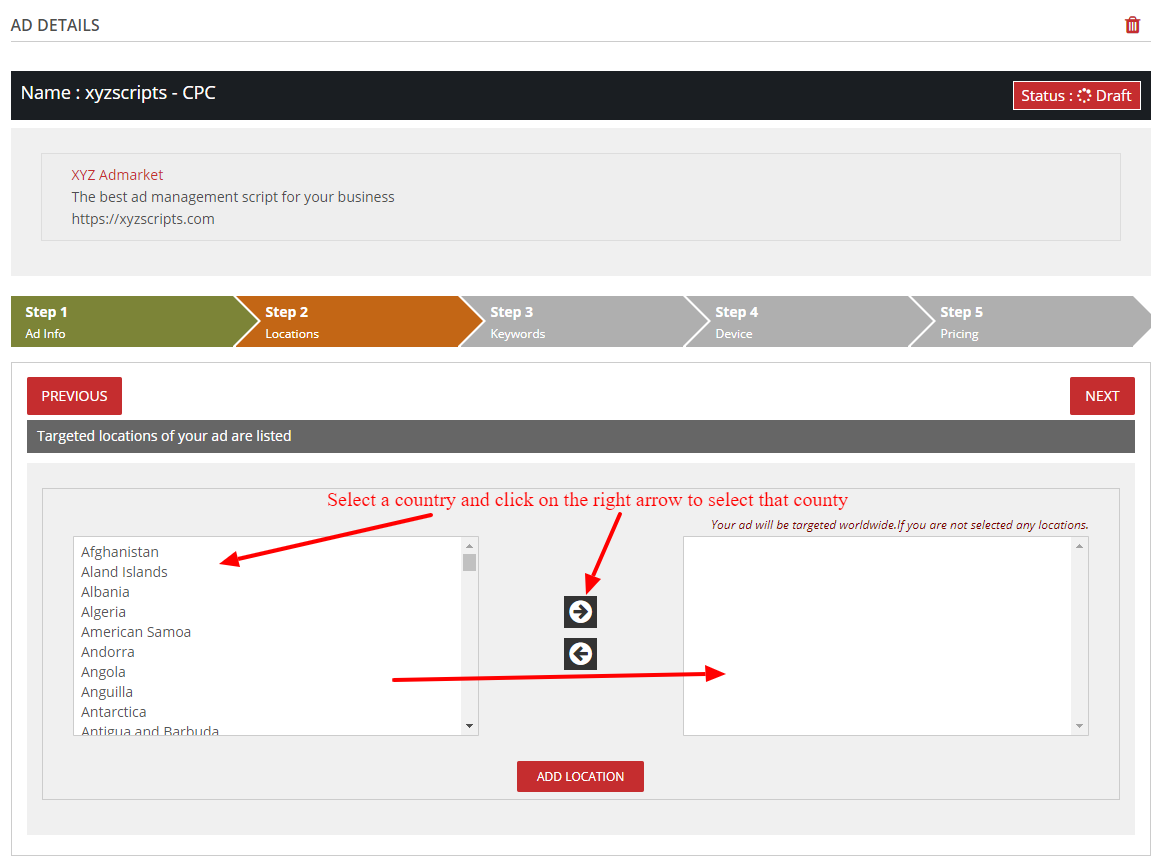
Here we can select the locations where you want to display the ad.
It is worldwide by default. If you want to display it in United States only, please select United States in the left column and move it to right column by clicking the right direction arrow.
After selecting the locations, click the ‘Add Location’ button. Step 2 is now completed and click the “Next” button to go to step 3.
Step 3 : Keywords
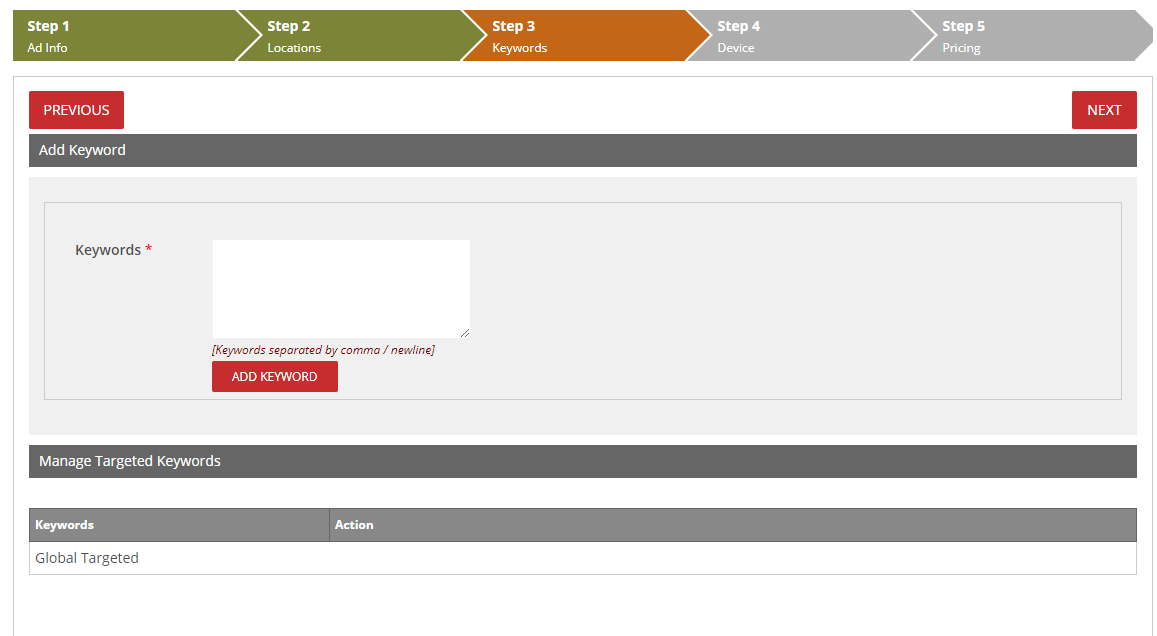
We can enter the keywords and click the “Add Keyword” button. If we have not entered the keywords, the ad is globally targeted without any keywords. Click the “Next” button to go to Step 4.
Step 4: Category Target
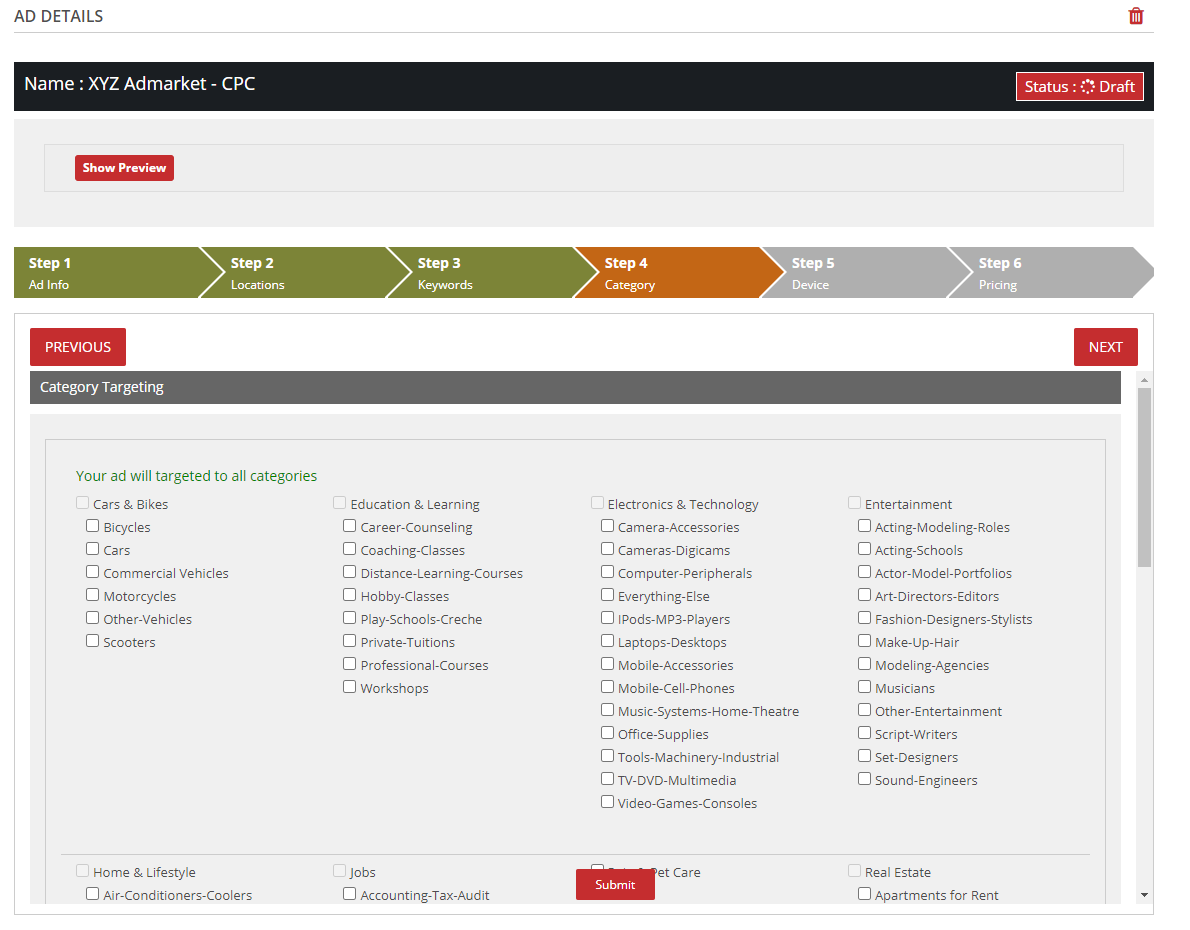
Advertisers can select the category of their ads here. The ad will display in the sites of these categories only.
Step 5: Device Target
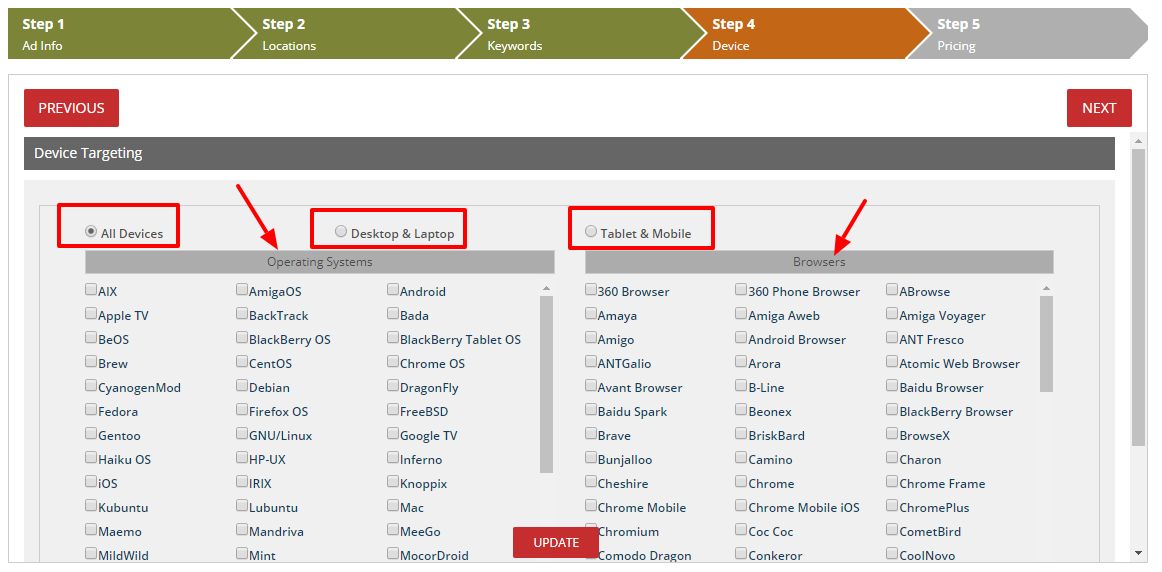
We can select the device, operating systems,
and browsers here.
After selecting the fields, please click on the “Update” button. Click the Next button to go to step 5.
Step 6: Pricing
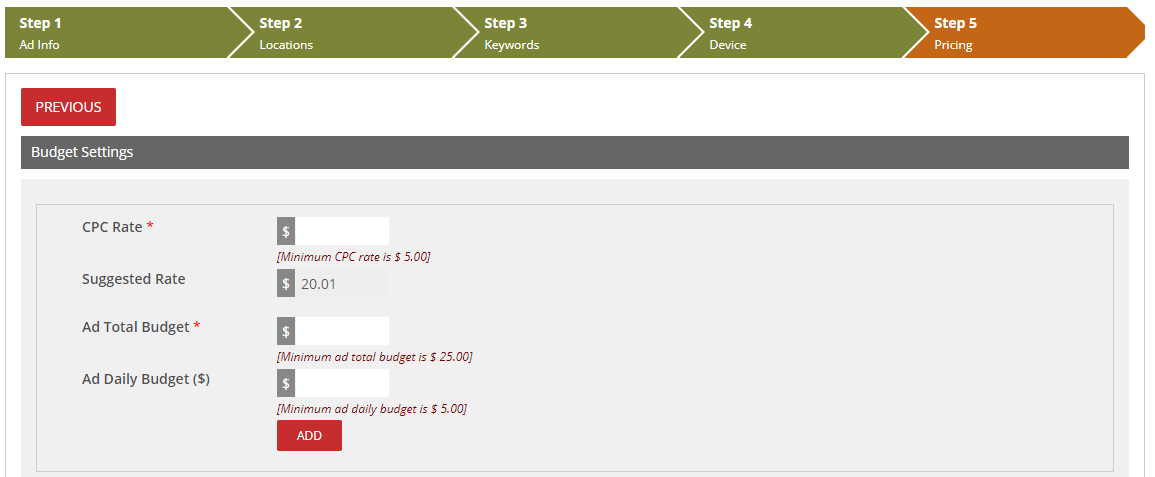
CPC Rate: This is the click value for the ad. That is, if anyone clicks on the ad, the amount spent will be equal to the CPC rate. There is a suggested rate and this value is generated based on the existing ad pricing.
Ad Total Budget: This is the total budget for the ad. The ad will stop displaying on reaching the total budget.
Ad Daily Budget: This is the daily budget for the ad. If exceeds this budget, the ad won’t display again on that day.
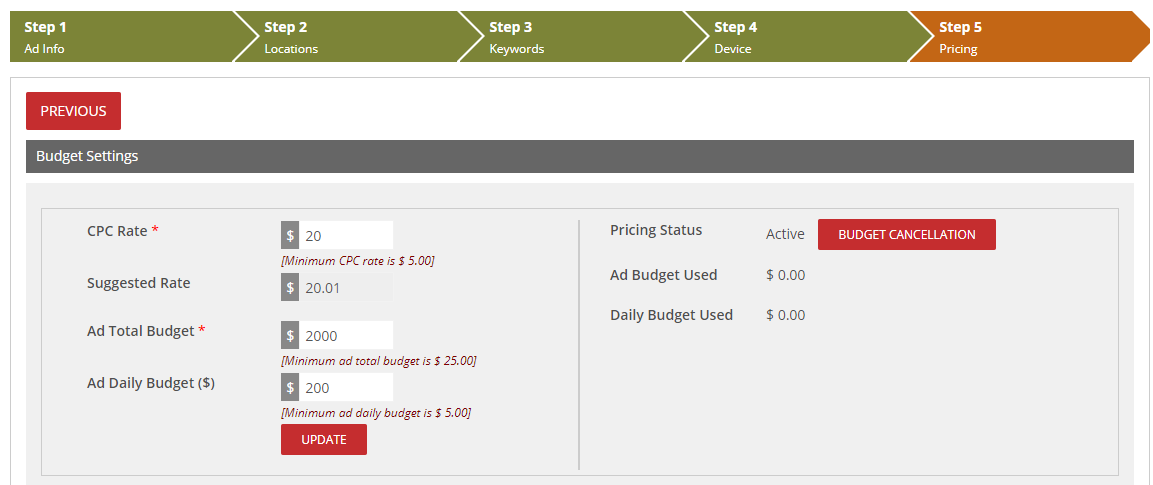
Click the “Add” button and the ad is now ready and we can see the pricing status.
Note: On creating the ad the total budget will be deducted from the advertiser account and reserved for the ad display.
Manage Ads
In the ‘Manage Ads’ section, the advertiser can manage all the ads.
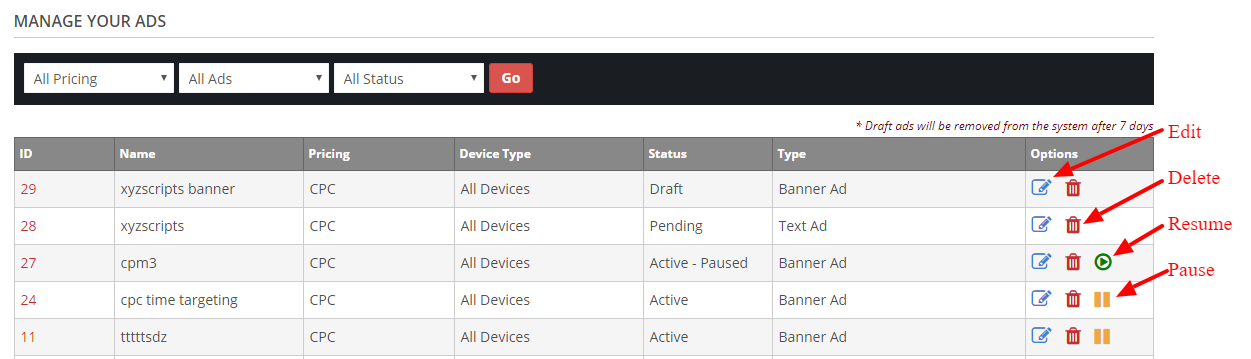
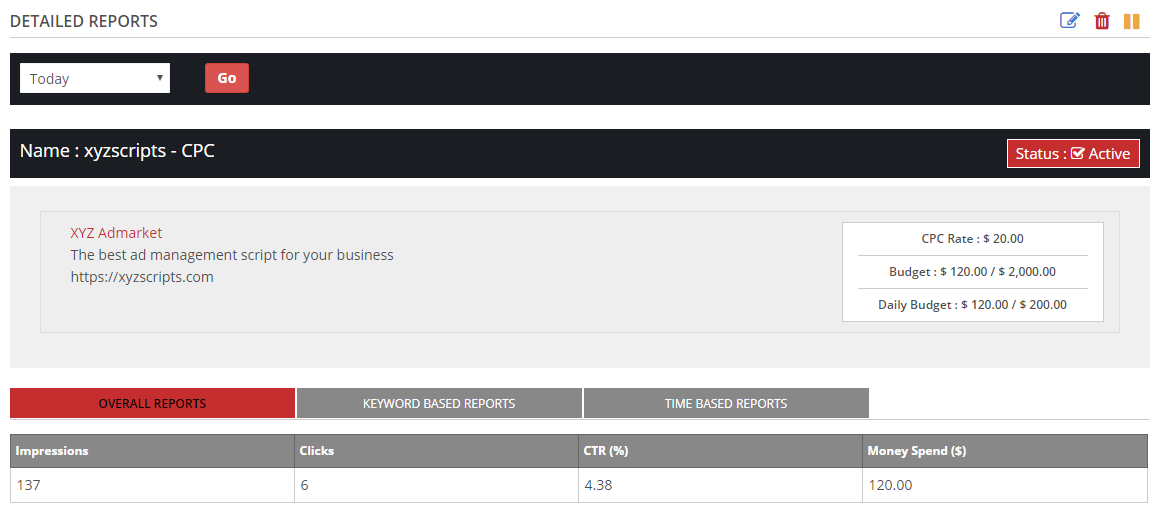
We can see the detailed reports if we click on the ad ID.
To edit the ad, click the ‘Edit’ button.
Click the ‘Delete’ button to delete the ad.
Click the ‘Pause’ button to pause the ad.
Click the ‘Resume’ button to resume the ad.
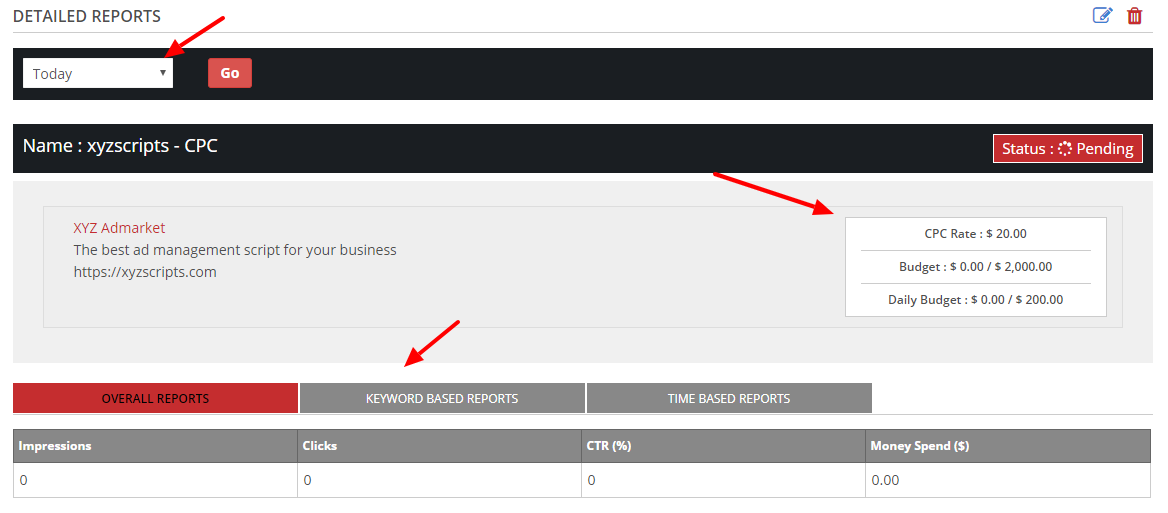
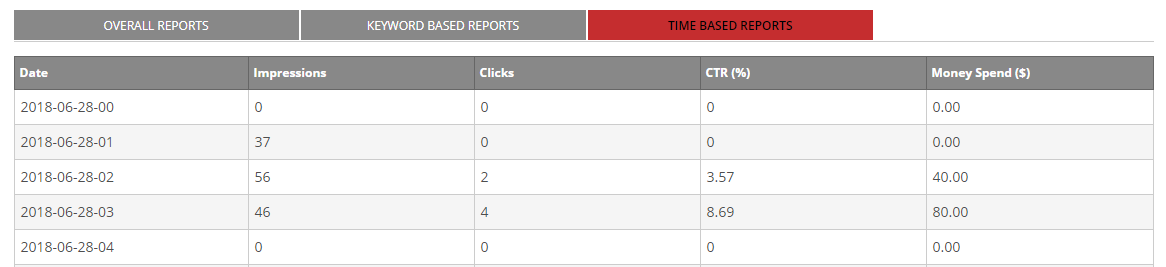
Here we can see the overall reports, keyword-based reports, and time-based reports with impressions, clicks, CTR, and money spend.
Ad Reports
In the ‘Ad Reports’ section, the advertiser can see the report of all the ads.
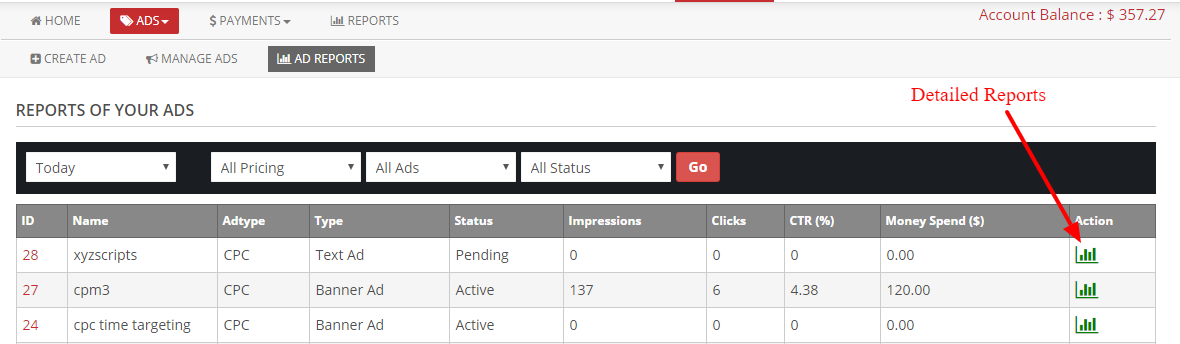
It shows the Impressions, Clicks, CTR, and Money spend on the ad.
To view the detailed report of each ad, click the ‘Detailed Reports’ button.
Here we can see the overall reports, keyword-based reports, and time-based reports.