Skin Ads Addon
Installation of Skin Ads Addon:
- In the “Manage Addons” page, click on the install button next to the Skin Ads Addon or Upload the Skin Ads addon to the “addons” folder in the XYZ Admarket script.
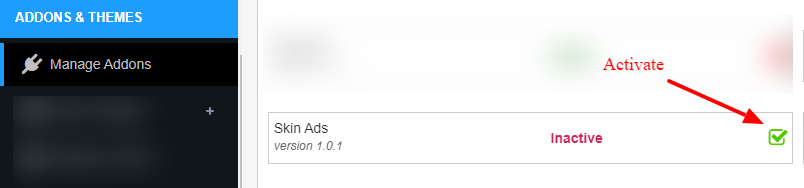
- Now please activate the Skin Ads Addon by clicking the activate button.
- The Skin Ads addon is now ready to use.
Admin Section
- On installing the addon, 12 default skin ads adblocks are creating. We can see it in the admin > configurations > adblocks > manage adblocks section.
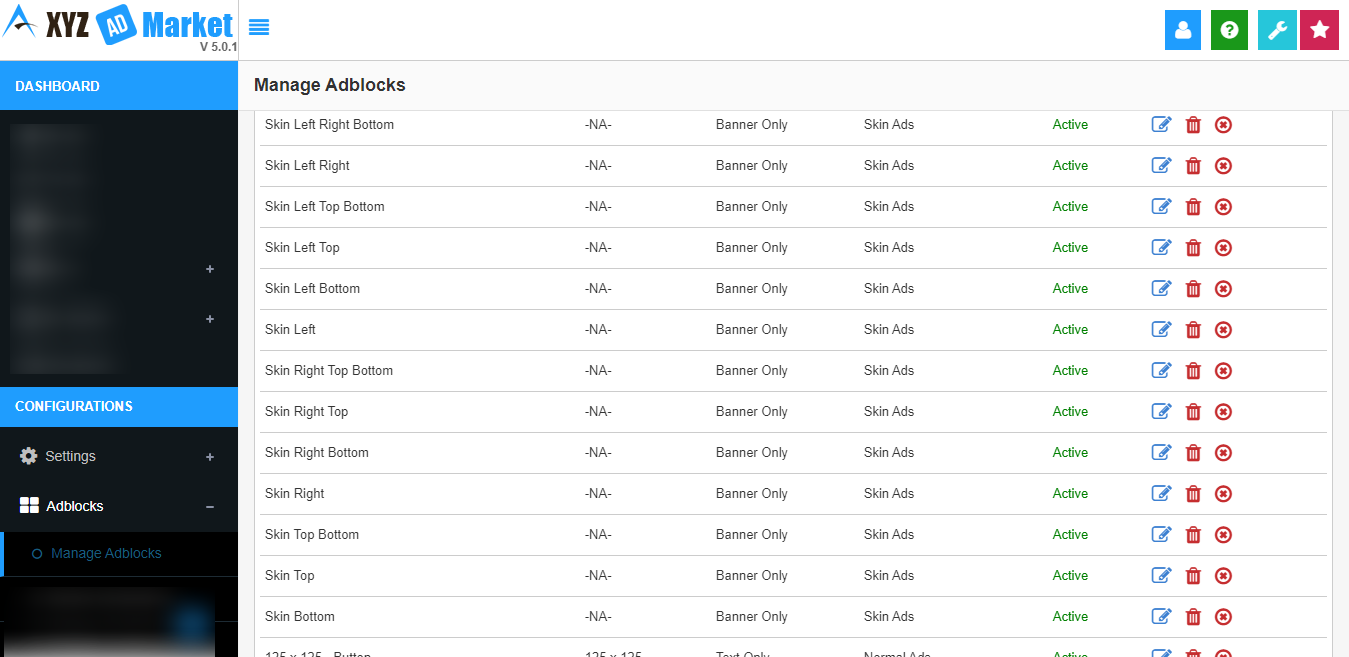
- We can edit the existing skin ads adblock or create a new one.
- To create a new skin ad adblock, click on the “Create Adblock” button.
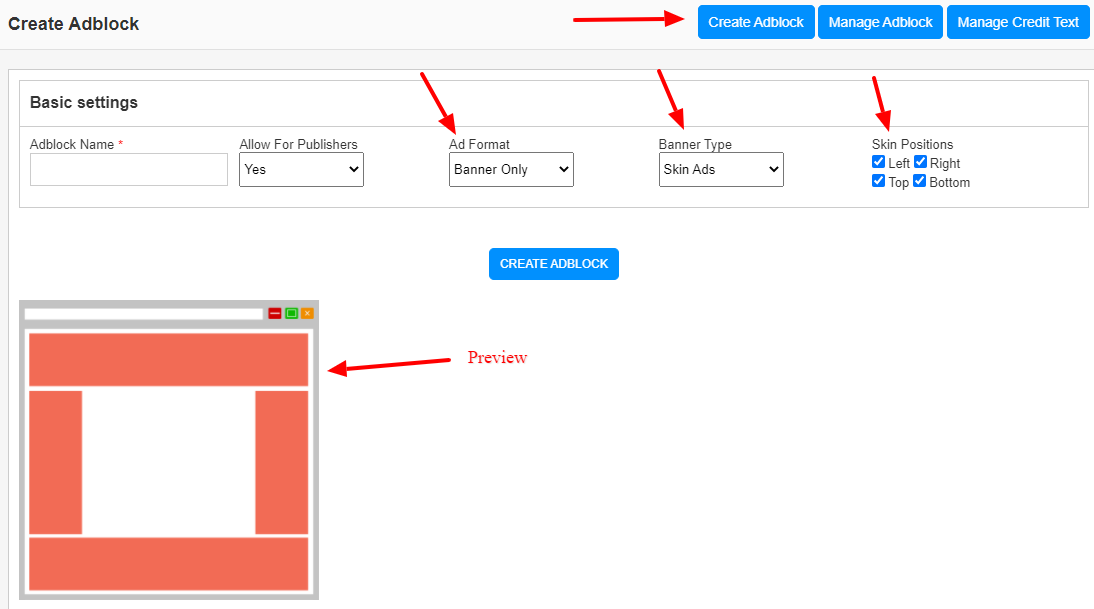
The skin ad works in banner format only and so you need to select “Ad Format: Banner Only” to create the skin ad. Now in the banner type, you can select the “skin ad” and select the “skin ad positions”.
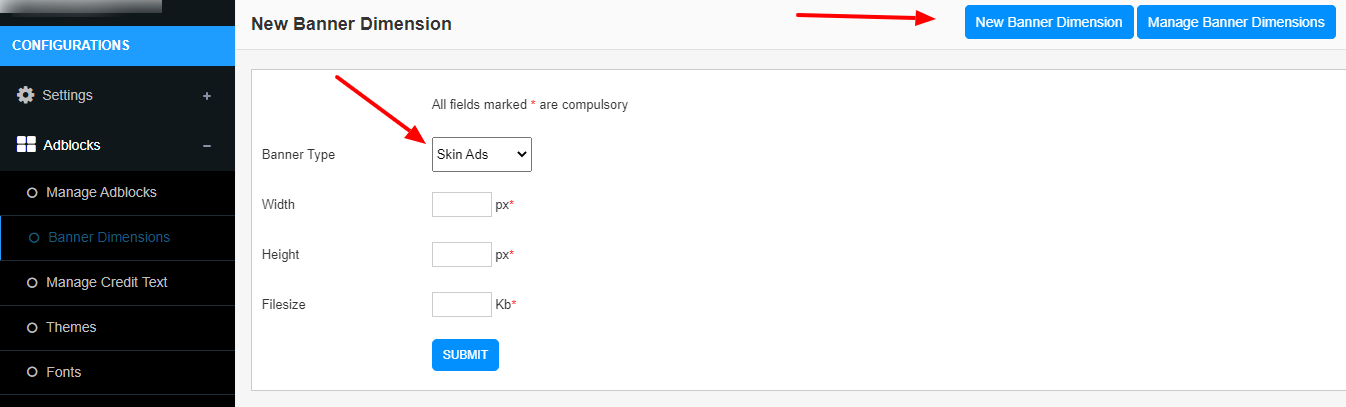
When we select skin positions, we can see the preview of the ad position. - In the “Banner Dimensions” section in configurations > adblocks, we can create and edit skin ad banner dimensions.
Advertiser Section
- To create a skin ad, please select ads > create ad > Ad Type : Skin Ad
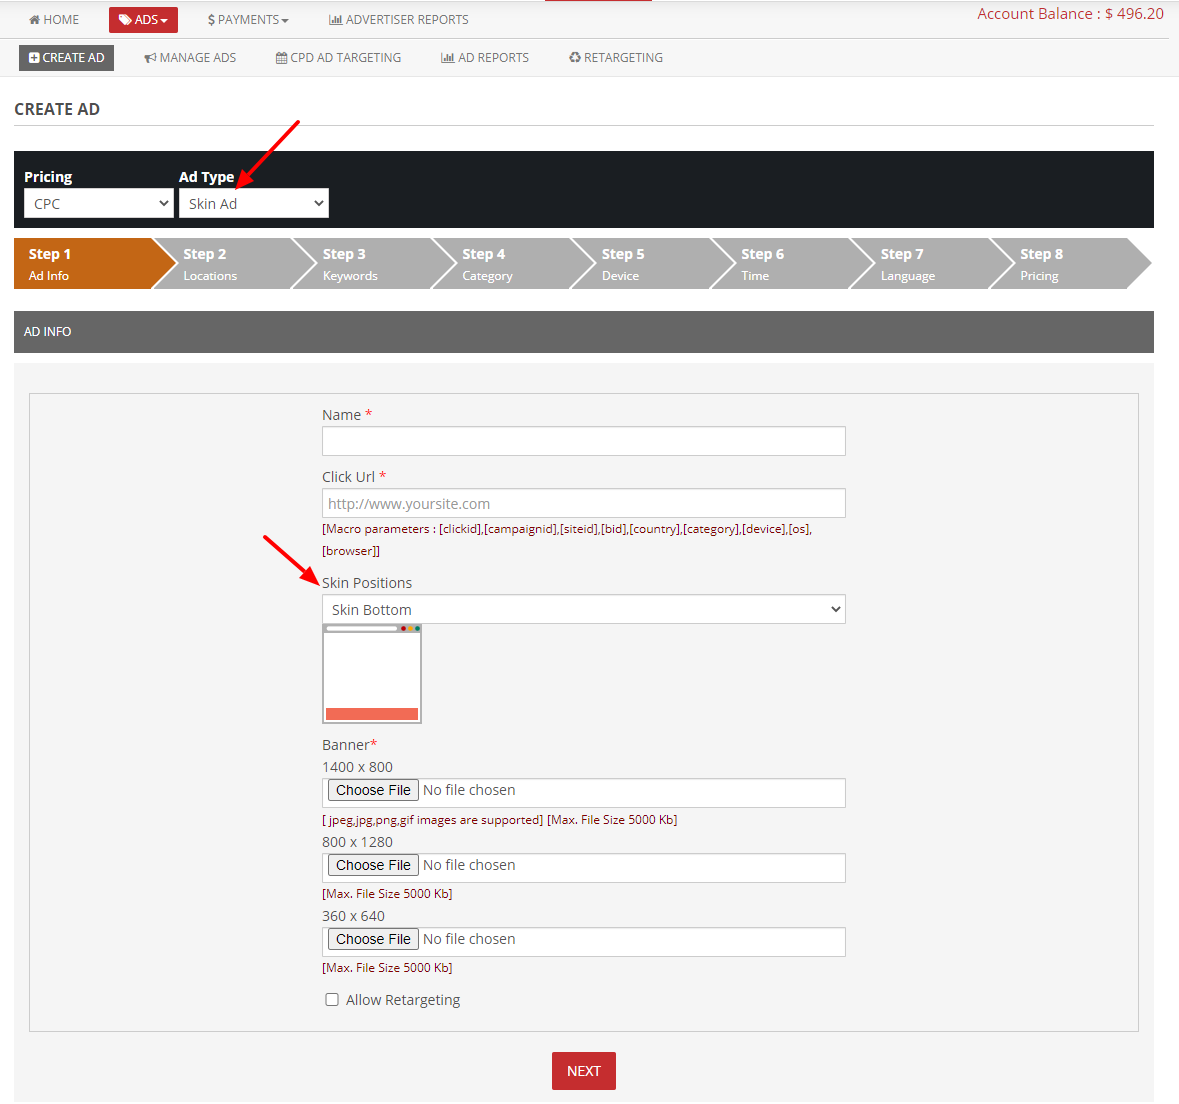
Here we can enter the Ad name, click URL, select the skin position and upload the banners.
Publisher Section
- Publisher can create skin ads adcode from “adcodes > create” section.
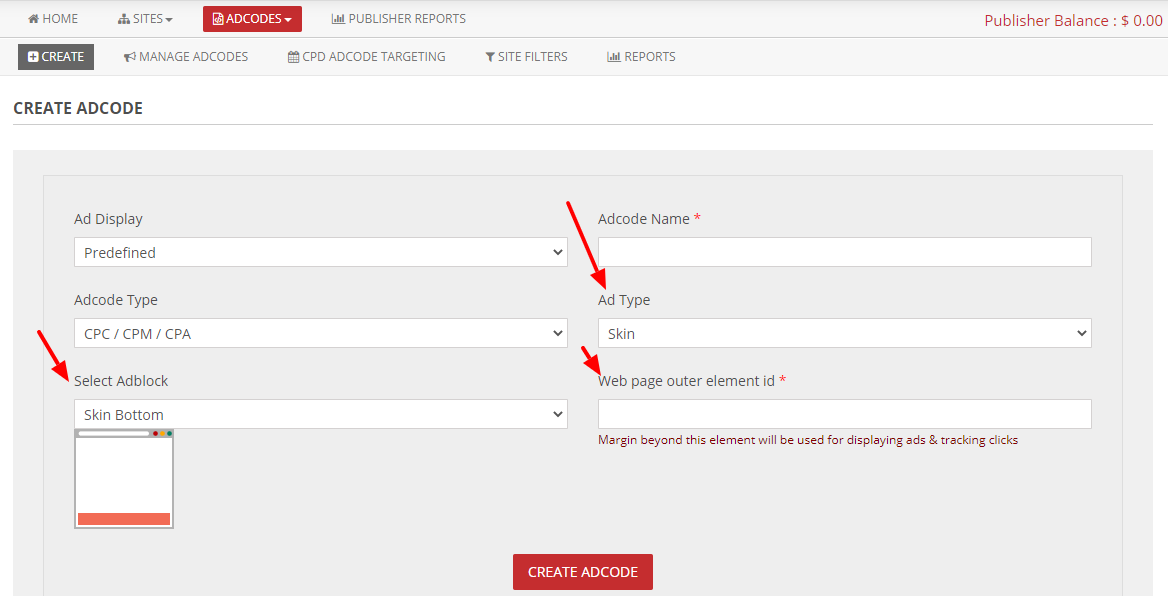
Here select the Ad Type : Skin, select adblock and enter the web page outer element id.
The webpage format is given below.
<html>
<head>
</head>
<body>
<outer element></outer element>
</body>
</html>
Here we need to enter the outer element id and click on the “Create Adcode” button. - Now we will get the skin adcode.
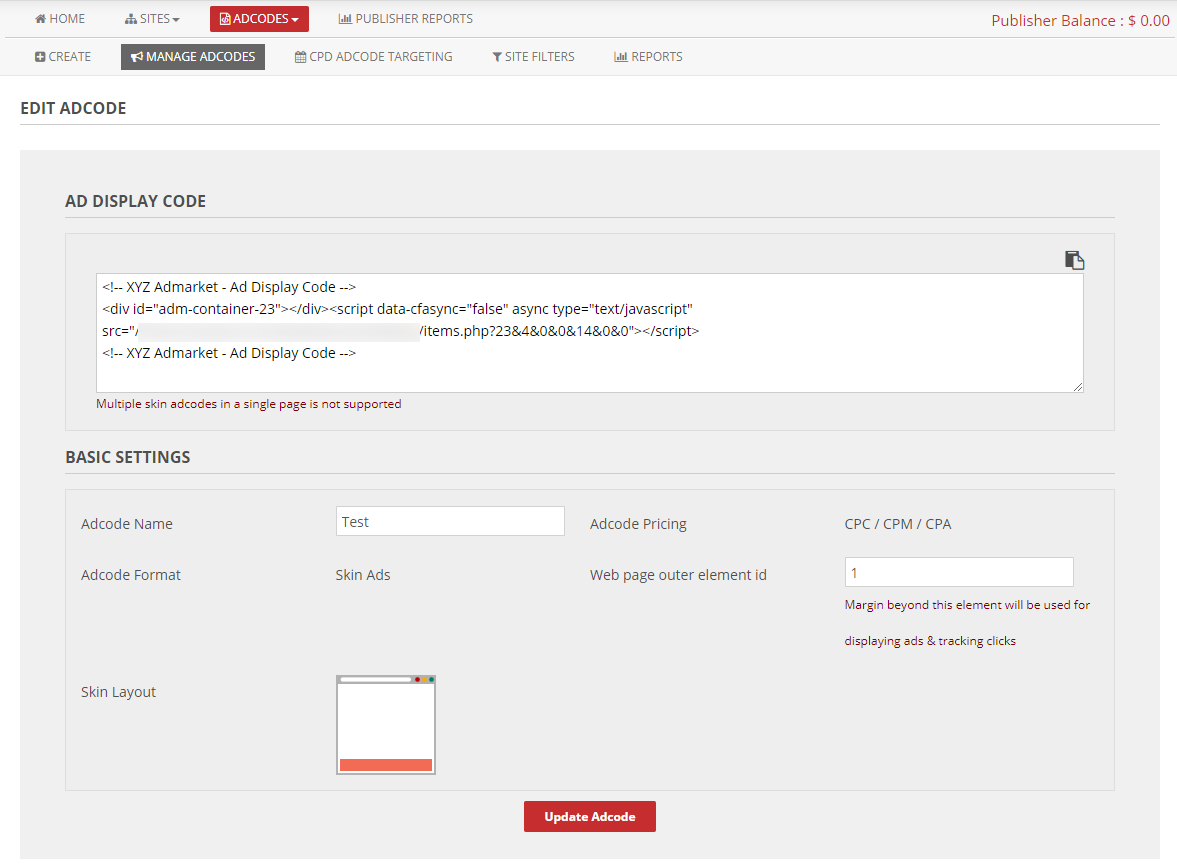
- Add this skin adcode inside the <body> part of the webpage and outside the <outer element>