Settings
CONTENTS
The settings for the XYZ Social Media Auto Publish (SMAP) Premium are given below.
BASIC SETTINGS
The basic settings of the plugin are given below.
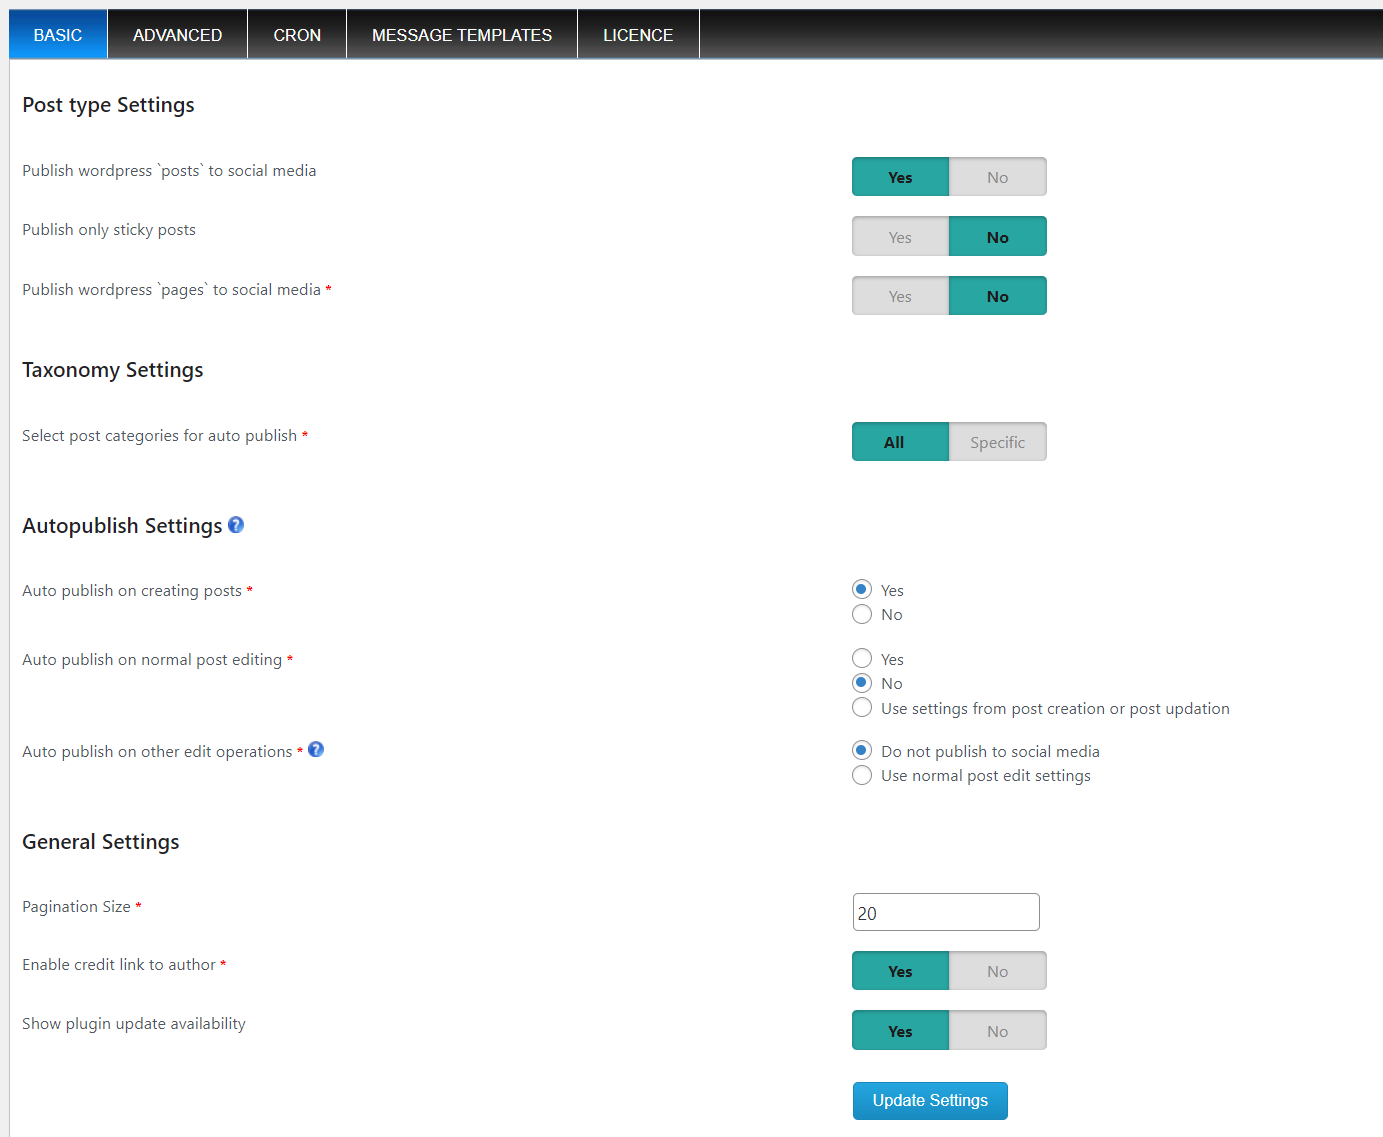
Post type Settings
- Publish wordpress `posts` to social media – If you want to publish WordPress posts to social media, enable this option.
- Publish only sticky posts – If you want to auto publish only the sticky posts, you can enable this option
- Publish wordpress `pages` to social media – If you want to publish the WordPress pages to social media, enable this option.
- Select wordpress custom post types for auto publish – If you have any custom post types in the site and want the posts in these types for auto publish, please select the types.
Taxonomy Settings
- Select wordpress categories for auto publish – Here you can select all your categories or specific categories for auto publish of posts. So the posts under the selected categories are published automatically to social media.
Note: If we are specifying the categories, we can choose the category selection mode.
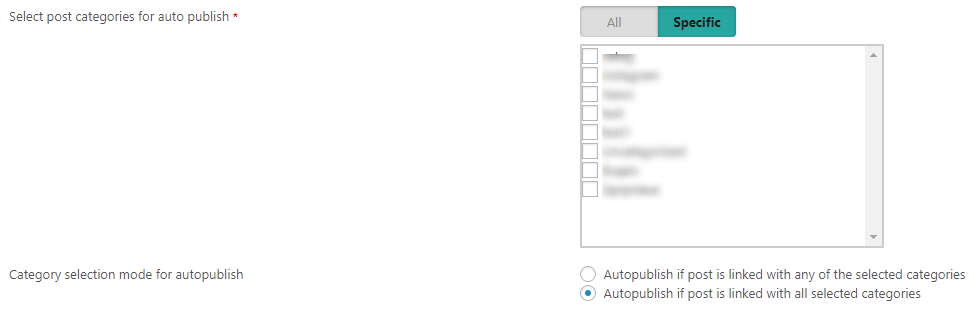
Here we can auto publish if the post is linked to any of the selected categories or all selected categories.
Auto publish Settings
(This setting applies for posts, pages, and custom post types)
- Auto publish on creating posts – To publish to social media when creating a new post/page/custom post type, select this option
- Auto publish on normal post editing – To publish to social media when editing a post/page/custom post type, select this option
- Auto publish on other edit operations (Other edit operations include bulk edit, quick edit, and rescheduling of an already auto published post) – To publish to social media when quick edit/bulk edit/rescheduling a post/page/custom post type, we can select this option.
General Settings
- Pagination Size – This is the number of entries displayed on a page.
- Enable credit link to the author – Enable this option for a credit link to the plugin author.
- Show plugin update availability – Select this option YES and you can see the update reminder if the update is available.
ADVANCED SETTINGS
In this section, we can manage the advanced settings of the plugin.
Hash Tag Settings
If the specified keywords are found in the message to be posted, those will be replaced as hashtags while posting to Facebook, Twitter, LinkedIn, Tumblr, Instagram, Telegram, Threads and Pinterest.
For the hashtag selection, we have 3 options.
- Use custom hashtags (we can add the custom tags separated by comma)
- Use post tags as hashtags (here we can use the post tags as hashtags)
- Use post categories as hashtags
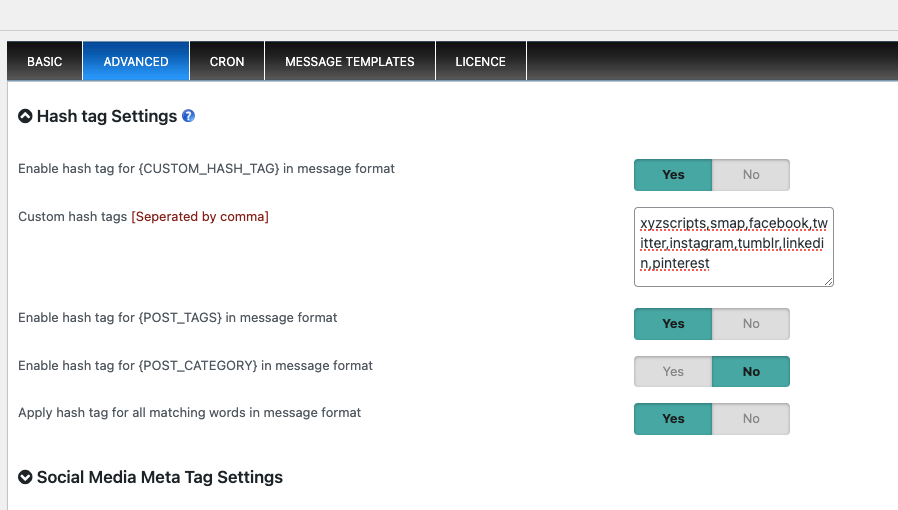
If ‘Apply hashtag for all matching words in the message’ is enabled, then the matching words will be replaced throughout the entire message. Otherwise, it will be applied only to {POST_TAGS}, {POST_CATEGORY}, and {CUSTOM_HASH_TAGS} in the message.
You can use {POST_TAGS:n}, {POST_CATEGORY:n}, and {CUSTOM_HASH_TAGS:n} to select the first ‘n’ tags/categories, where ‘n’ can be any number greater than or equal to 1, allowing you to customize the number of hashtags.
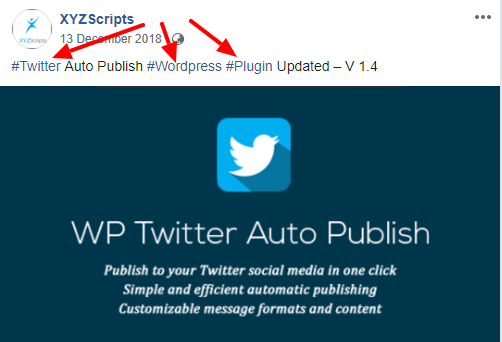
If the tags are Twitter, WordPress and Plugin and if these keywords are present in the message format, it will be replaced as a hashtag as in the given image.
Social Media Meta Tag Settings
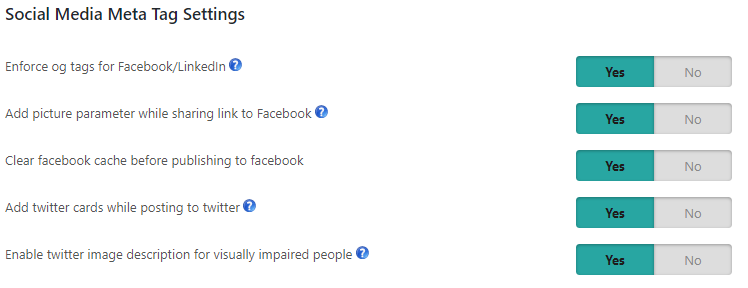
- Enforce og tags for Facebook/LinkedIn – If you enable this option, Open Graph tags will be generated while posting to Facebook and LinkedIn. When sharing links to Facebook and LinkedIn, Facebook/LinkedIn Crawler uses internal heuristics to set the preview image for your content, so the image preference set may not have relevance when using the posting method Share a link to your blog post or Attach your blog post in Facebook and also when sharing to LinkedIn.
If Open Graph tags are present, most major content-sharing platform crawlers will not have to rely on their own analysis to determine what content will be shared, which improves the likelihood that the information that is shared is exactly what you intended. - Add picture parameter while sharing link to Facebook – Enable this feature only if you have successfully verified your domain at the Facebook business manager. Otherwise, posts to Facebook with a posting method Share a link to your blog post or Attach your blog post will fail with the error:(#100) Only owners of the URL have the ability to specify the picture, name, thumbnail, or description params. The domain verification is given in https://developers.facebook.com/docs/sharing/domain-verification
- Clear Facebook cache before publishing to Facebook – We can delete the cache of the post on Facebook if already been published and do a fresh post to Facebook. This will help to upload the proper image.
- Enable Twitter Cache Bypass- Adds a unique timestamp (?_t=123) to shared URLs to force Twitter to fetch fresh preview data. Helps fix outdated or blank preview cards caused by Twitter’s 7-day caching.
- Add Twitter cards while posting to Twitter – By crawling Twitter card-specific meta tags, Twitter can generate a summarized preview of the tweeted link. To generate a tweet preview of the post, set Attach media to twitter post : No
- Enable Twitter image description for visually impaired people – Image descriptions are internally applied as per the image preference.
featured -alt text of featured image.
First Image From the Content -alt text (if not provided image name will be used).
Meta Keyname or Twitter default image url -image name.
Open Graph Tags -content of twitter:image:alt / og:image:alt tag.
* Once posted, the description applied to the image won’t be visible but visually impaired people will have access to the description via their assistive technology.
* Image descriptions cannot be added to GIFs or videos.
* The limit is 420 characters.
Auto publish Message Formats

The codes used in messages are given below.
- {BLOG_TITLE} – This is the title of the blog (wordpress site name)
- {POST_TITLE} – Title of your post.
- {PERMALINK} – This is the URL of the post.
- {POST_EXCERPT} – This is the summary of your post.
- {POST_CONTENT} – This is the description of the post.
- {USER_NICENAME} – This is the nicename (username) of the user
- {USER_DISPLAY_NAME} – This is the display name of the user
- {POST_ID} – This is the ID of the post
- {POST_TAGS} – This is the tag of the post
- {POST_CATEGORY} – This is the category of the post.
- {SHORTLINK} – This is the shortlink of the site.
- {POST_PUBLISH_DATE} – This is the post publish date.
- {POSTMETA:META_KEY_NAME} – Using this feature we can use the post meta value corresponding to the meta key name. Please note that you need to replace the META_KEY_NAME with the original meta key name. For example, if the meta key name is meta_image, please use it as {POSTMETA:meta_image}
- {CUSTOM_HASH_TAGS} Insert custom hash tags.
- {CUSTOM_TAXONOMY:TAXONOMY_NAME} – Insert taxonomy values corresponding to taxonomy name.
If you want to display the post title, the link to the post, and the summary of the post, please use the codes {POST_TITLE} – {PERMALINK} – {POST_EXCERPT}. You can select the code from the dropdown menu.
Note: You may limit the content of {POST_TITLE}, {POST_EXCERPT}, {POST_TAGS}, {POST_CATEGORY}, {CUSTOM_HASH_TAGS} and {POST_CONTENT} using below format.
{POST_CONTENT:L-2} – use 2 lines from the content
{POST_CONTENT:W-5} – use 5 words from the content
{POST_TAGS:3} – use 3 tags from the post
{POST_CATEGORY:3} – use 3 categories from the post
{CUSTOM_HASH_TAGS:3} – use 3 custom hash tags from the provided custom hash tags at settings
- Facebook Message Format for posting – This is the message format for posting on Facebook. You can add your message with a post title, blog title, etc. here.
- Twitter message Format for posting – This is the message format for posting on Twitter. You can add your message with a post title, blog title, etc. here.
- Linkedin message Format for posting – This is the message format for posting on LinkedIn.
- Pinterest message Format for posting – This is the message format for posting on Pinterest.
- Tumblr message format for posting – This is the message format for posting on Tumblr.
- Instagram message format for posting – This is the message format for posting on Instagram.
- Threads message format for posting – This is the message format for posting on Threads.
- Telegram message format for posting – This is the message format for posting on Telegram.
Image Settings
Facebook:
*Supported image formats: JPEG, BMP, PNG, GIF, TIFF
*Images cannot exceed 4MB in size.
*When uploading a PNG file, try to keep the file size below 1 MB.
Twitter:
*Supported image formats: JPG, PNG, GIF, WEBP
*Images cannot exceed 3MB in size.
*Maximum dimension of Twitter image: 8192×8192
LinkedIn:
*Supported image formats: PNG, JPEG
*Images cannot exceed 5MB in size.
*Recommended ratio: 1.91:1
Tumblr:
*Supported image formats: PNG, JPEG
*Maximum dimension of Tumblr image: 1280×1280 pixels
*Maximum size of Tumblr image: 10MB
Pinterest:
*Supported image formats: JPG, PNG, GIF
*Minimum required dimension 100 x 200 pixels.
Instagram:
*Supported image formats: JPEG
*Maximum file size: 8MB
*Aspect ratio: Must be within a 4:5 to 1.91:1 range
*Format: JPEG and PNG image types are the officially supported formats for image posts.
*File Size: 8 MB maximum.
*Aspect Ratio Limit: 10:1
*Minimum Width: 320 (will be scaled up to the minimum if necessary)
*Maximum Width: 1440 (will be scaled down to the maximum if necessary)
*Height: Varies (depending on width and aspect ratio)
*Color Space: sRGB. Images using other color spaces will have their color spaces converted to sRGB.
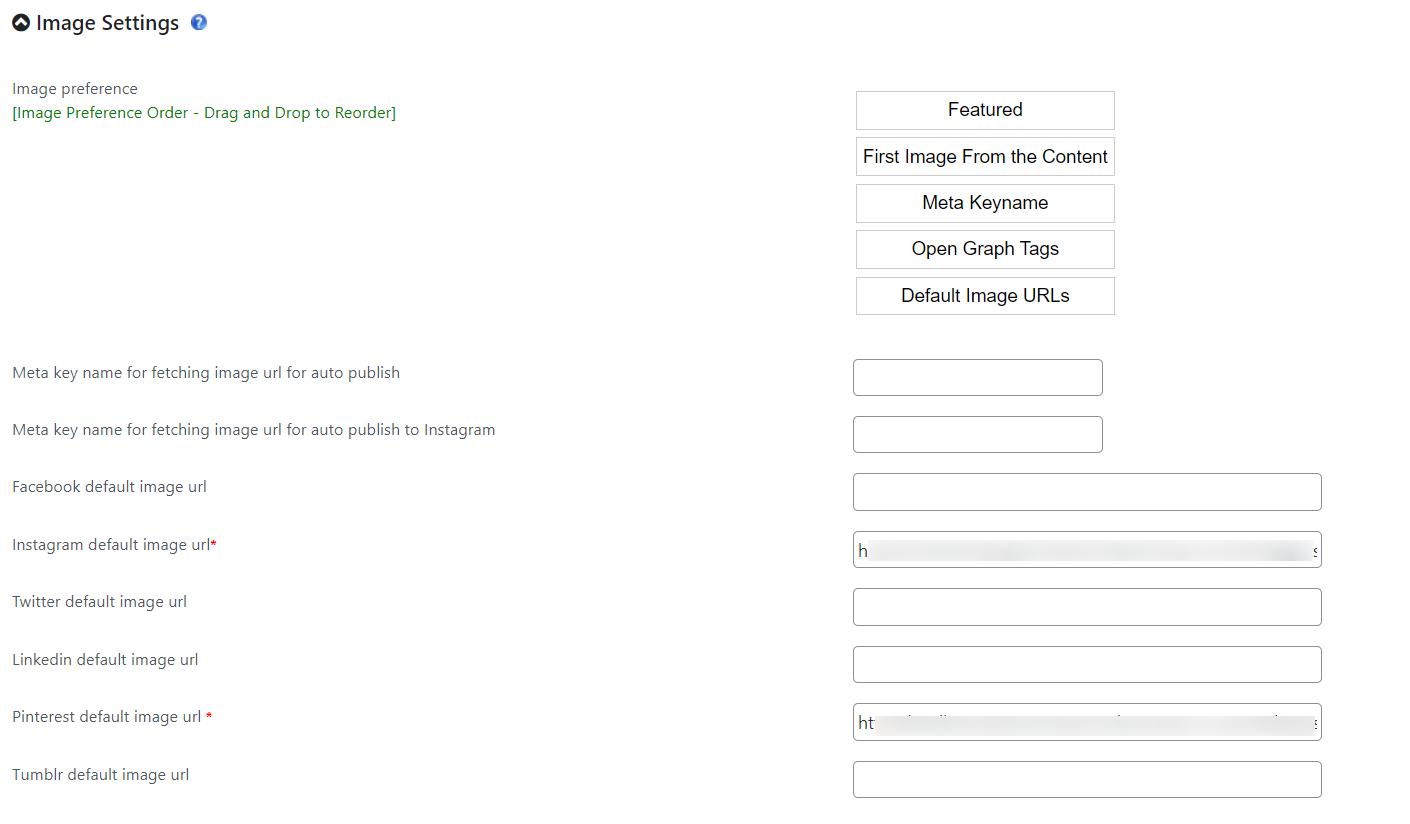
- Image preference – You can select the image to be displayed with the post on social media. We have 5 options here. Meta Key name, Featured, Open Graph Tag, First image from the content, and default image. You can set the order of image preference here.
- Meta key name for fetching image url for auto publish – This is the meta key name of the image of the post. This is used to fetch the image of the post to display on social media. More details are available in How can I publish an image to social media using the meta keyname option?
- Meta key name for fetching image url for auto publish to Instagram – We can set a separate meta key name for Instagram
- Facebook default image url – We can add the default image for Facebook display here. This default image is used if there is no image with the Facebook post.
- Twitter default image url – We can add the default image for Twitter here.
- Linkedin default image url – We can add the default image for LinkedIn here.
- Pinterest default image url – We can add the default image for Pinterest here. This is a mandatory field. Pinterest needs an image with every post.
- Instagram default image url – We can add the default image for Instagram here. This is a mandatory field. Instagram needs an image with every post.
- Tumblr default image url – We can add the default image for Tumblr here.
- Telegram default image url – We can add the default image for Telegram here.
- Threads default image url – We can add the default image for Threads here.
Multi Photo Settings
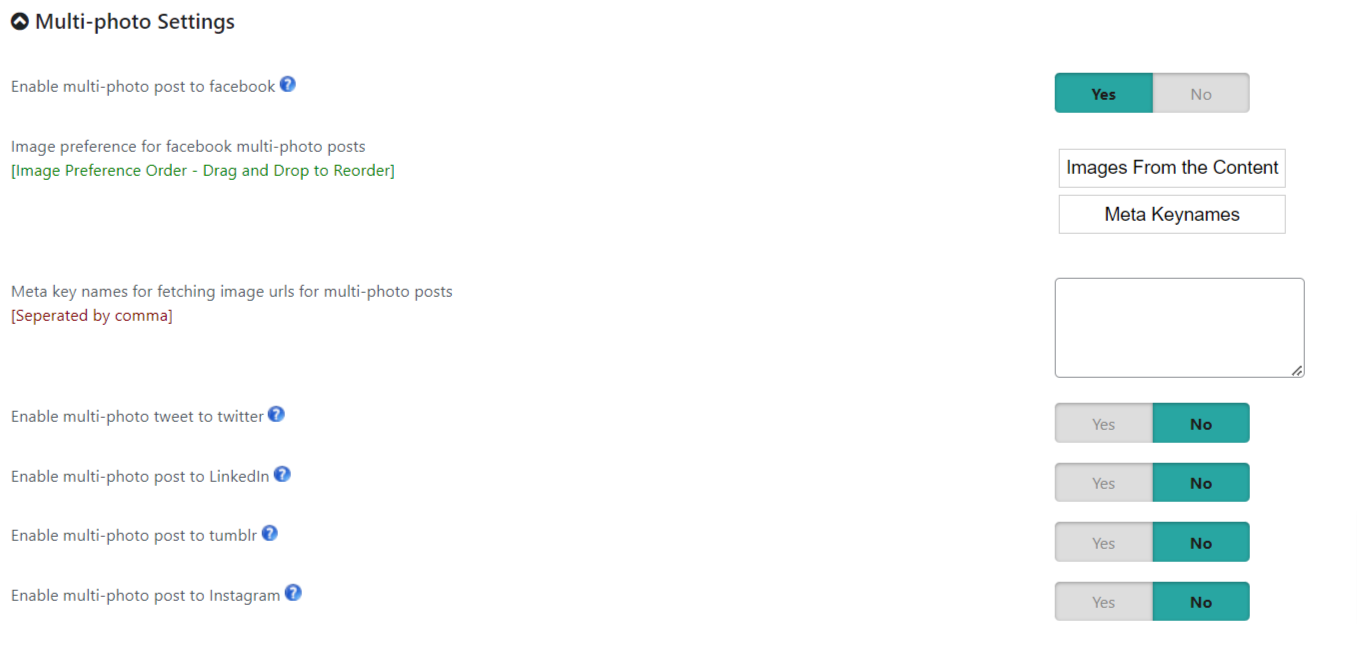
We can upload multiple photos to Facebook, Twitter, Linkedin, Tumblr, Telegram, Threads and Instagram.
- Enable multi-photo post to Facebook – If you want to upload multiple photos to Facebook, please enable this option.
Note 1: We can upload multiple images only if we are using the posting method “Text message with image”.
-
- Image preference for facebook multi-photo posts – We have 2 options here, Images from the content and Meta key names. We can set the preference here.
- Meta key names for fetching image urls for multi-photo posts – We can add the meta keynames of the image urls here.
- Enable multi-photo tweet to Twitter – If you want to upload multiple photos to Twitter, please enable this option.
Note 1: Maximum dimension of Twitter image is 8192 x 8192
Note 2: Maximum number of photos allowed by Twitter is 4
-
- Image preference for multi-photo tweets – We have 2 options here, Images from the content and Meta key names. We can set the preference here.
- Meta key names for fetching image urls for multi-photo tweets – We can add the meta keynames of the image urls here.
- Enable multi-photo post to Tumblr– If you want to upload multiple photos to Tumblr, please enable this option.
- Enable multi-photo post to Linkedin– If you want to upload multiple photos to Linkedin, please enable this option.
Note 1: Minimum dimension of LinkedIn image: 552 (w) x 276 (h) pixels
Note 2: Maximum size of the Linkedin image: 5 MB
Note 3: Maximum number of photos allowed by LinkedIn: 9
-
- Image preference for multi-photo posts – We have 2 options here, Images from the content and Meta key names. We can set the preference here.
- Meta key names for fetching image urls for multi-photo posts– We can add the meta keynames of the image urls here.
- Enable multi-photo post to Tumblr– If you want to upload multiple photos to Tumblr, please enable this option.
Note 1: Maximum dimension of Tumblr image: 1280×1280 pixels
Note 2: Maximum size of Tumblr image: 10MB
Note 3: Maximum number of photos allowed by Tumblr: 10
-
- Image preference for multi-photo posts – We have 2 options here, Images from the content and Meta key names. We can set the preference here.
- Meta key names for fetching image urls for multi-photo posts– We can add the meta keynames of the image urls here.
- Enable multi-photo post to Instagram– If you want to upload multiple photos to Instagram, please enable this option.
Note 1: Supported image formats: JPEG
Note 2: Maximum file size: 8MB
Note 3: Aspect ratio: Must be within a 4:5 to 1.91:1 range
-
- Image preference for multi-photo posts – We have 2 options here, Images from the content and Meta key names. We can set the preference here.
- Meta key names for fetching image urls for multi-photo posts– We can add the meta keynames of the image urls here.
- Enable multi-photo post to Threads– If you want to upload multiple photos to Threads, please enable this option.
Requirements:
*Format: JPEG and PNG image types are the officially supported formats for image posts.
*File Size: 8 MB maximum.
*Aspect Ratio Limit: 10:1
*Minimum Width: 320 (will be scaled up to the minimum if necessary)
*Maximum Width: 1440 (will be scaled down to the maximum if necessary)
*Height: Varies (depending on width and aspect ratio)
*Color Space: sRGB. Images using other color spaces will have their color spaces converted to sRGB.
-
- Image preference for multi-photo posts – We have 2 options here, Images from the content and Meta key names. We can set the preference here.
- Meta key names for fetching image urls for multi-photo posts– We can add the meta keynames of the image urls here.
- Enable multi-photo post to Telegram– If you want to upload multiple photos to Telegram, please enable this option.
Note 1: Supported image formats: JPEG,JPG,WEBP
Note 2: Must include 2-10 images
-
- Image preference for multi-photo posts – We have 2 options here, Images from the content and Meta key names. We can set the preference here.
- Meta key names for fetching image urls for multi-photo posts– We can add the meta keynames of the image urls here.
Carousel Settings
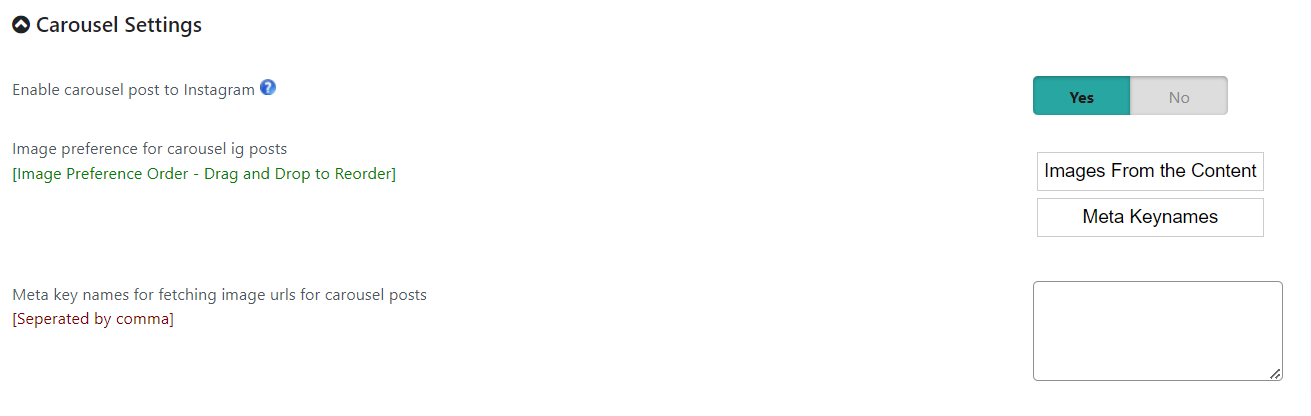
- Enable carousel post to Instagram – We can enable the carousel post to Instagram here. We can publish up to 10 images, videos, or a mix of the two in a single post.
Note 1: Supported image formats: JPEG
Note 2: Maximum file size: 8MB
Note 3: Aspect ratio: Must be within a 4:5 to 1.91:1 range
-
- Image preference for carousel Instagram posts – We have 2 options here, Images from the content and Meta key names. We can set the preference here.
- Meta key names for fetching image urls for carousel posts– We can add the meta key names of the image urls here.
Video Auto Publish Settings
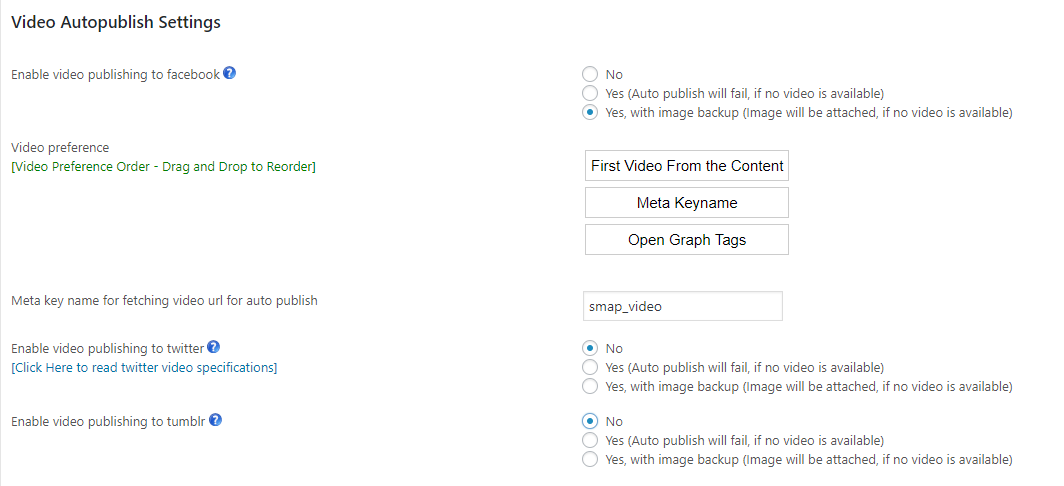
- Enable video publishing to Facebook – If you want to publish the video on your site to Facebook, you can enable this option. To publish the video, we have 2 options. Publish the video with and without image backup. It is recommended to use the video with image backup. If we have not used the image backup and for any reason, the video is not accessible, the auto publish may fail.
Note 1: Facebook supported video formats: 3g2, 3gp, 3gpp, asf, avi, dat, divx, dv, f4v, flv, m2ts, m4v, mkv, mod, mov, mp4, mpe, mpeg, mpeg4, mpg, mts, nsv, ogm, ogv, qt, tod, ts, vob, and wmv.
Note 2: Video cannot exceed 1GB in size and 20 minutes in duration.
Note 3: The aspect ratio of the video must be between 9×16 and 16×9.
-
- Video preference – We can set the video preference here. We have 3 options here. Meta Key name, Open Graph Tag, and First video from the content. You can set the order of video preference here.
- Meta key name for fetching video url for auto publish – This is the meta key name of the video of the post. This is used to fetch the video of the post to display in social media.
- Enable video publishing to Twitter– If you want to publish the video on your site to Twitter, you can enable this option. To publish the video, we have 2 options. Publish the video with and without image backup. It is recommended to use the video with image backup. If we have not used the image backup and for any reason, the video is not accessible, the auto publish may fail.
Note 1: Twitter supports only MP4 video format.
Note 2: Video cannot exceed 15MB in size and 30 seconds in duration.
Note 3: Aspect ratio should be between 1:3 and 3:1
Note 4: Dimensions should be between 32×32 and 1280×1024.
Note 5: You can see the Twitter video specifications at https://dev.twitter.com/rest/media/uploading-media#videorecs
- Enable video publishing to Tumblr – If you want to publish the video on your site to Tumblr, you can enable this option. To publish the video, we have 2 options. Publish the video with and without image backup. It is recommended to use the video with image backup. If we have not used the image backup and for any reason, the video is not accessible, the auto publish may fail.
Note 1: Tumblr supports only MP4 video format with AAC audio.
Note 2: Video cannot exceed 100MB in size and 5 minutes in duration per day.
Note 3: The maximum recommended size is 500 x 700 pixels.
Note 4: Only videos from https sites will play on Tumblr.
- Enable video publishing to Instagram – If you want to publish the video on your site to Instagram, you can enable this option.
Note 1: Container: MOV or MP4 (MPEG-4 Part 14), no edit lists, moov atom at the front of the file.
Note 2: Audio codec: AAC, 48khz sample rate maximum, 1 or 2 channels (mono or stereo). Video codec: HEVC or H264, progressive scan, closed GOP, 4:2:0 chroma subsampling.
Note 3: Frame rate: 23-60 FPS. Picture size: Maximum columns (horizontal pixels): 1920. Minimum aspect ratio [cols / rows]: 4 / 5. Maximum aspect ratio [cols / rows]: 16 / 9. Video bitrate: VBR, 5Mbps maximum. Audio bitrate: 128kbps. Duration: 60 seconds maximum, 3 seconds minimum.
Note 4: File size: 100MB maximum.
- Enable video publishing to Linkedin – If you want to publish the video on your site to Linkedin, you can enable this option.
Note 1: Length: Three seconds to 30 minutes
Note 2: File size: Between 75kb and 200MB
Note 3: File format: MP4
- Enable video publishing to Pinterest– If you want to publish the video on your site to Pinterest, you can enable this option.
Note 1: Pinterest supports .mp4, .mov, or .m4v videos only.
Note 2: Video cannot exceed 2GB in size.
Note 3: The video length should be between 4 seconds – 15 minutes.
Note 4: The text title should not be more than 100 characters.
- Enable video publishing to Telegram– If you want to publish the video on your site to Telegram, you can enable this option.
Note 1: Telegram supports .mpeg4 and .mp4 videos only.
Note 2: Video cannot exceed 50MB in size.
- Enable video publishing to Threads– If you want to publish the video on your site to Threads, you can enable this option.
Notes :
*Container: MOV or MP4 (MPEG-4 Part 14), no edit lists, moov atom at the front of the file.
*Audio Codec: AAC, 48khz sample rate maximum, 1 or 2 channels (mono or stereo).
*Video Codec: HEVC or H264, progressive scan, closed GOP, 4:2:0 chroma subsampling.
*Frame Rate: 23-60 FPS
*Picture Size:
-Maximum Columns (horizontal pixels): 1920
-Required aspect ratio is between 0.01:1 and 10:1 but we recommend 9:16 to avoid cropping or blank space.
*Video Bitrate: VBR, 100 Mbps maximum.
*Audio Bitrate: 128 kbps.
*Duration: 300 seconds (5 minutes) maximum, minimum longer than 0 seconds.
*File Size: 1 GB maximum.
Audio Autopublish Settings
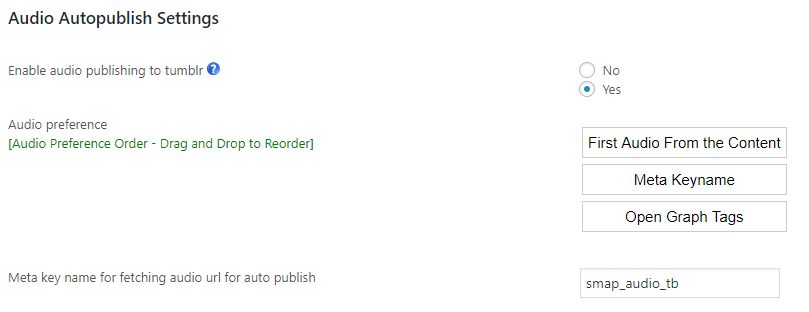
- Enable audio publishing to Tumblr – If you want to publish the audio on your site to Tumblr, you can enable this option.
Note 1: Tumblr supports only MP3 audio format.
Note 2: Audio cannot exceed 10 MB in size.
-
- Audio preference – We can set the audio preference here. We have 3 options here. Meta Key name, Open Graph Tag, and First audio from the content. You can set the order of audio preference here.
- Meta key name for fetching audio url for auto publish – This is the meta key name of the audio of the post. This is used to fetch the audio of the post to display in tumblr.
Other Settings
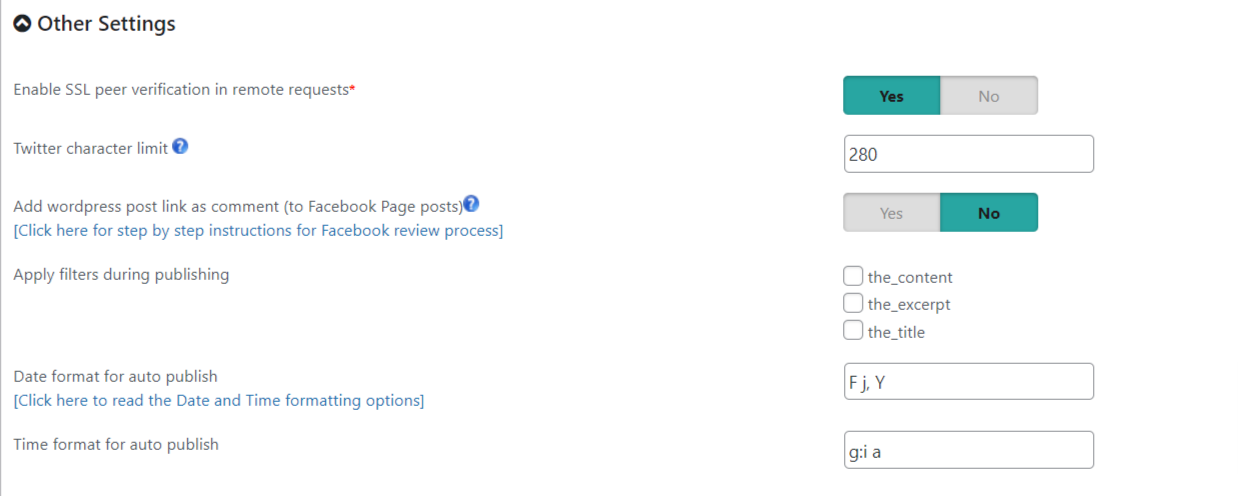
- Enable SSL peer verification in remote requests – This is the setting of verifying the SSL connection with an external site. It is better to use SSL peer verification. In some sites, SSL peer verification is not available and then you can disable this option.
- Twitter character limit – This is the character limit for Twitter. The character limit of tweets is 280. Use 140 for languages like Chinese, Japanese, and Korean which won’t get the 280-character length limit.
- Twitter API Daily Limit –The default API limit is 17 requests / 24 hours for free-tier users. For paid tiers, adjust the daily limit here(if you are using your own app).
For example, the basic tier allows 100 requests / 24 hours per user, and the pro tier allows approximately 100 requests / 15 mins per user. - Allow Telegram Markdown in message format –You can use bold, italic, underlined, strikethrough, spoiler text, block quotations as well as inline links and pre-formatted code in your message format.
*bold* or **bold**_italic_ __underline__ ~strikethrough~ or ~~strikethrough~~
||spoiler||[inline URL](https://www.example.com/)[inline mention of a user](tg://userid=123456789)`inline fixed-width code““ pre-formatted fixed-width code block “`
>Block quotation started>Block quotation continued>Block quotation continued
>The last line of the block quotation**>The expandable block quotation started right after the previous block quotation>It is separated from the previous block quotation by an empty bold entity>Expandable block quotation continued>Hidden by default part of the expandable block quotation started>The last line of the expandable block quotation with the expandability mark|| - Add WordPress post link as comment (to Facebook Page posts) – By enabling this option, we can add the post link as a comment to the Facebook page posts.
- Apply filters during publishing – You can apply the given filters if you want it while publishing the post. Enable the apply filters in order to evaluate all the functions attached to the specified hooks from other plugins as well as theme.
- Date format for auto publish – This is the date format of the auto publish. You can see the details of the format at https://secure.php.net/manual/en/function.date.php
- Time format for auto publish – This is the time format of the auto publish. You can see the details of the format at https://www.php.net/manual/en/function.time.php
CRON SETTINGS
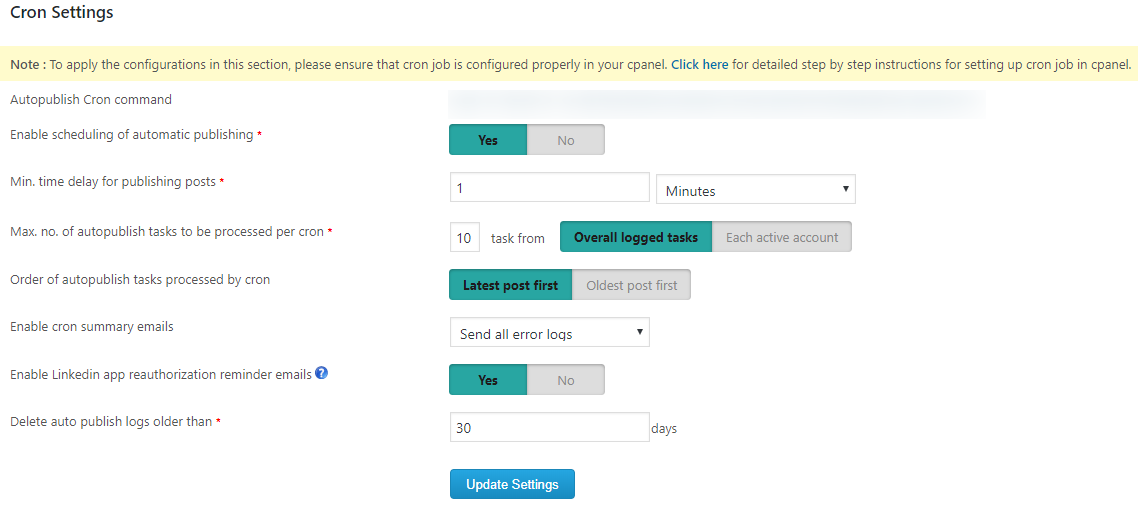
- Auto Publish Cron command – This is the cron command added to the cron job for scheduling. That means if you want to publish a post to social media after some time of original publishing in the wordpress site, you can use the scheduling option and then set the cron command in the cron job. The details of the cron setting are given in How to setup cron job in cpanel? and How to setup scheduled task or cron in plesk panel?
If there is any issue with setting up the cron job, please contact our support team.
- Enable scheduling of automatic publishing – You can schedule the automatic publishing of the posts on social media. So the messages will auto publish to the social media in a scheduled time after publishing the blog post. For this enable the scheduling.
- Min. time delay for publishing posts – This is the time delay of publishing a post on social media after publishing it in the blog.
- Max. no. of autopublish tasks to be processed per cron – This is the maximum number of posts to be processed in a single cron job.
- Order of autopublish tasks processed by cron – we can set the preference to publish the latest posts per cron or the oldest posts per cron. If we use “latest post first”, it will publish the latest post in the cron.
- Enable cron summary emails – If you want to send the cron summary emails, you can select the option and it will send a mail to the admin email. Here we can send error logs, success logs, and both error and success logs.
- Enable Linkedin app reauthorization reminder emails – If you enable this option, you will receive reminder emails one week before and one day before the LinkedIn app authorization expiry.
- Delete auto publish logs older than – This is the interval period for clearing the history. If you have set the cron interval as 30 days, it will clear the history before the last 30 days. That means the history of the last 30 days only is available after the cron execution.
MESSAGE TEMPLATES
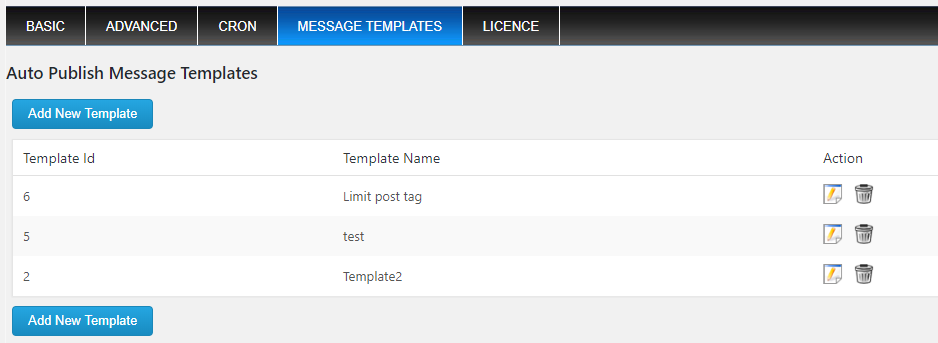
Message templates are the predefined templates for messages.
In this section, we can see all the message templates.
To create a new template click on the “Add New Template”.
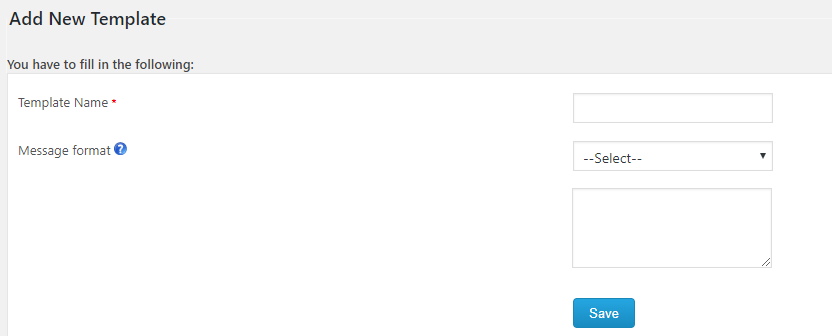
In this section, we can add the template name and the message format and save it.
Later when we create a new account, we can use the message template.
LICENSE
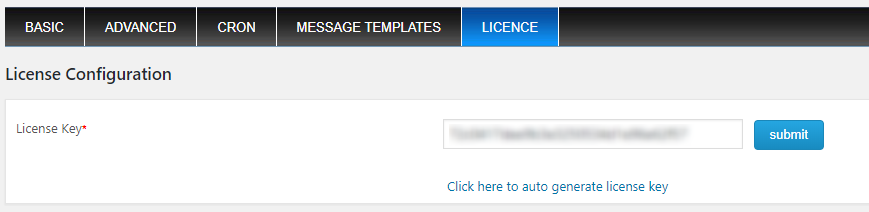
Here we can add the license key and activate the premium plugin.
To auto-generate the license key, click on the link provided.
If the automatic license key generation is not working, you can manually create the license key and the steps are given in How can I create license key?