NOTE
Important Updates to Twitter/X API
Twitter (now X) has made several major changes to its API access and pricing model since 2023. Free API access has been significantly restricted and pricing structures have changed over time.
As of February 7, 2026, X introduced a new Pay-Per-Use pricing model for the X API.
Official Announcement:
https://devcommunity.x.com/t/announcing-the-launch-of-x-api-pay-per-use-pricing/256476Key Updates
Pay-Per-Use Pricing Model
Developers can now pay only for the API usage they consume. This model is intended to support indie developers, startups, and small projects.Public Utility Apps
Only applications classified as Public Utility Apps may continue to receive free scaled API access.Legacy Free API Users
Developers who were previously using the Legacy Free Tier may be automatically transitioned to the Pay-Per-Use model and may receive a one-time $10 API credit voucher.Basic and Pro Plans
The Basic and Pro subscription plans remain available and developers may optionally switch to Pay-Per-Use depending on their needs.Important
With the new API model, X has introduced New Developer Console for easier API management
Because X continues to update its API policies, pricing, and access levels, availability of free or low-cost API usage may change in the future. Developers should always refer to the official X Developer documentation for the latest information.
X (Twitter) App Creation and Developer Setup
Step 1: Apply for Twitter/X Developer Account
Step 5: Twitter/X Project Details
Step 7: Authentication settings
Step 8.1: Generate keys and tokens for Traditional
Step 8.2: Generate client ID and Client Secret for OAuth 2.0
To create a Twitter/X application, we need to apply for a developer account.
Step 1: Apply for X/Twitter Developer Account
If you do not have a developer account, it will redirect to the developer account section when you go to https://console.x.com/ . If your developer account is approved, please go to Step 3.
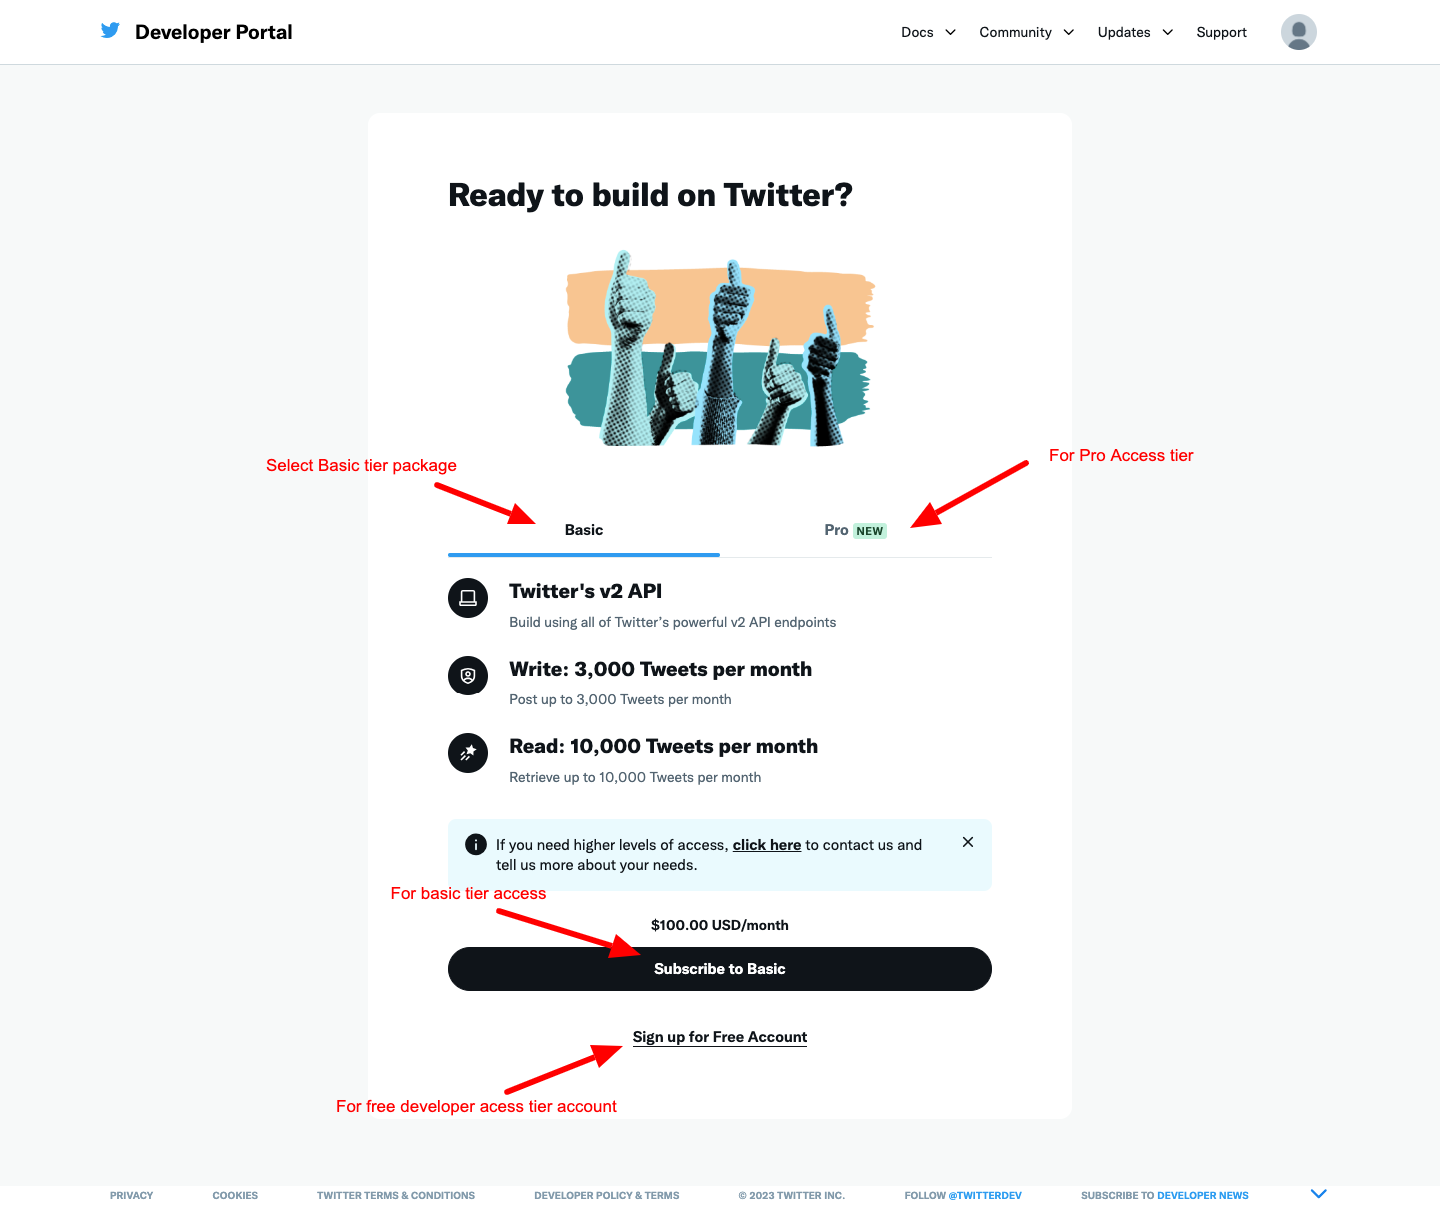
Sign up for an X (Twitter) Developer account or choose a plan based on your needs.
Note: API limits, pricing, and available plans may change over time.
Please refer to the official X Developer website for the latest information: https://console.x.com
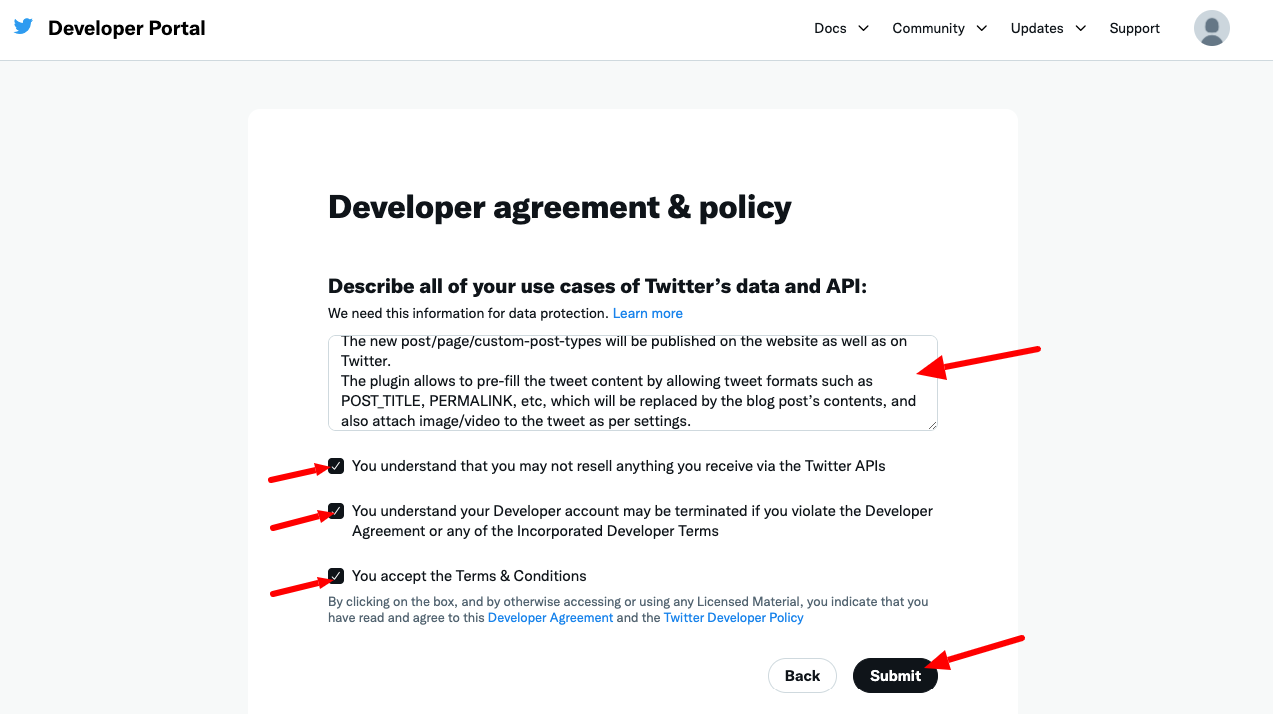
Step 2: Project Description
Describe the project. Here we need to explain how we are using the Twitter API.
A sample description is given below.
I am using a WordPress plugin to publish posts automatically from my blog to Twitter.
The plugin requires Twitter App to publish posts from WordPress to Twitter.
For this, I must create an app and provide the app details such as API key, API secret, Access token, and Access token secret.’
When a new post, custom post type, or page is created on my WordPress site, it contains the title, content, excerpt, images/videos, etc. When clicking the ‘publish’ button on the right side of the post/page/custom post type. The new post/page/custom-post-types will be published on the website as well as on Twitter.
The plugin allows to pre-fill of the tweet content by allowing tweet formats such as POST_TITLE, PERMALINK, etc, which will be replaced by the blog post’s contents, and also attach image/video to the tweet as per settings.
Step 3: Twitter Default App
This will redirect to the developer portal https://console.x.com/
A default project and app will be added automatically.
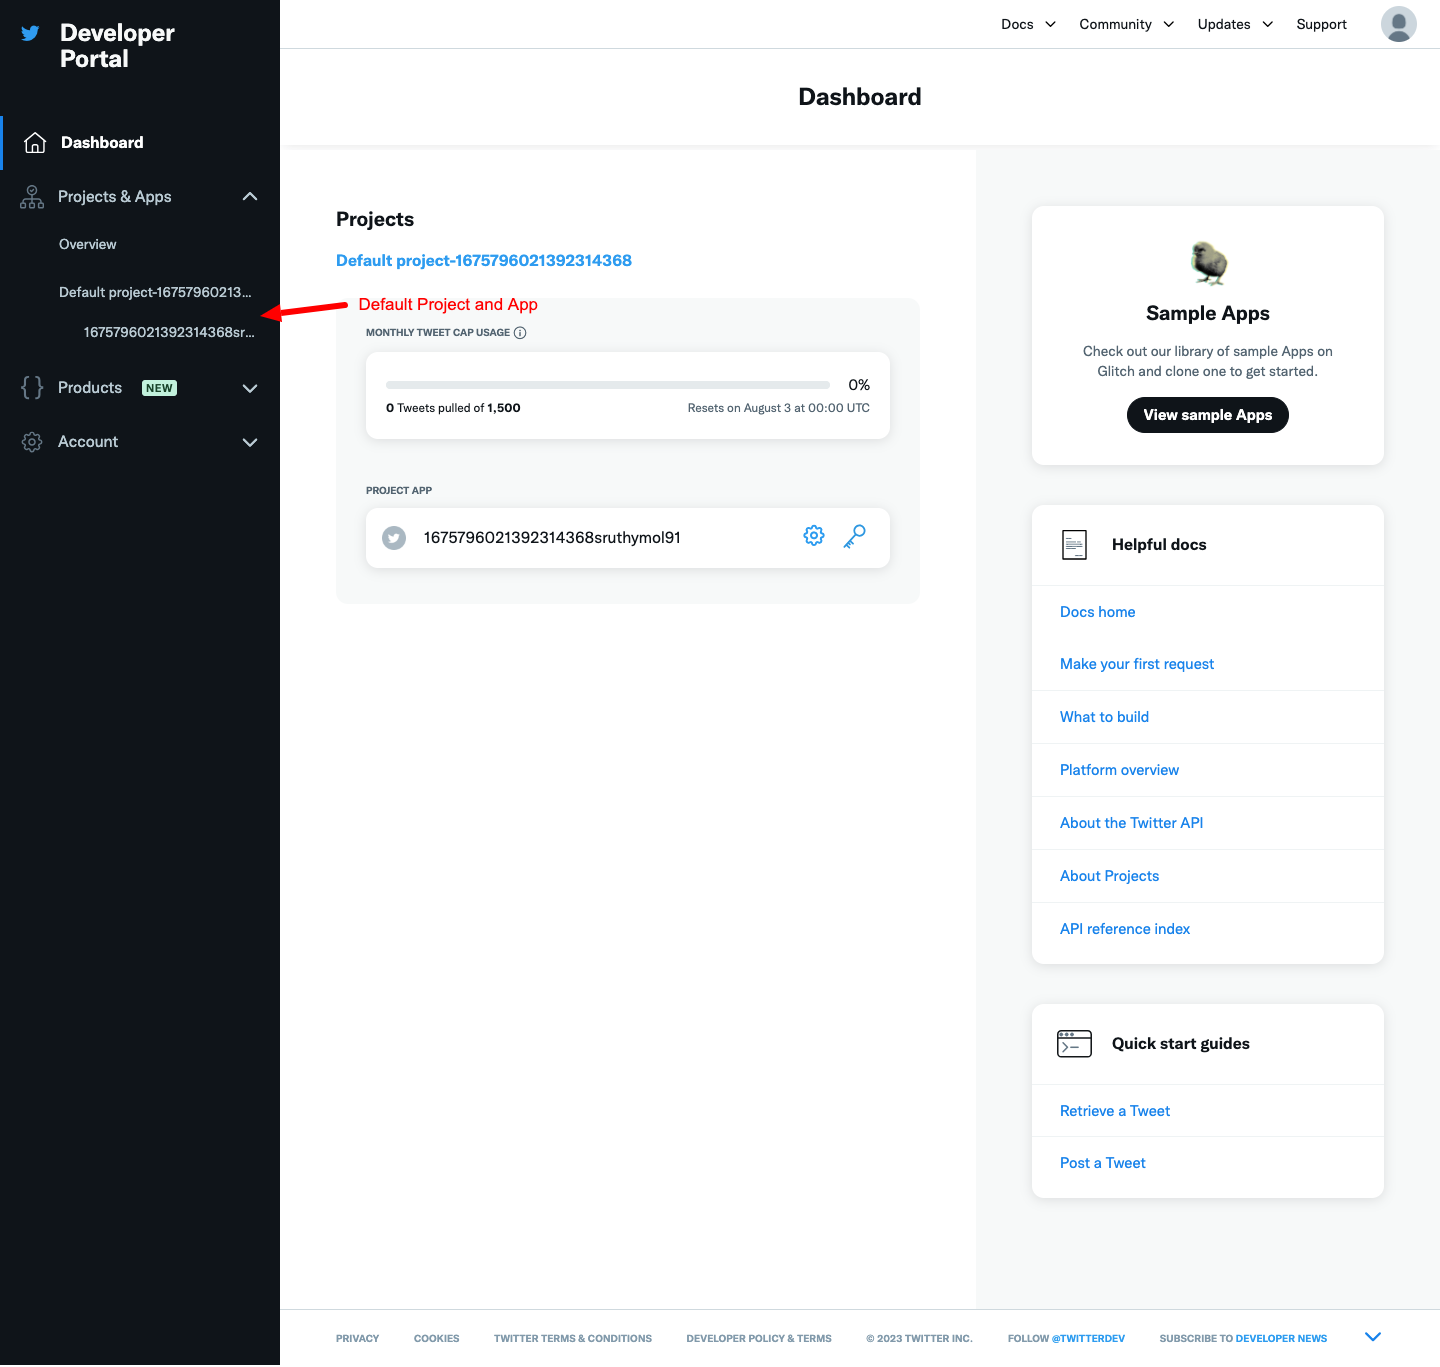
You can either rename the project and app or delete it to create another one.
If your developer account already has more than 1 app and project then remove the standalone apps and projects(if more than 1). Otherwise, it will be suspended automatically.
Step 4: Create or Edit Twitter Project
Create a new project or rename the default project.
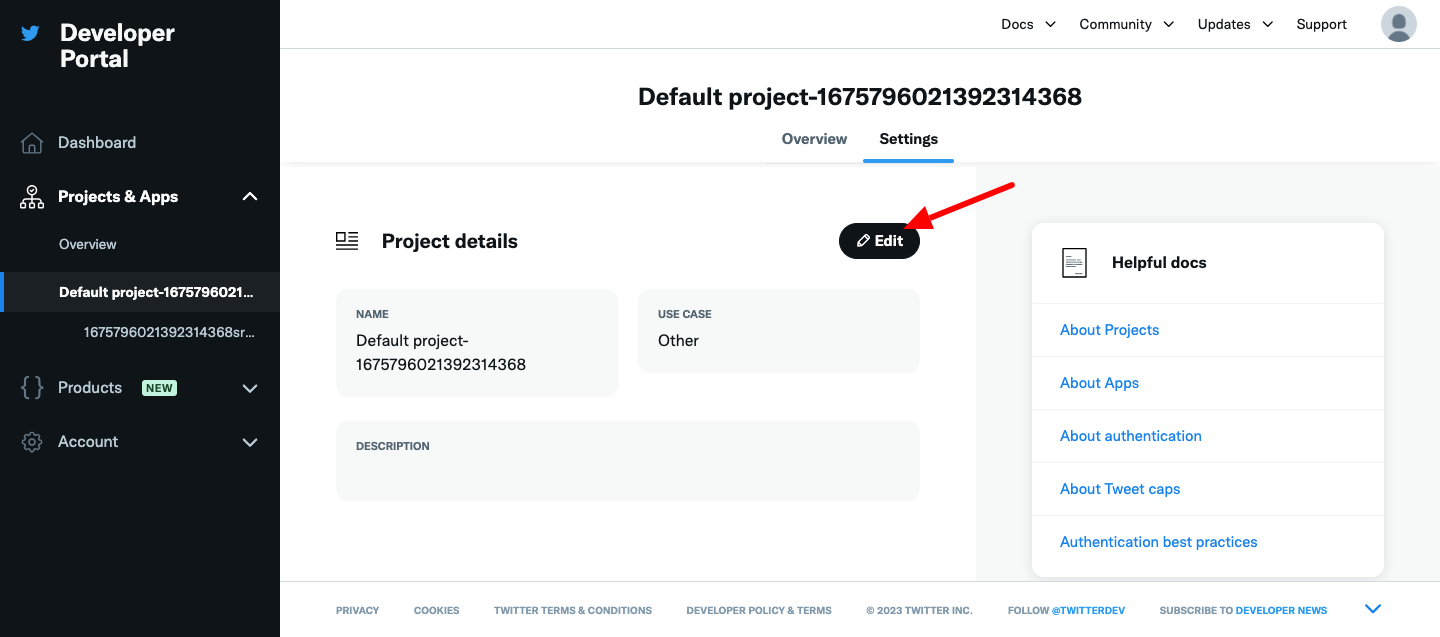
Step 5: Edit Twitter Project Details
Update your Project details and choose the appropriate use case.

Step 6: Edit Twitter App Details
Edit the default app /add a new one(only 1 app will be allowed for the free tier)

Update settings:

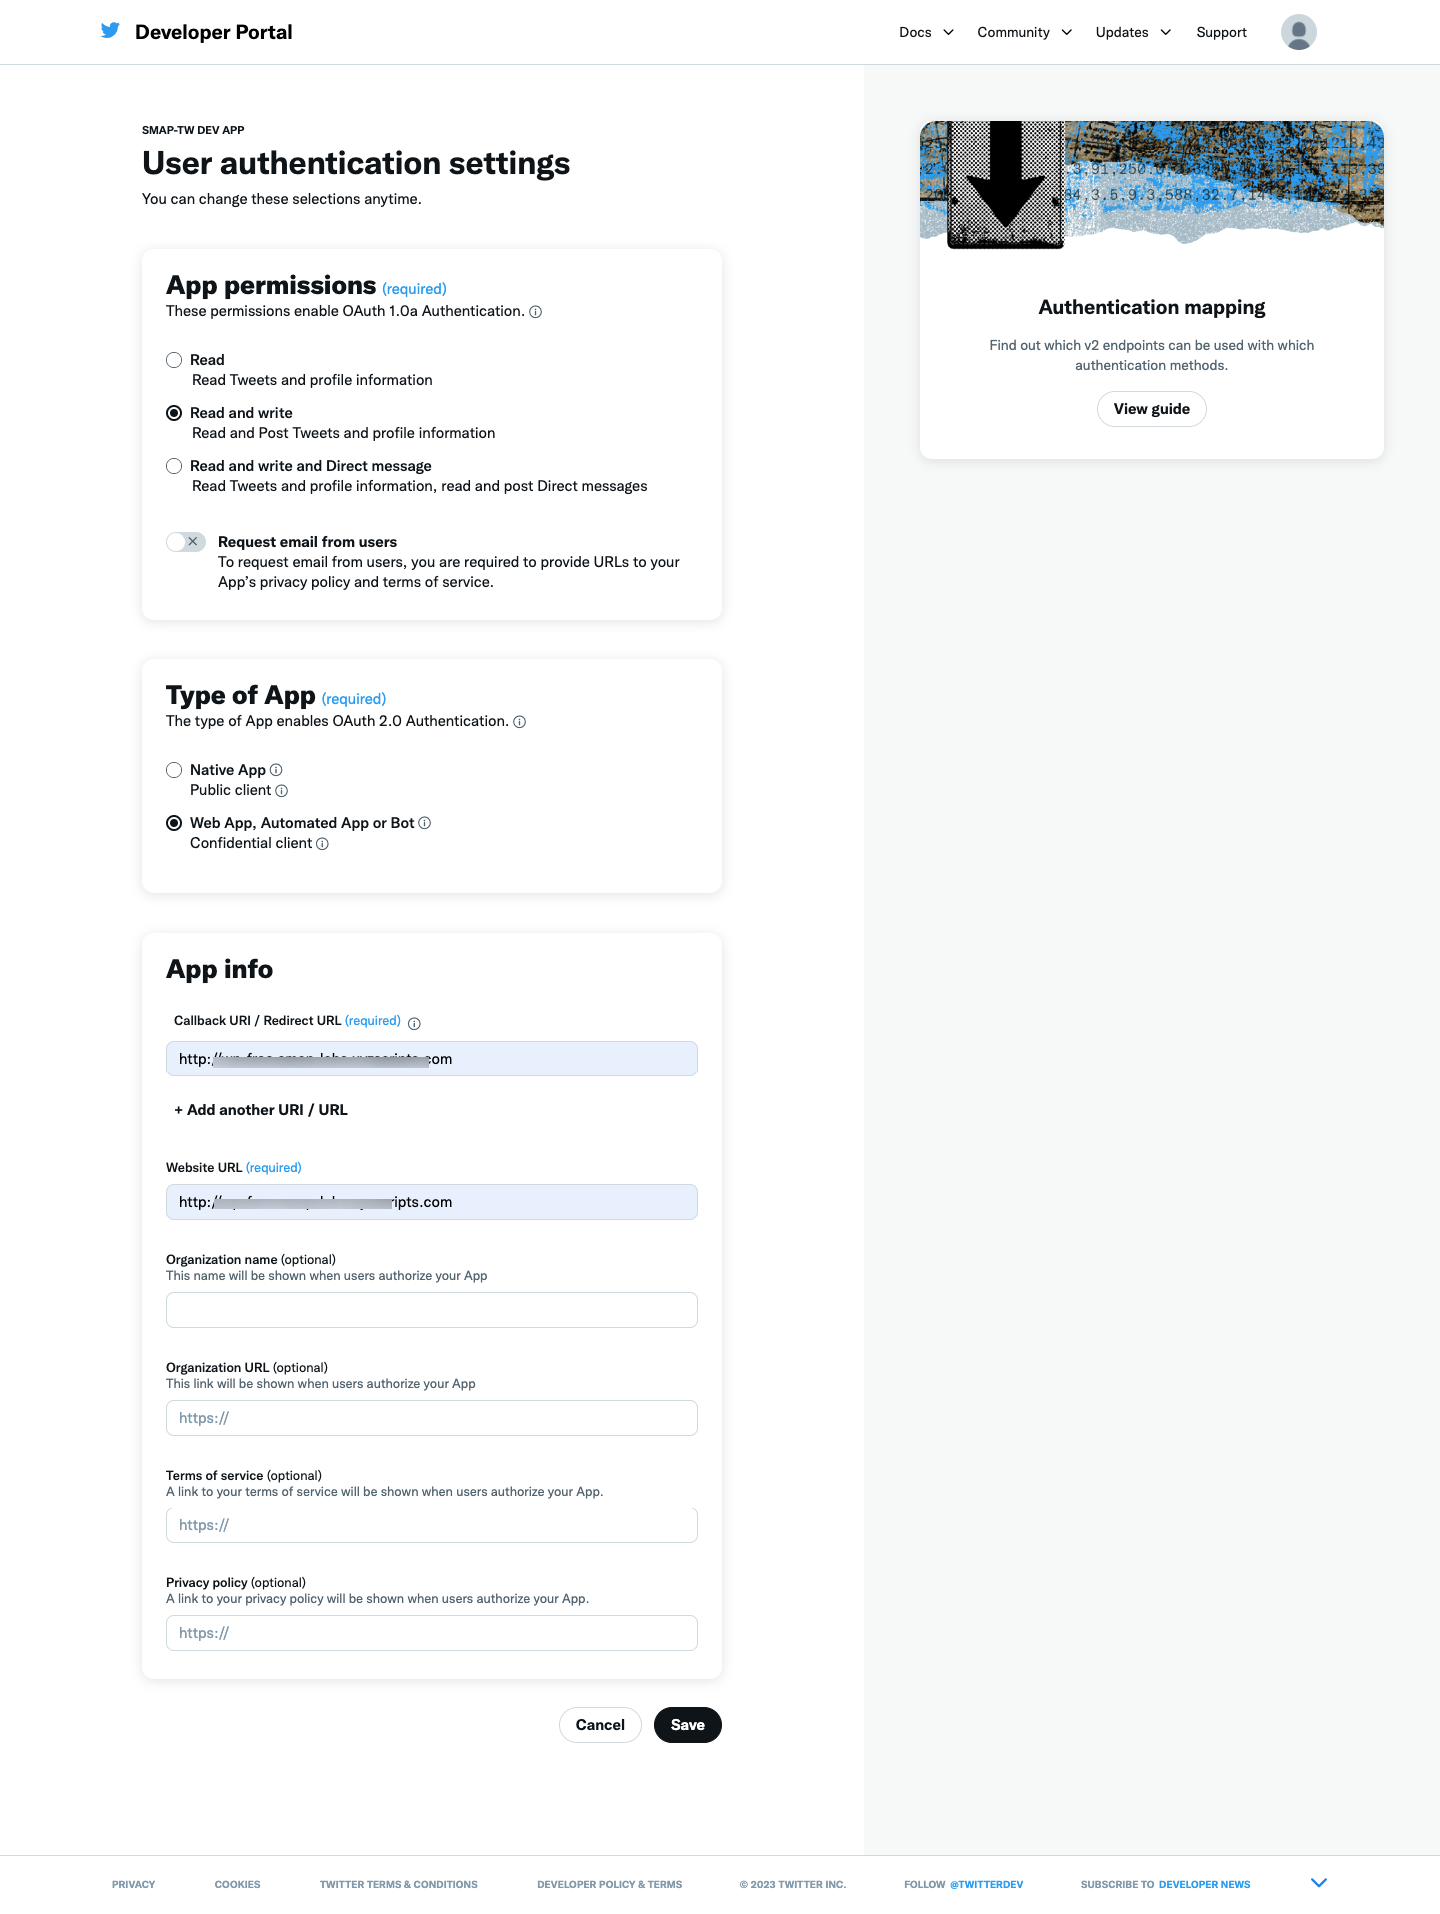
Step 7: Edit Authentication settings
Set App permissions to Read and Write and also enter the website URL as Callback/redirect URL and website URL in the settings as shown in the screenshot.
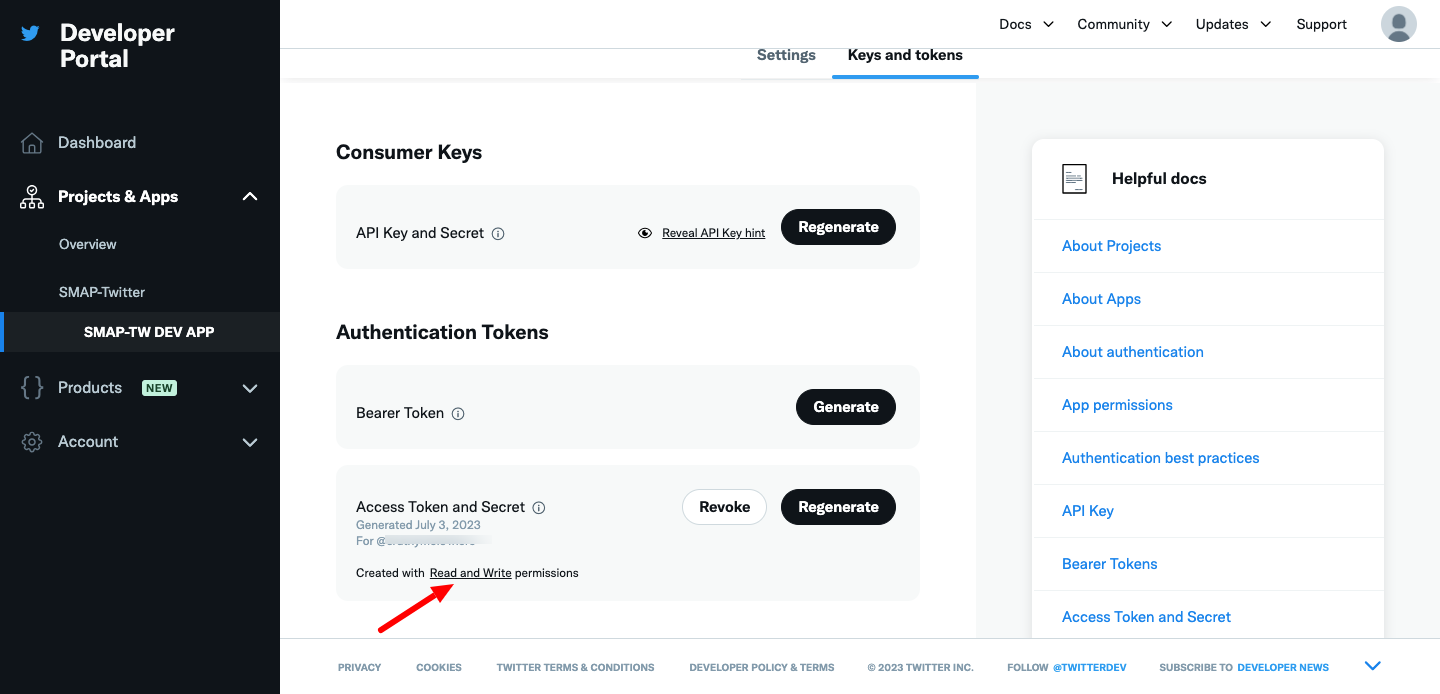
Step 8.1:Generate keys and tokens for traditional

Copy the API Key and secret and use it on the plugin settings page for Twitter.
Generate Access token and secret
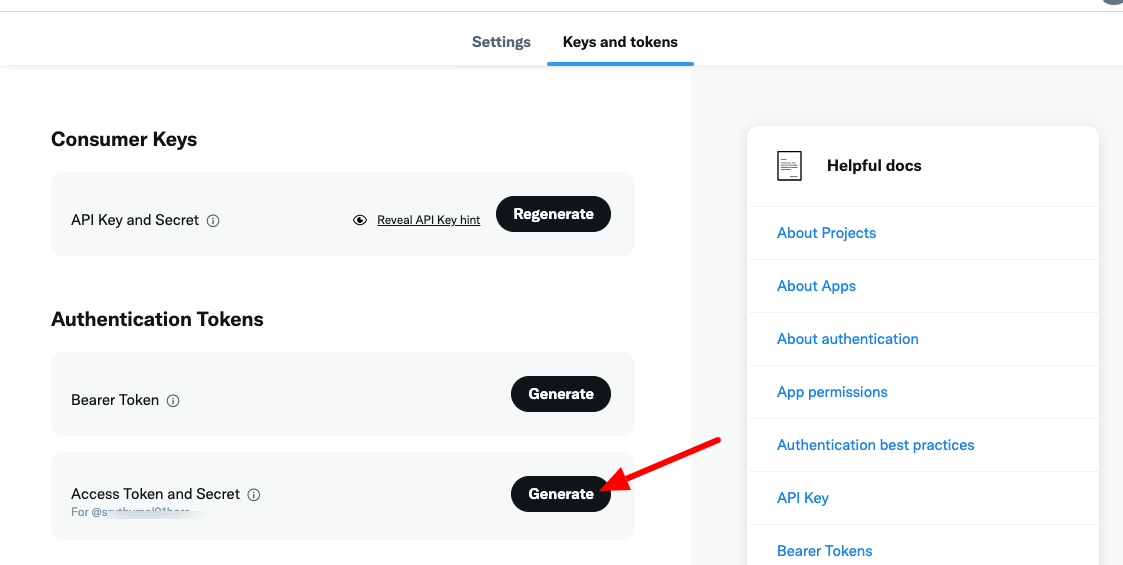
Copy the token and secret to use in Twitter settings.
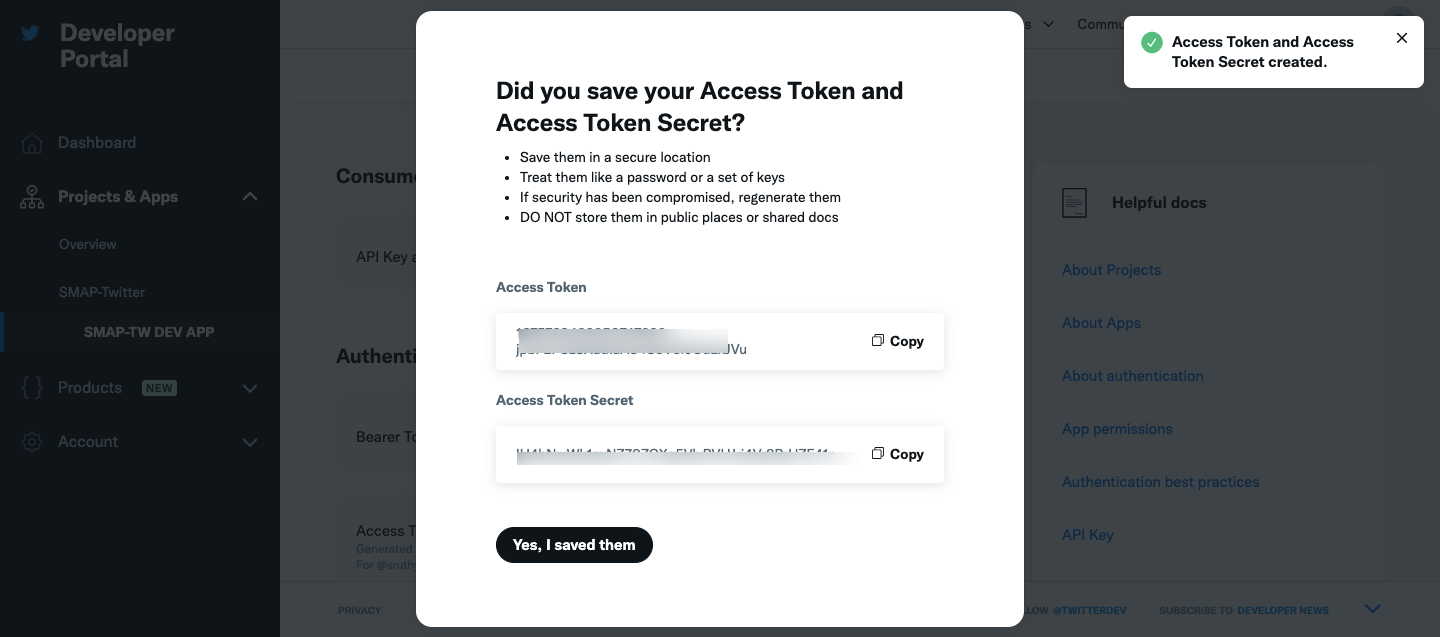
Make sure that the token has Read and Write access.
Step 8.2:Generate Client ID and Client Secret for oAuth 2.0
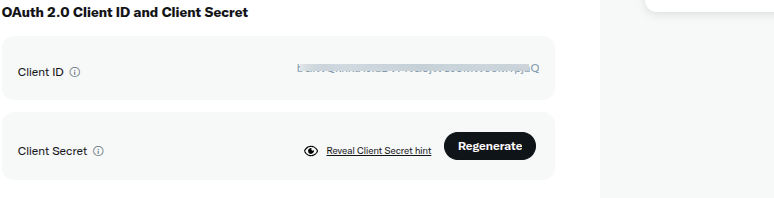
Copy the Client ID and Client Secret and use it on the plugin settings page for Twitter.
Update the Twitter Settings
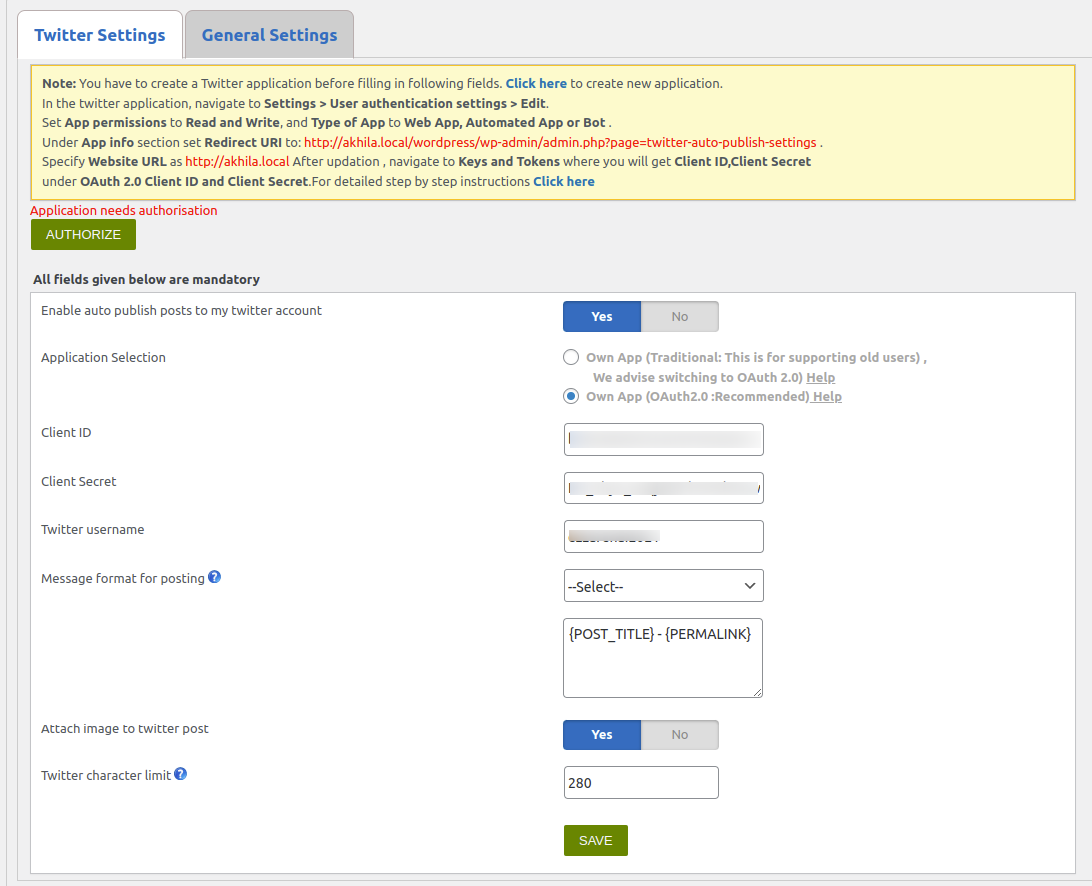
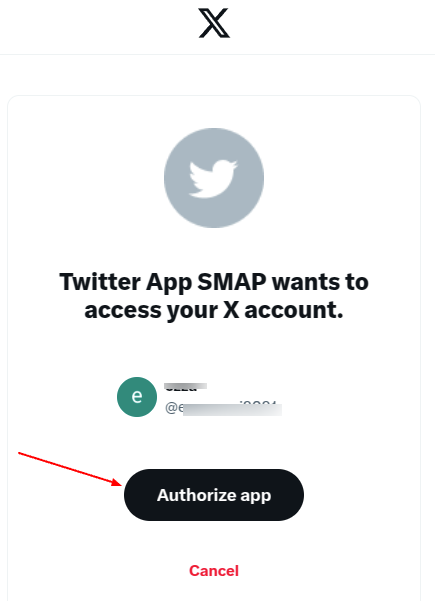
Clicking the “Authorize” button will redirect you to Twitter for authentication.
Now you can publish WordPress posts as tweets with the app.
Note: Image/media upload may take up to 2 API calls for a single image so it is recommended to use {PERMALINK} in the message format to display the preview of the post (Since a thumbnail will be generated from a Twitter card ) and it will take only 1 API call.