Linkedin Settings
Linkedin settings are given below.
To publish a post to Linkedin we need an app and you can either create a Linkedin application before filling the Linkedin settings details or use the paid smapsolutions service.
To create a new Linkedin application follow the link
From the LinkedIn application, you will get the API Key and API Secret Key. Enter these values in the space provided.
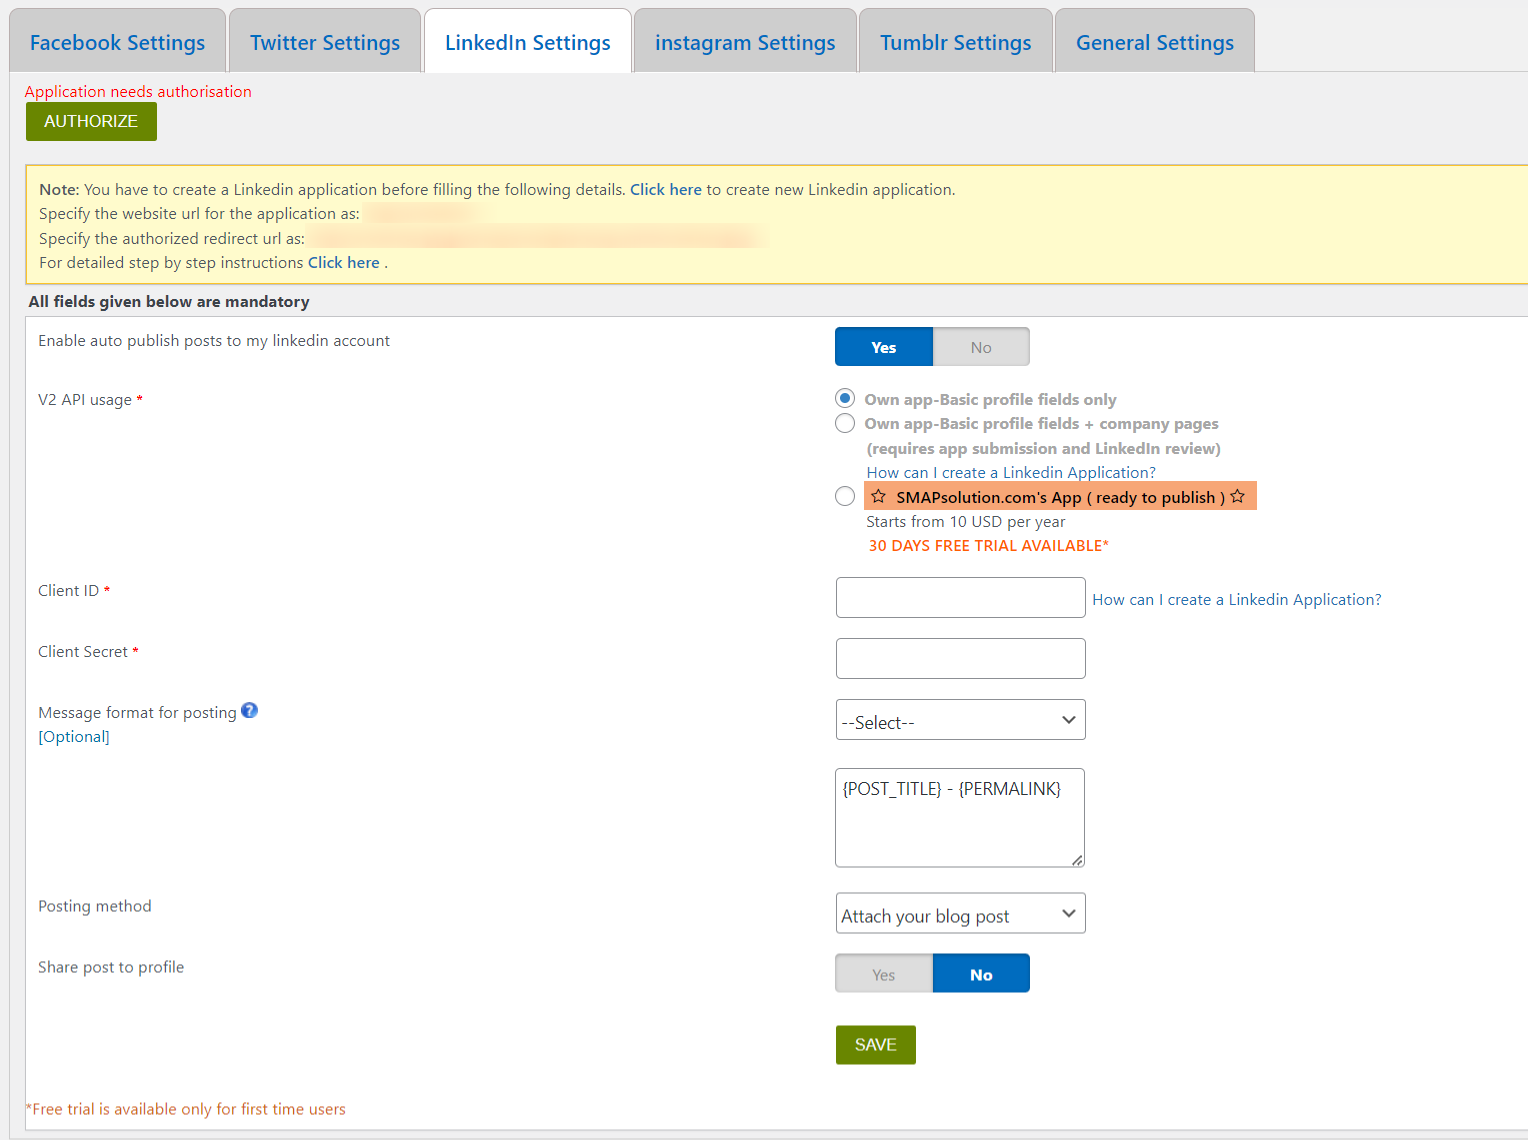
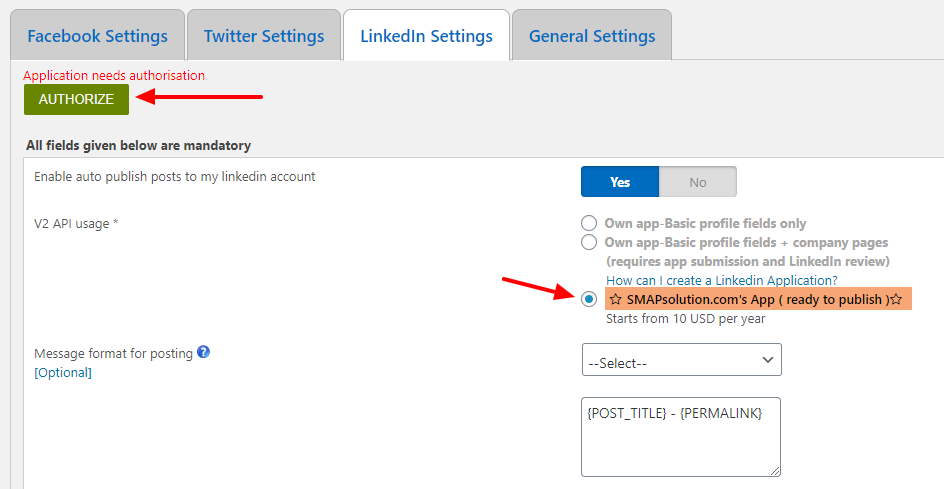
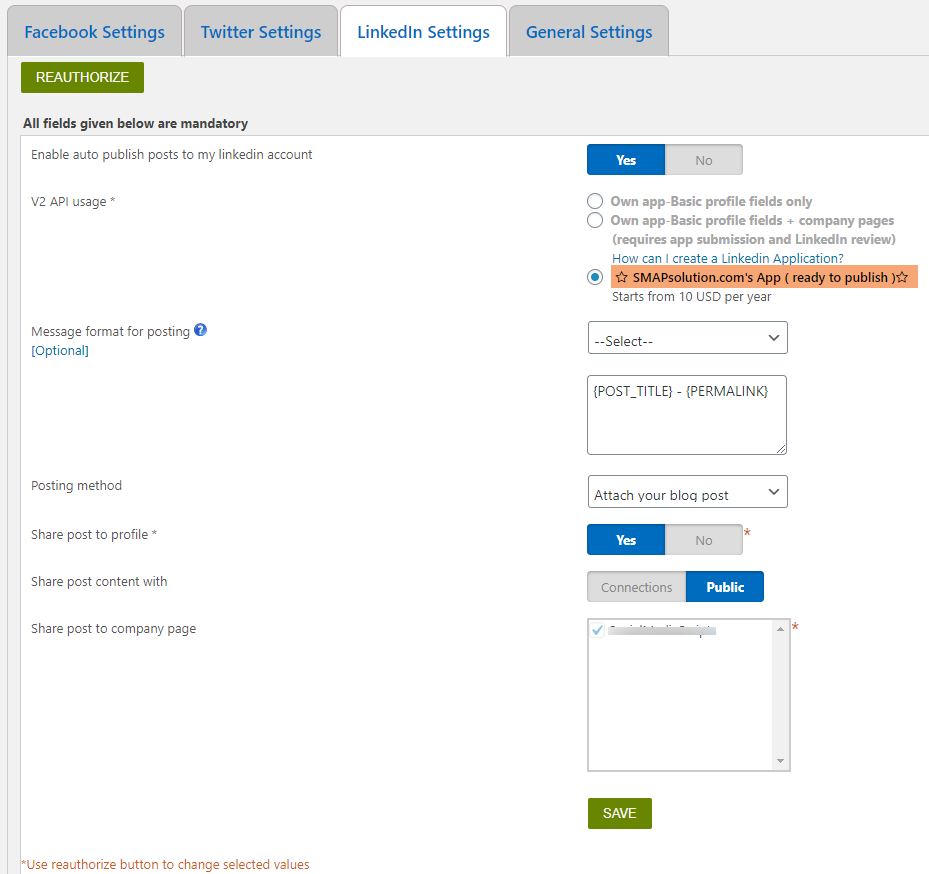
1. Enable auto publish posts to my linkedin account – If you want to publish your blog posts on LinkedIn automatically, enable this option.
2. V2 API usage – Select your own LinkedIn app for profile only or profile and company page or select the smapsolutions app (paid service).
To publish to linkedin company page with your own app, you need to submit your app for approval and the details are given in How can I auto publish to Linkedin company page?
3. Client ID – Enter the API key client ID from the LinkedIn application here. (Applicable only if you are using your own LinkedIn app.)
4. Client Secret – Enter the LinkedIn API secret key here. (Applicable only if you are using your own LinkedIn app.)
5. Message Format for posting – This is the message format for posting in the LinkedIn. You can add your message with a post title, blog title, etc. here. The codes are given below.
- {BLOG_TITLE} – This is the title of the blog (WordPress site name)
- {POST_TITLE} – Title of your post.
- {PERMALINK} – This is the URL of the post.
- {POST_EXCERPT} – This is the summary of your post.
- {POST_CONTENT} – This is the description of the post.
- {USER_NICENAME} – This is the nice name of the author.
- {POST_ID} – This is the ID of the post
- {POST_PUBLISH_DATE} – This is the post publish date.
- {USER_DISPLAY_NAME} – This is the user display name.
If you want to display the post title, the link to the post, and the summary of the post, please use the codes {POST_TITLE} – {PERMALINK}-{POST_EXCERPT}. You can select the code from the dropdown menu.
6. Share post to profile – If you want to publish the post to your profile, select this option.
6a.. Share Post content with – Select the option to whom you want to display the posts. Select “public” if you want to display the post to public or select “Connections Only”, if you want to display the post with your connections only.
A sample LinkedIn post is given below.
Now save the content and click the “Authorize” button.
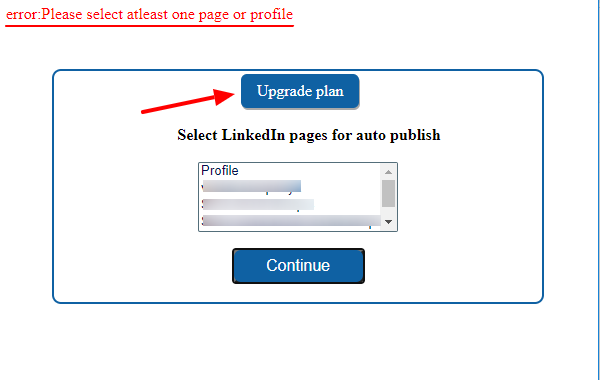
Now after the authorization, you can see all the LinkedIn company pages and you can select the company accounts to publish.
7. Select pages for auto publish – You can select the LinkedIn company pages you want to publish.
The steps for using the smapsolutions app
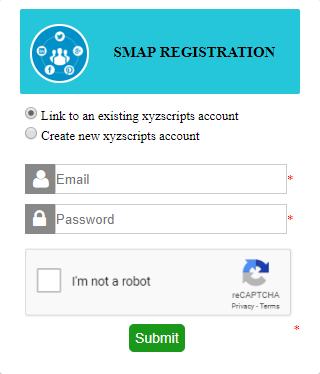
Please select the smapsolutions app option and click on the connect to xyzscripts account button.
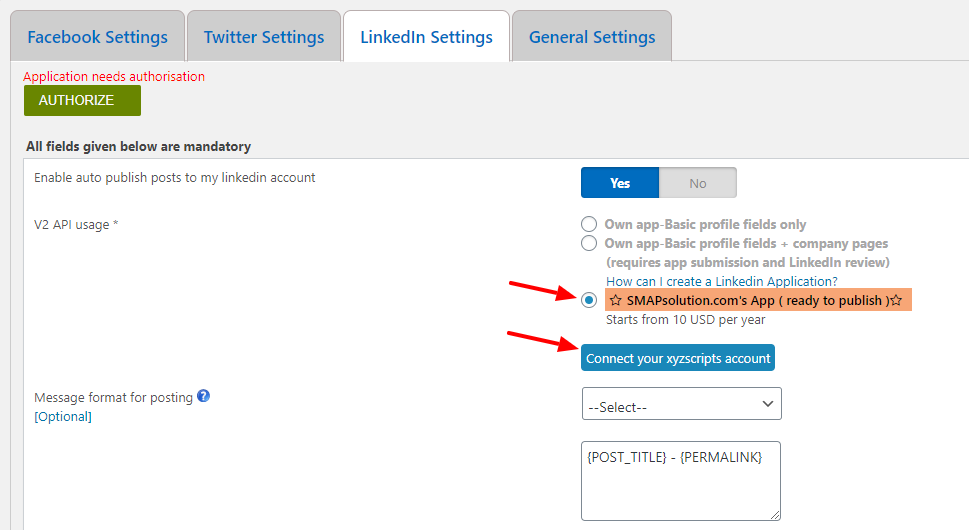
Now it will display a popup to login to xyzscripts or register to xyzscripts.
After connecting to xyzscripts account, please save it and click on the “authorize” button.
Now it will ask you to select the package.

After purchasing a package and successful payment it will redirect to LinkedIn authorization flow.
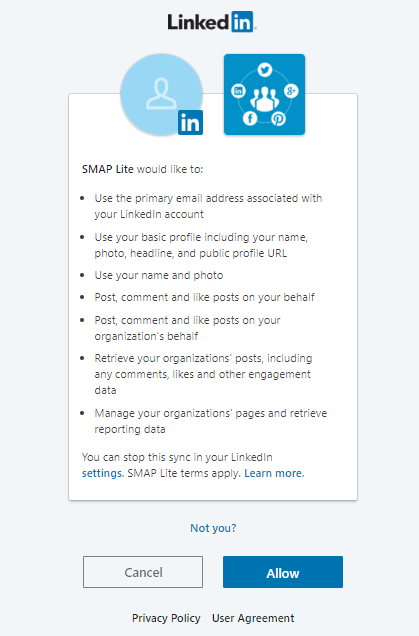
You can allow the app to use your account. Now you can select the profile or LinkedIn page to publish.
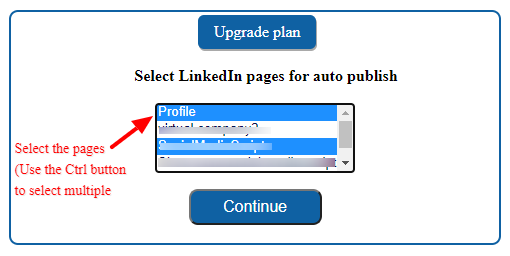
After selecting the pages, you can see the selected pages in the plugin linkedin settings.
Error cases on the authorization procedure
- Click on continue without selecting pages