Basic configuration settings like SMTP, sender email, email templates etc. can be updated here.
4.a. Configuration Setting
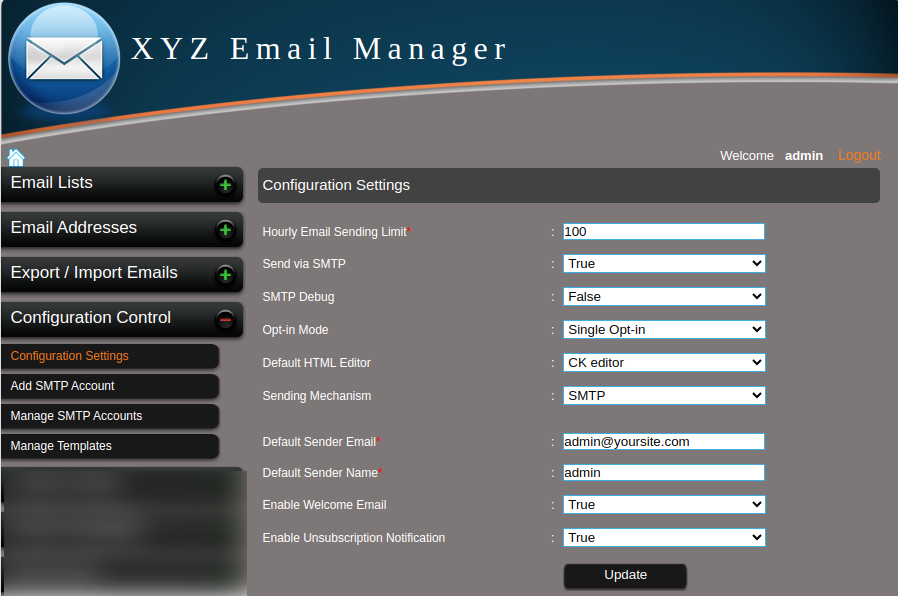
You can set the basic configurations like hourly email sending limit, send email using smtp, smtp debug, default subscription status etc. (Figure 4.a.1)

Figure 4.a.1 – Basic Configurations
a. Hourly Email Sending Limit
In most shared hosting and VPS hosting, there is a limit for sending emails in an hour.
If your host allows you to send only 100 emails per hour, you can enter this limit in the “Hourly Email Sending Limit” section and the system will send only 100 emails per hour.
b. Send via SMTP
Make it “True” to send emails using the SMTP.
To send emails with phpmail() feature, make it “False”.
Sending emails using SMTP authentication gives your emails better chances for reaching inbox rather than spam folder.
c. SMTP Debug
Make it “True” to find the error messages related to the SMTP.
It will not display the error messages if the value is “False”.
d. Opt-in mode
It is the status assigned to an email when a user subscribe to newsletter using the HTML form.
If you want your users to be active immediately after the subscription, use the ‘Single opt-in’ mode
If you choose ‘Double opt-in’, it will send a confirmation mail to the subscriber and the user becomes active only after confirming the subscription by clicking a link.
e. Default HTML Editor
We are using an HTML WYSIWYG editor called FCK editor and the text area to create email campaigns.
To create beautiful HTML campaigns, select the “FCK Editor” as the default HTML editor.
f. Default Sender Email
This is the default sender email address if the SMTP is not enabled.
g. Default Sender Name
This is the default sender name if the SMTP is not enabled.
4.b. Add SMTP Account
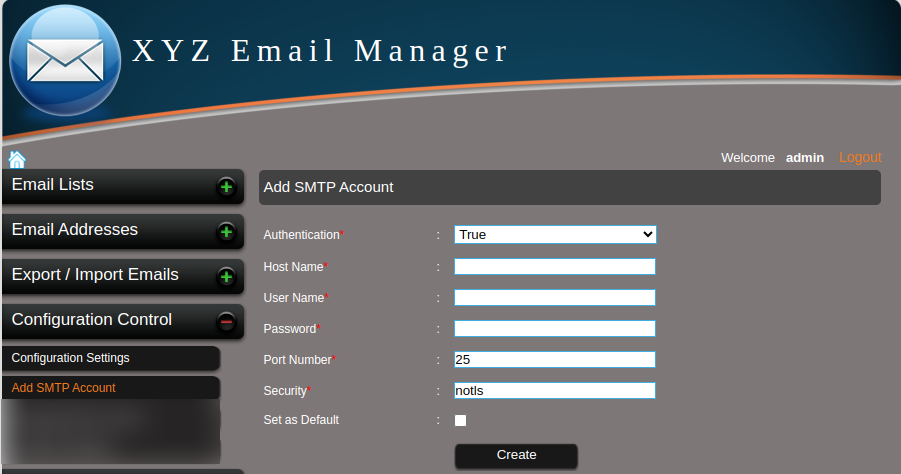
The SMTP configuration can be set here. (Figure 4.b.1)

Figure 4.b.1 – Add SMTP Account Details
a. Authentication
Set the authentication “TRUE” or “FALSE” depending on the hosting server.
Some server allow to send emails with authentication only. In such a case use the option “TRUE”.
b. Host Name
This is the name of the host. If you are using the SMTP account of the same hosting where the XYZ Mail Manager script is installed, the host name may be “localhost”.
If you are using an external SMTP account, use the proper hostname.
c. Email Address
This is the SMTP email address which is the “from email” used in the campaigns.
d. Password
This is the password of the SMTP email address.
e. Port Number
This is the port number of the SMTP server used. This is different for different SMTP hosts.
f. Security
This is the security measure used in the SMTP account. The different security options are ssl, tls, notls etc.
Note: You can refer your hosting support to get the SMTP port number and security, if you are not an expert.
Also you can make these settings as the default one to send emails using SMTP.
4.c. Manage SMTP Accounts
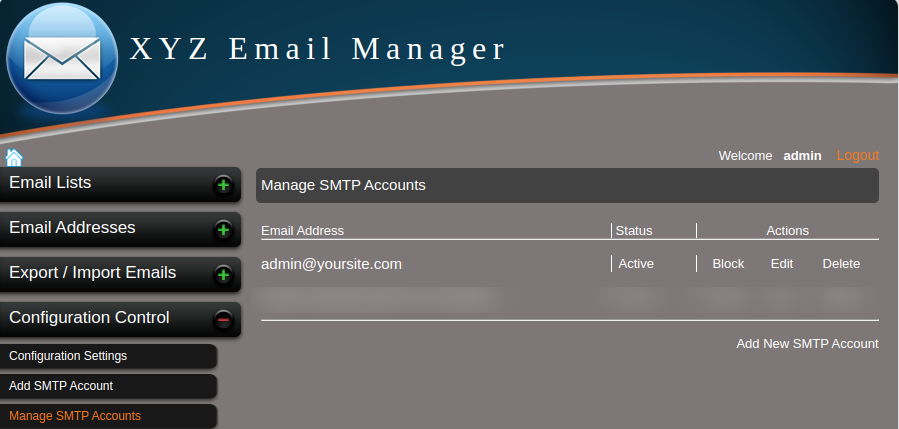
You can manage all your SMTP accounts here. You can block/activate, edit and delete SMTP accounts. (Figure 4.c.1)

Figure 4.c.1 – Manage SMTP Accounts
4.d. Manage Templates
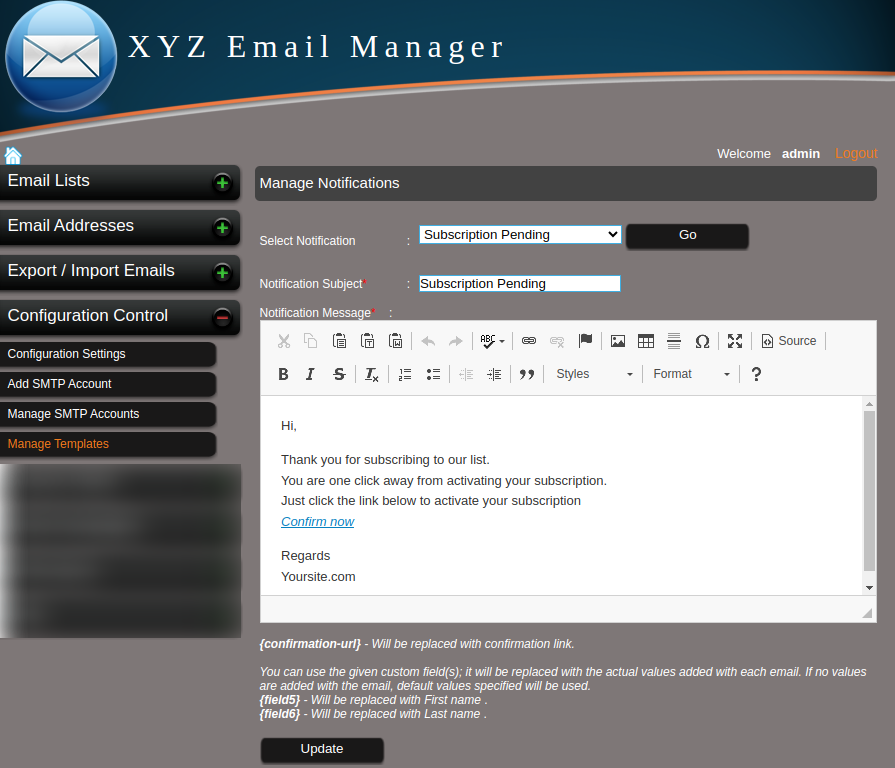
Here you can see the basic message templates and edit the messages. (Figure 4.d.1)

Figure 4.d.1 – Message Templates
a. Subscription Pending Template –
This is the message after a subscription if status is pending.To activate the subscription the subscriber need to click a confirmation link in the mail.
The confirmation link is written as {confirmation_link} in the message template. This parameter will be replaced with the original link in the confirmation mail.
Please DO NOT remove the parameter {confirmation_link} from the Subscription Pending template.
b. Welcome Email Template –
This is the message send to the subscriber after the subscription status become active. Here {field1}, {field2} etc. will be the custom fields and these will be replaced by the original values.
c. Unsubscription Notification Template –
This is the mail received when a user unsubscribes from your email list.