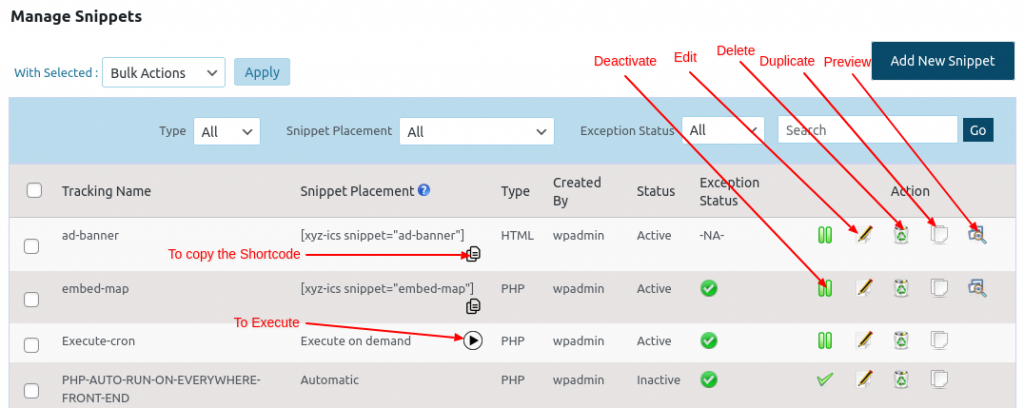
This section displays all snippets along with their Tracking Name, Snippet Placement, Type, and Status.
Additionally, various actions are available, such as changing the status, editing, deleting, duplicating, and previewing (applicable only for manual shortcodes).
To filter snippets by type (HTML or PHP), use the “Type” drop-down menu and click “Go.”
A search option is also provided to find snippets by name.
To create a new snippet, click the “Add New Snippet” button.
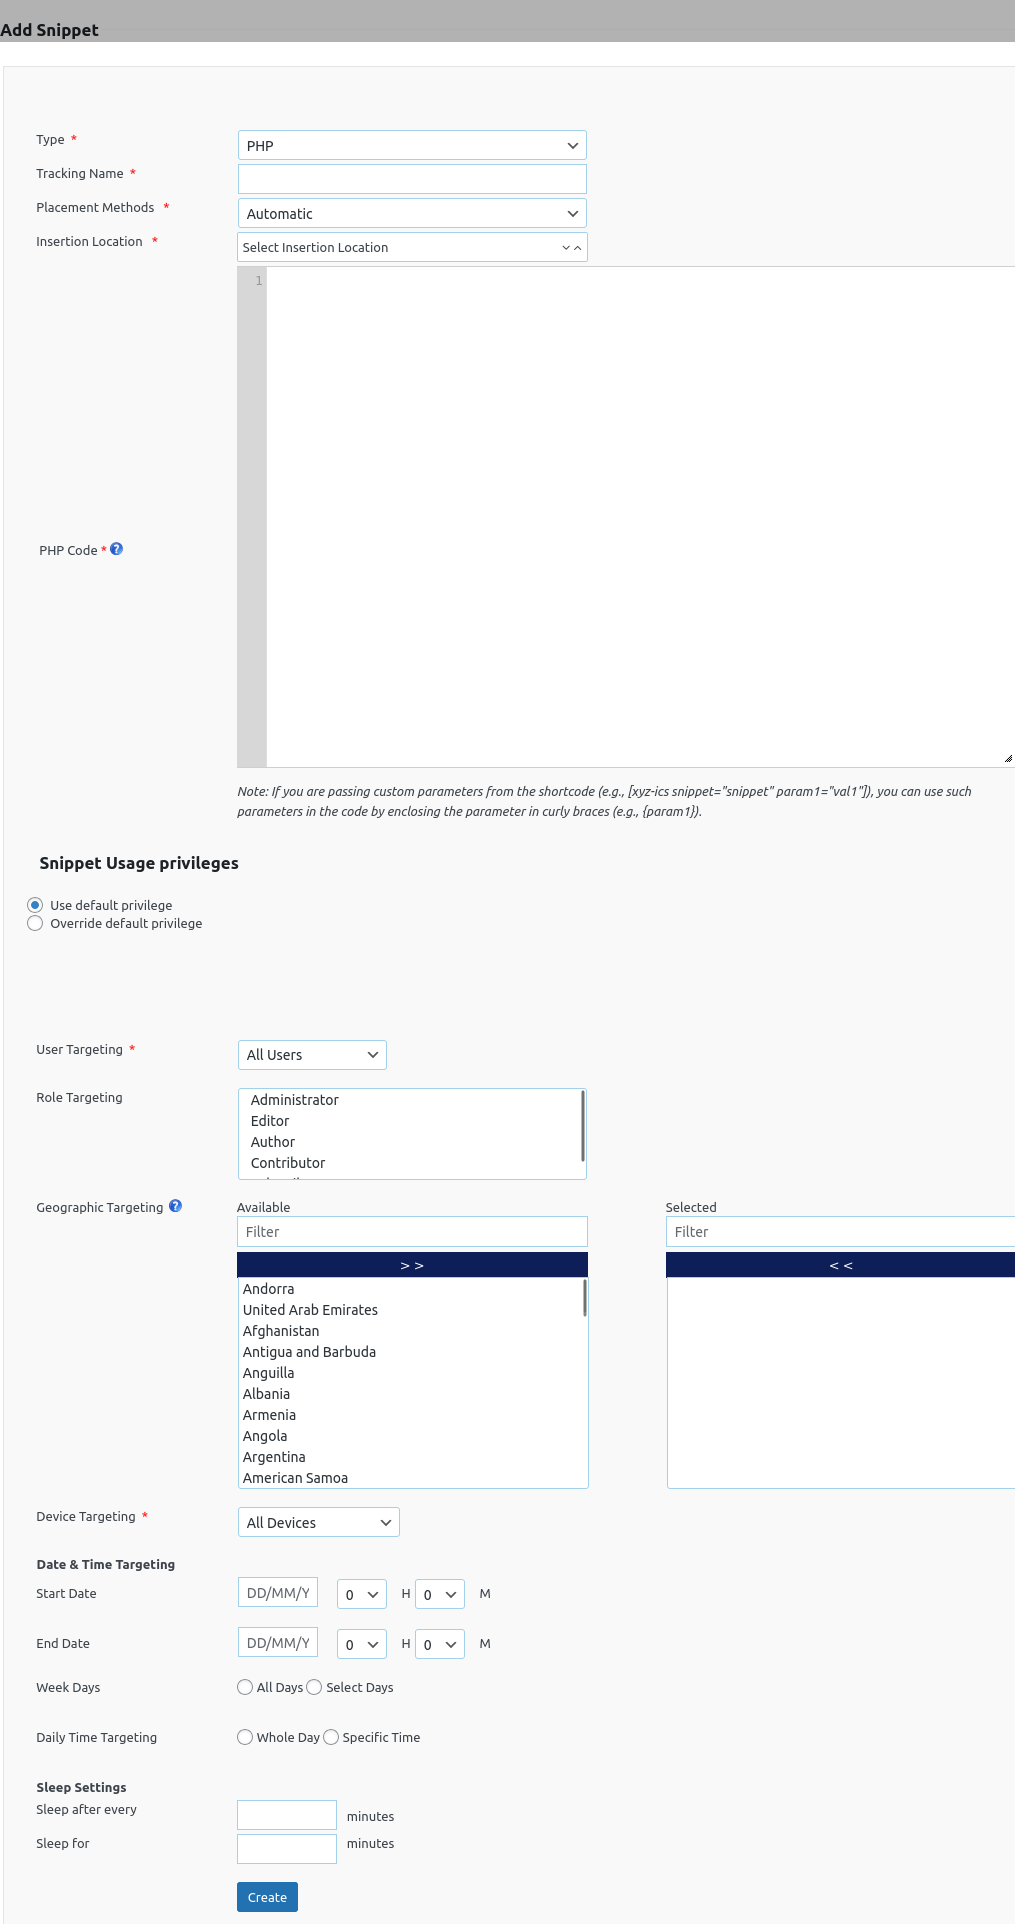
Here we can select the Type, enter the tracking name and add the code.
User Targeting: We can display the snippet to all users, logged-in users only and logged-out users only.
Role Targeting: Snippets can be displayed to specific user roles. If no roles are selected, the snippet will be visible to all users, from admins to subscribers.
Geographic Targeting: We can display the snippet to certain countries only.
Device Targeting: In this device targeting, we can publish the snippet to all devices, Mobiles and Tabs only, Laptop and desktop only.
Date & Time Targeting: We can display the snippet on the specified date. There is an option to enter start date and end date. And we can choose which day in the date range to display.
Daily Time Targeting: We can display the snippet at specified time. There is an option to set a whole day or specific time setting to display the snippet.
Sleep Settings: Let’s set the snippet to sleep after every x minutes and sleep every y minutes.
After entering all the details click the “Create” button and a snippet is now created.
Snippet Placement Methods
Users can select the desired method for placing snippets on their site. The available options are:
1. Automatic
- Automatically inserts the snippet based on the selected location.
- Supports placement in predefined locations in the admin area, frontend, or specific pages/posts.
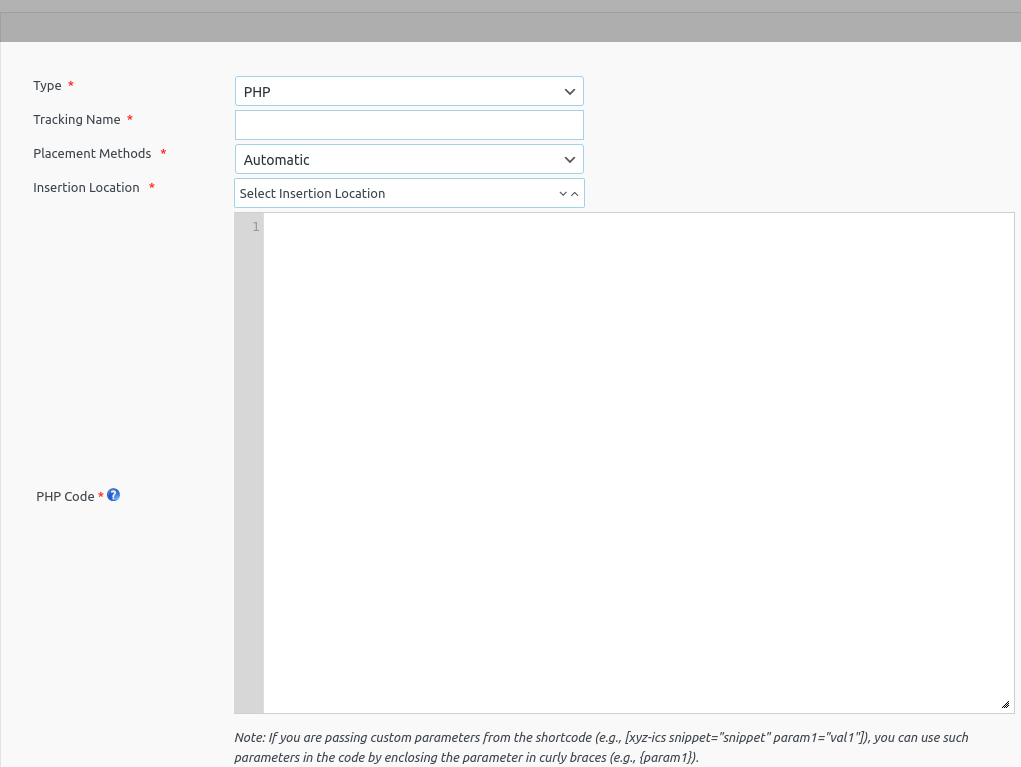
Automatic Placement Locations
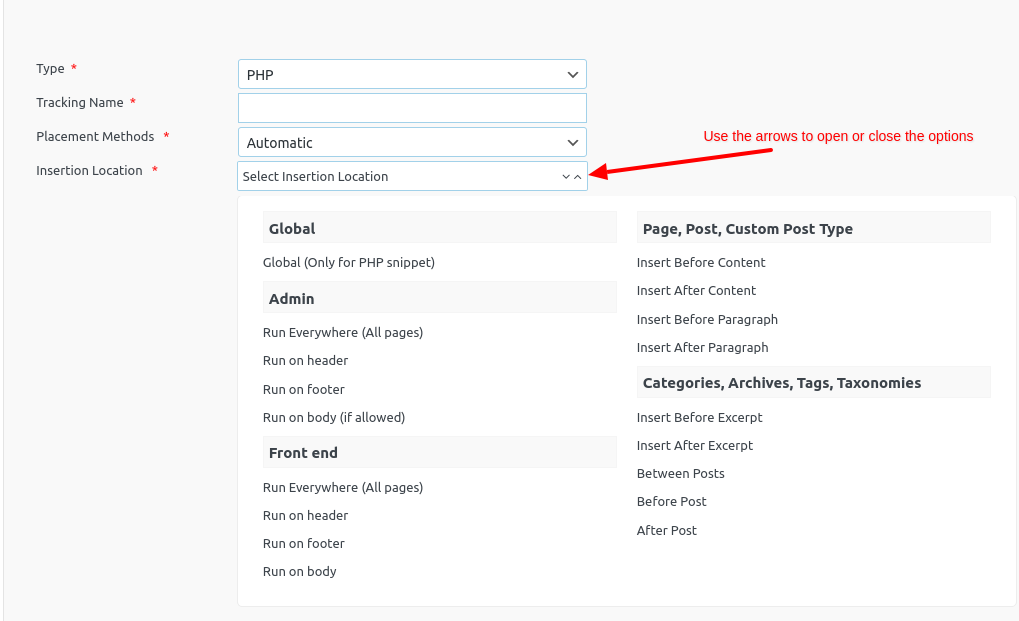
Detailed descriptions of automatic placement locations and sample codes are available in the Automatic Placement Locations Samples
2. Execute on Demand
This feature allows snippets to be executed only when clicked, making it ideal for developers who want to run snippet code manually by clicking the play icon next to the snippet.
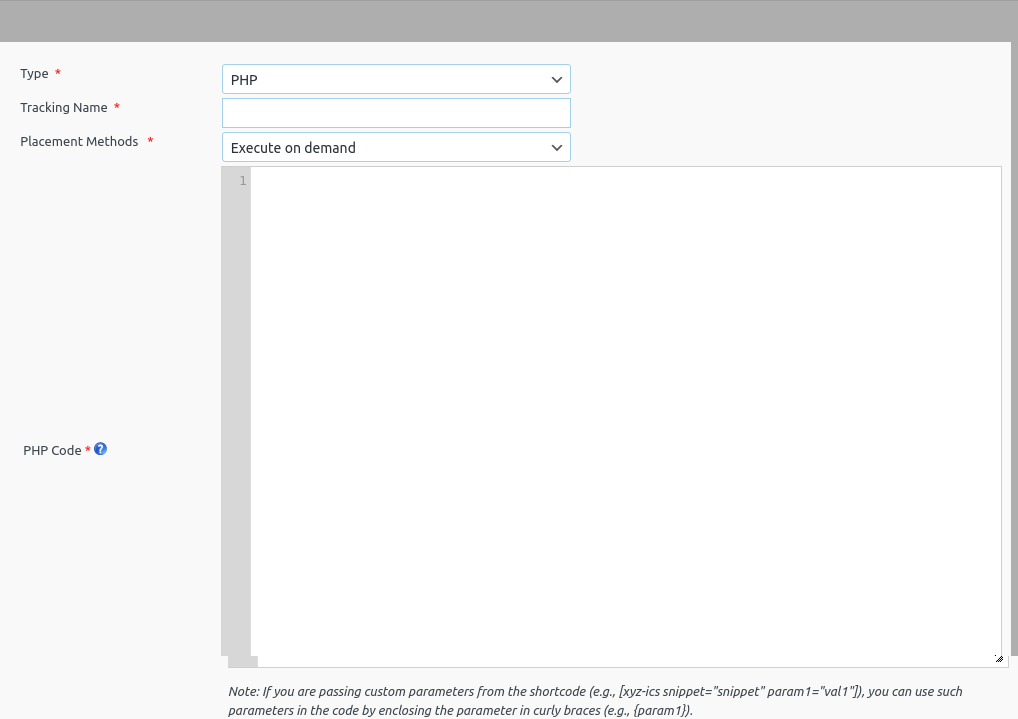
Example: Delete Spam and Trash Comments
<?php
// Function to bulk delete comments by status
function delete_comments_by_status($status) {
$comments = get_comments(array(
‘status’ => $status,
‘number’ => 0, // Get all comments of the specified status
‘fields’ => ‘ids’, // Retrieve only the comment IDs for efficiency
));
if (!empty($comments)) {
foreach ($comments as $comment_id) {
wp_delete_comment($comment_id, true); // true means force delete
}
}
}
// Delete spam comments
delete_comments_by_status(‘spam’);
// Delete trash comments
delete_comments_by_status(‘trash’);
?>
Usage:
- Add the snippet .
- Configure it as “Execute on Demand.”
- Click the play icon next to the snippet whenever you want to clean up spam and trash comments.

This ensures the snippet runs only when needed, providing flexibility and control.
3. Short code (Manual)
- Generates a short code for the snippet, which the user can manually insert into content.
- Useful for fine-grained control over snippet placement.
- Users can copy this shortcode and paste it in the location where you want to display the content.
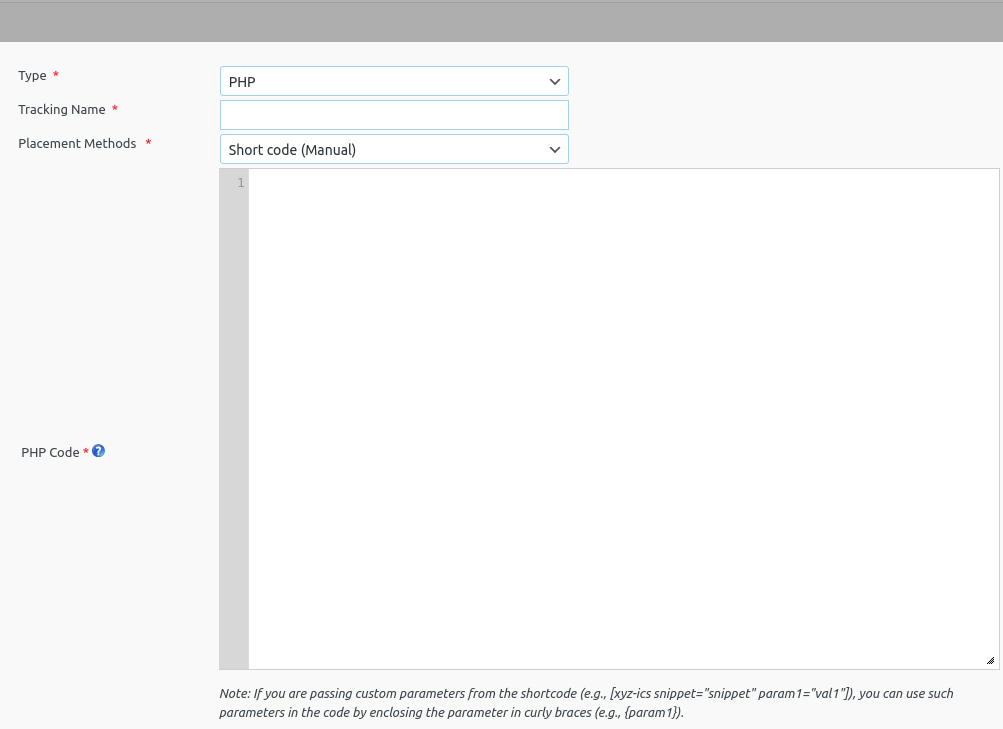
Note : If you are passing custom parameters from the shortcode (eg: [xyz-ics snippet=”snippet” param1=”val1″]) you can use such parameters in the code by enclosing the parameter in curly braces (eg: {param1}).
More details available in
For manual shortcode placement, users are required to insert the snippet directly into posts, pages, widgets, or any other supported fields.
When you create a new post or page, you can see the snippet (Short code (Manual))in the editor section as given below.
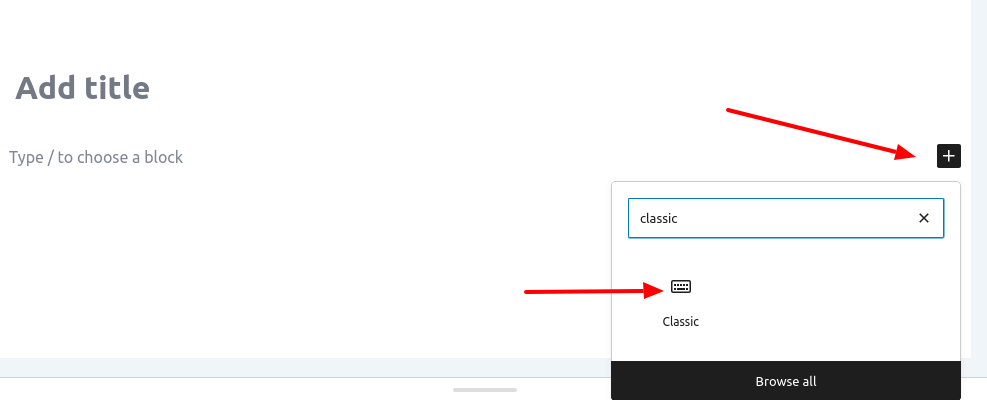
Interface in Gutenberg editor
Note: For Gutenberg editor, please select “Classic” block while editing.
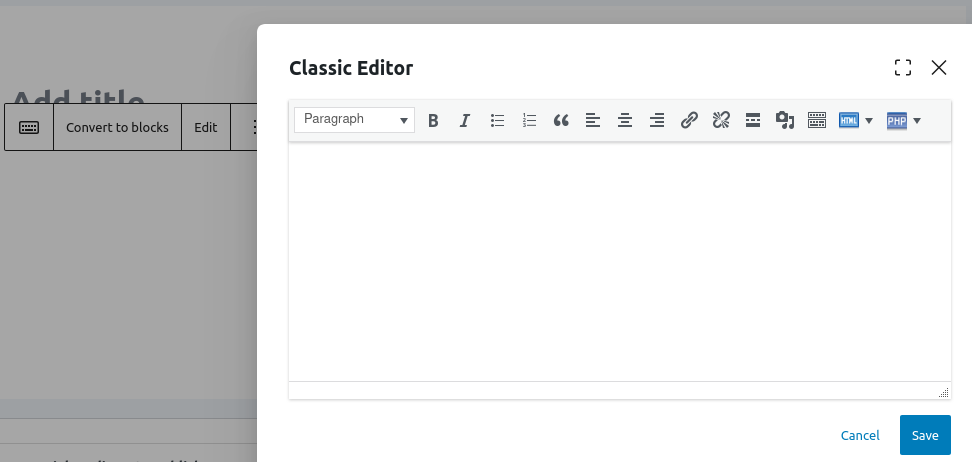
Interface in Classical editor
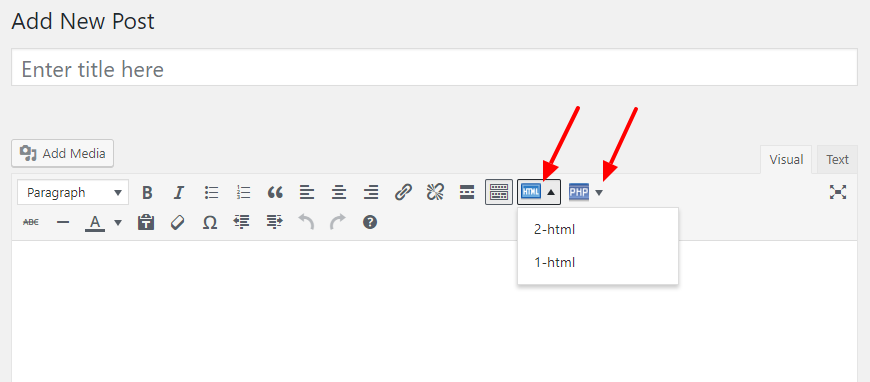
Here the HTML snippets and PHP snippets are displayed as 2 separate section.
Note: To add the snippet in a template file, please follow the link