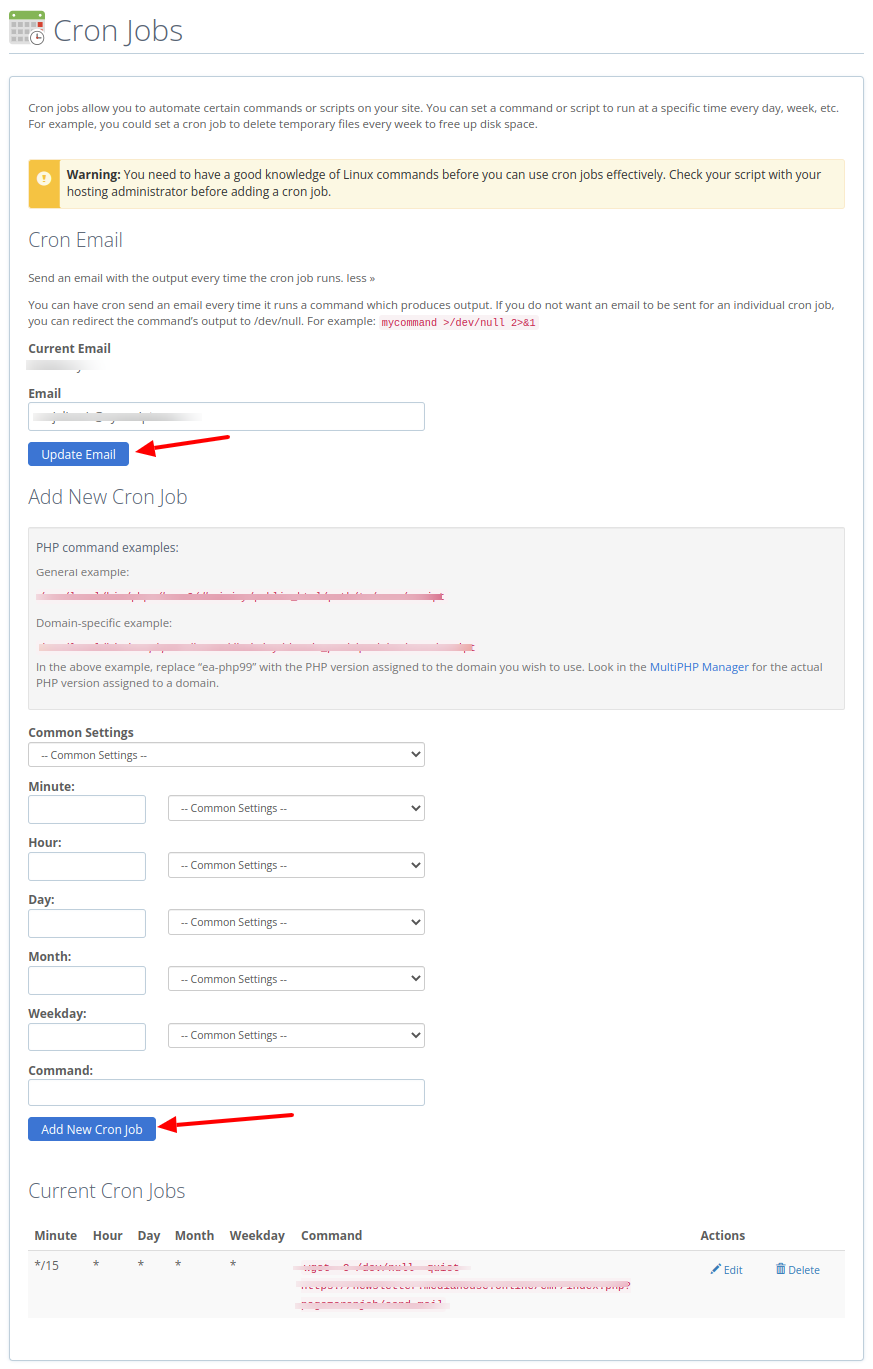
It is very easy to set up the cron job in cPanel.
Please follow the given procedure to setup the cron in cpanel.
1. Select the ‘Cron Jobs’ tab under the ‘Advanced’ menu.

2. Add a cron email.
The Cron Email section of this interface allows you to specify an email address at which you would like to receive notifications whenever your cron jobs are run. To specify an email address:
- Enter the email address at which you wish to receive the notifications in the email field.
- Click the Update Email button.
3. Add a new cron job.

For this first, configure the interval at which you wish to run the cron job.
- Common Settings— This menu allows you to select a commonly used interval without having to specify settings for the minute, hour, day, month, and so on.
- Minute — Use this drop-down menu to select the number of minutes between running the cron job or the minute each hour on which you wish to run the cron job.
- Hour — Use this drop-down menu to select the number of hours between running the cron job, or the hour each day on which you wish to run the cron job.
- Day — Use this drop-down menu to select the number of days between running the cron job or the day of the month on which you wish to run the cron job.
- Month — Use this drop-down menu to select the number of months between running the cron job or the month of the year in which you wish to run the cron job.
- Weekday — Use this drop-down menu to select the day(s) of the week on which you wish to run the cron job.
4. Now, in the Command field, type the command you wish the system to run.
Note: In some servers, it will create a file in the server after each cron execution. To prevent this please use the code -O /dev/null –quiet after wget. Eg: wget -O /dev/null –quiet https://SCRIPT INSTALLED PATH/cron/index.php?page=datacron/data-backup
5. Click Add New Cron Job.
Note: In some servers, they don’t allow to use cron jobs. In such a situation, you can use third-party sites like easycron to run the cron.