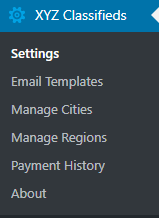
Settings
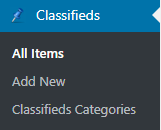
We can see the “WP Classifieds Listings” in the left menu as “XYZ Classifieds” and the listing items as “Classifieds”.
First of all we can install the default classifieds pages by clicking the link in the header section. (Note: You can also use your own pages instead of the default classifieds pages.)
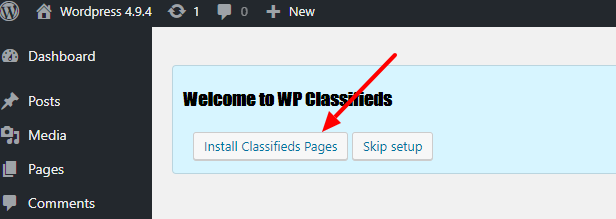
Now it will install the default basic pages for classifieds site like register, forgot password, items, regions etc.
You can also use your own pages and you need to use the short code in your pages only.
Settings
Item Settings
The item settings are given below.
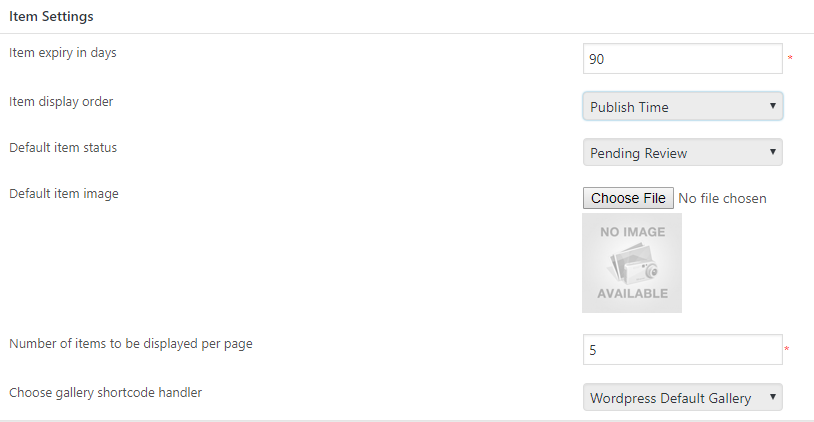
- Item expiry in days – This is the item expiry days. After these days the item will be expired.
- Item display order – We can display the items based on the “Publish Time” or “Last Modified Time”.
- Default item status – We can make the item active and publish by default or pending review. In the status is pending review, admin need to activate the item manually.
- Default item image – This is the default image of the item if the user is not uploading an image with the item.
- Number of items to be displayed per page – It is the items displayed in a page.
- Choose gallery shortcode handler – We can use the default wordpress gallery or any other gallery plugins.
Payment Settings
The payment settings are given below.
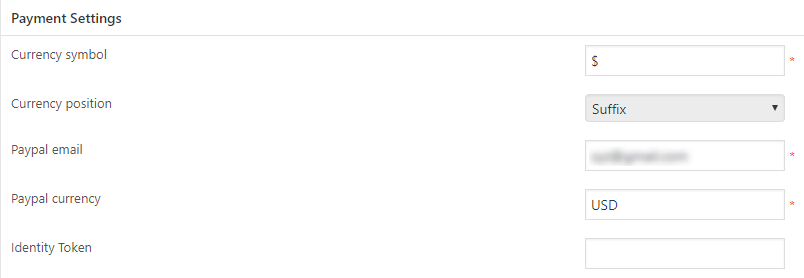
- Currency symbol – We can enter the currency symbol here
- Currency position – We can select the currency position Suffix or prefix
- Paypal email – Enter the paypal email here
- Paypal currency – Enter the paypal currency
- Identity Token – We can enter the paypal identity token here. Details available in How can I generate the PayPal Identity Token?
Email Settings
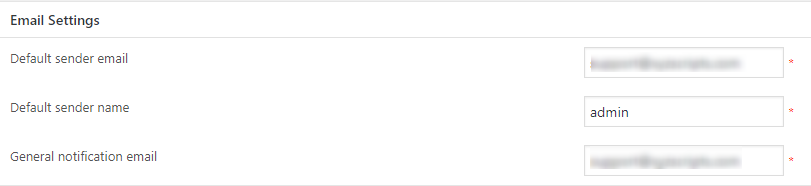
- Default sender email – This is the sender email address
- Default sender name – This is the email sender name
- General notification email – This is the admin email address where the system emails are send.
Premium Settings
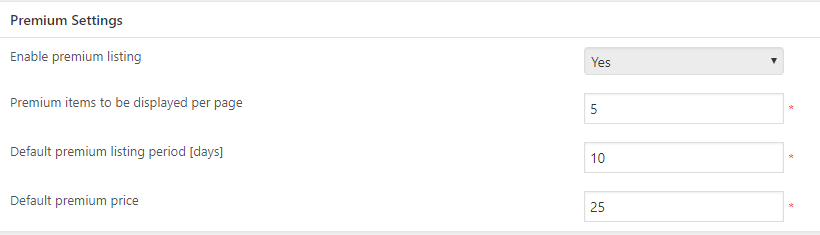
- Enable premium listing – If you want to enable the premium listing, you can enable it here.
- Premium items to be displayed per page – This is the number of premium items to be displayed per page.
- Default premium listing period [days] – This is the premium listing period in days. If you set it 30, the premium listing will be displayed in the page for 30 days.
- Default premium price – This is the premium listing default price.
Roles and Capabilities Management
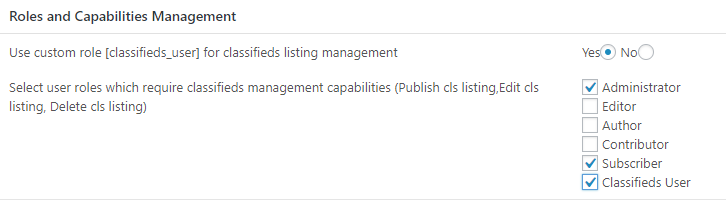
- Use custom role [classifieds_user] for classifieds listing management – In the plugin we can create a new custom role (classifieds user) and allow this role to create the classifieds listings.
- Select user roles which require classifieds management capabilities – Here we can select the roles for the classifieds management capabilities like create listing, edit listing and delete listing.
Login Management
For the login and register, we can use the default wordpress login/register or the plugin login pages.
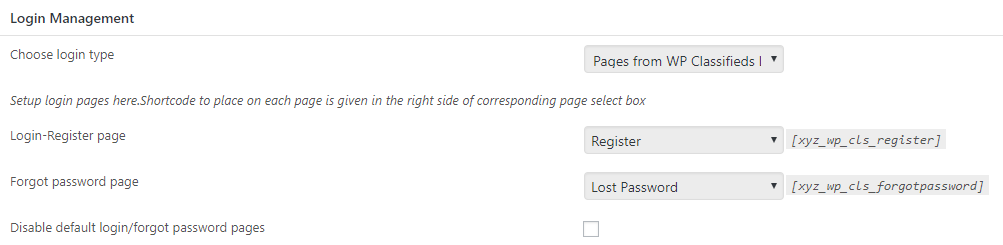
- Choose login type – Here we can select the default wordpress login or the pages from the plugin.
If you are selecting the plugin pages you can setup the login-register page and the forgot password page.
Also you can disable the default wordpress login and forgot pages here.
Page Settings
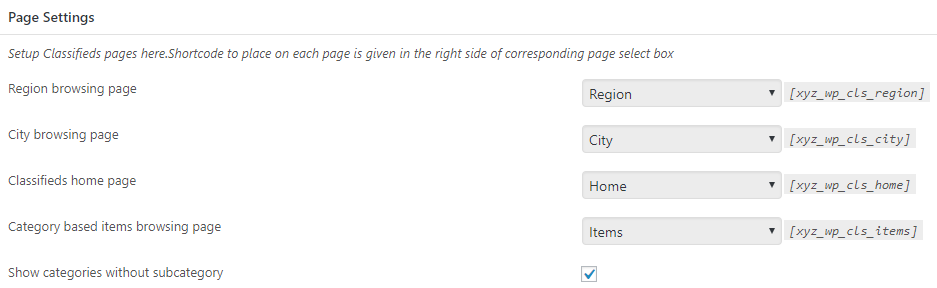
In this section we can setup the pages for region, city, home page and items page.
Also we can display the categories without sub categories.
Manage Custom Fields
For managing the custom fields we can install a plugin custom field manager or any other custom field plugin.

Click the install link to install the custom field manager.
After installation and activation of the custom field manager plugin we can install the default custom fields for the classifieds.
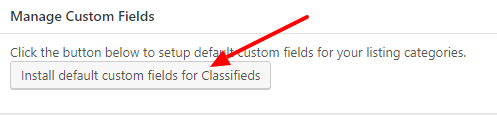
Now it will install the custom fields for the classifieds and you can manage them.
Cron and General Settings
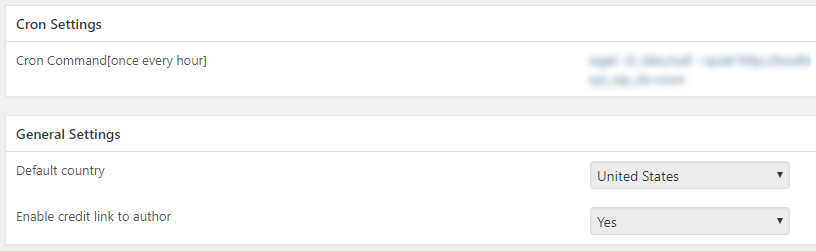
Here we can see the cron command to execute every hour. The cron setting details are available in How to setup cron job in cpanel?
- Default country – This is the default country of the site.
- Enable credit link to author – You can help us by enabling the credit link in your site footer.
Making the classifieds page as the home page of the site
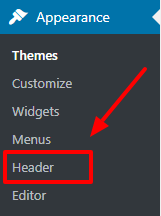
To make the classifieds page as the home page of the site, please go to the “Appearance > Header” section.
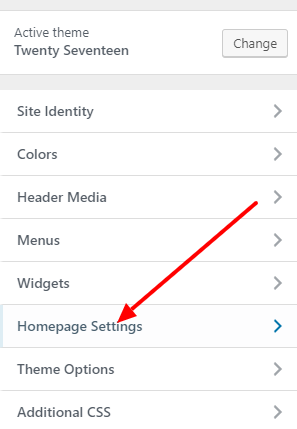
Here please go to the “Homepage Settings”.
In this please select the “A static Page” as the home page and select “Home” as the home page.
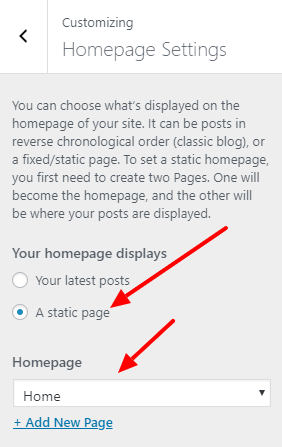
This page “Home” is the page created automatically when the classifieds plugin installed.
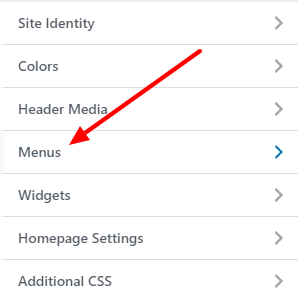
Now you can add menu to the pages if required and for this please go to “Menus” section.
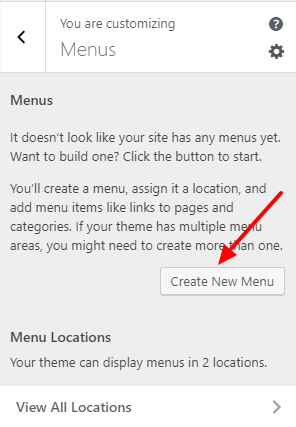
In this page you can create a new menu.
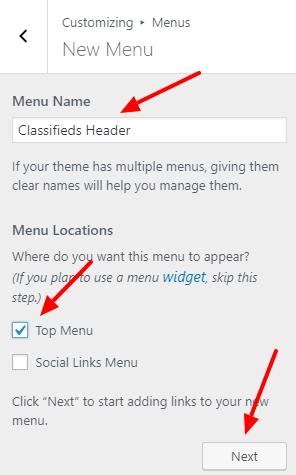
Here you can enter the menu name, menu location and click Next.
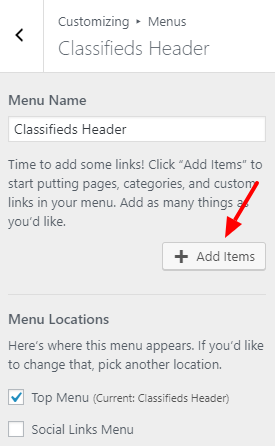
Now click on the “+ Add Items” button
Here we can see the items to add to menu in the right column. Click on the items to add to menu.
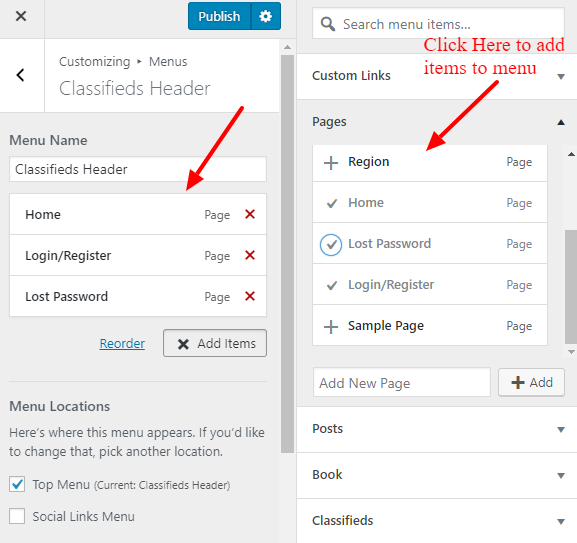
After adding the items to menu, click on the “Publish” button in the top of the page.
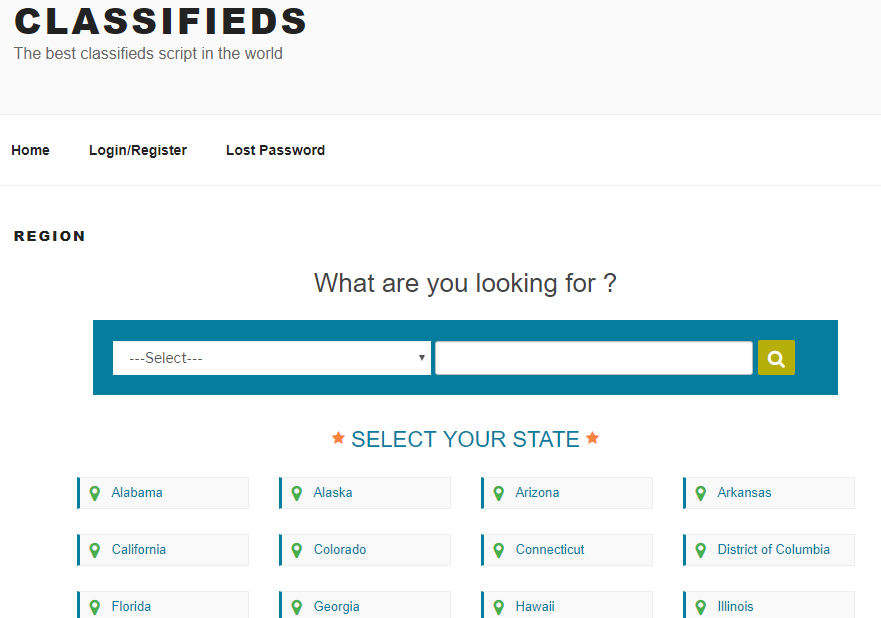
Now the Classifieds site is ready and the home page display is given below.