How can I create Facebook application?
Note: Deprecated Groups API for Facebook
As of v19.0, Meta’s Groups API is deprecated and will be removed from all versions on April 22, 2024. Auto publishing to groups from social media plugins is no longer allowed. Regrettably, no alternatives or updates are available at this time.
Note 1: Due to Facebook Restriction we can use the new Facebook App in HTTPS sites only.
Note 2: With the Facebook app we can publish to Facebook Pages only and we cannot publish to Facebook profile.
Note 3: We can publish to Facebook with the approved app only. So we need to submit the app for approval and it may take up to 3 months to get the approval. An alternate solution is available in How can I use the alternate solution for publishing posts to facebook?
Section A: Create a Facebook Developer account if you do not have a developer account
Section 1: Facebook App Creation
Section 2: App Review Section (Submission of app for approval)
Section 3: App Authorization
Section A: Create a Facebook Developer Account
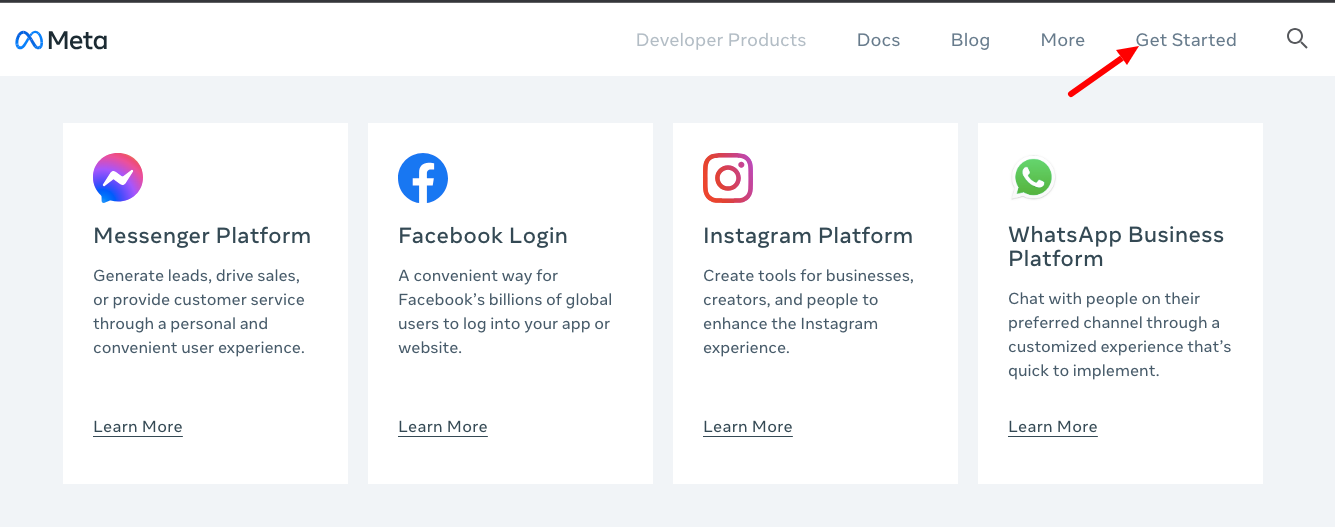
If you are a new user, click on Get Started link.
Enter your details.
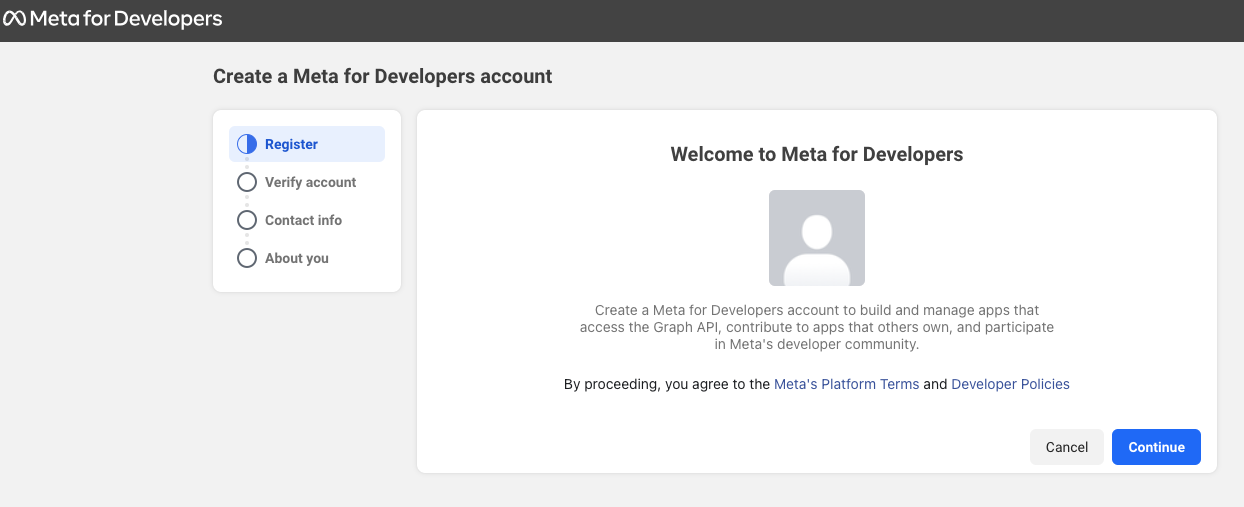
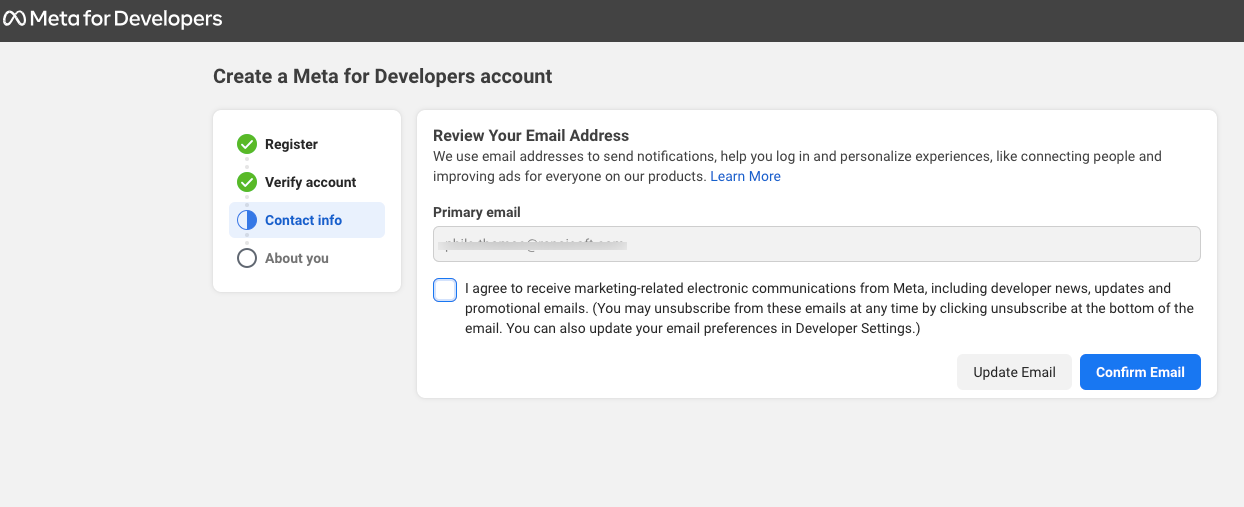
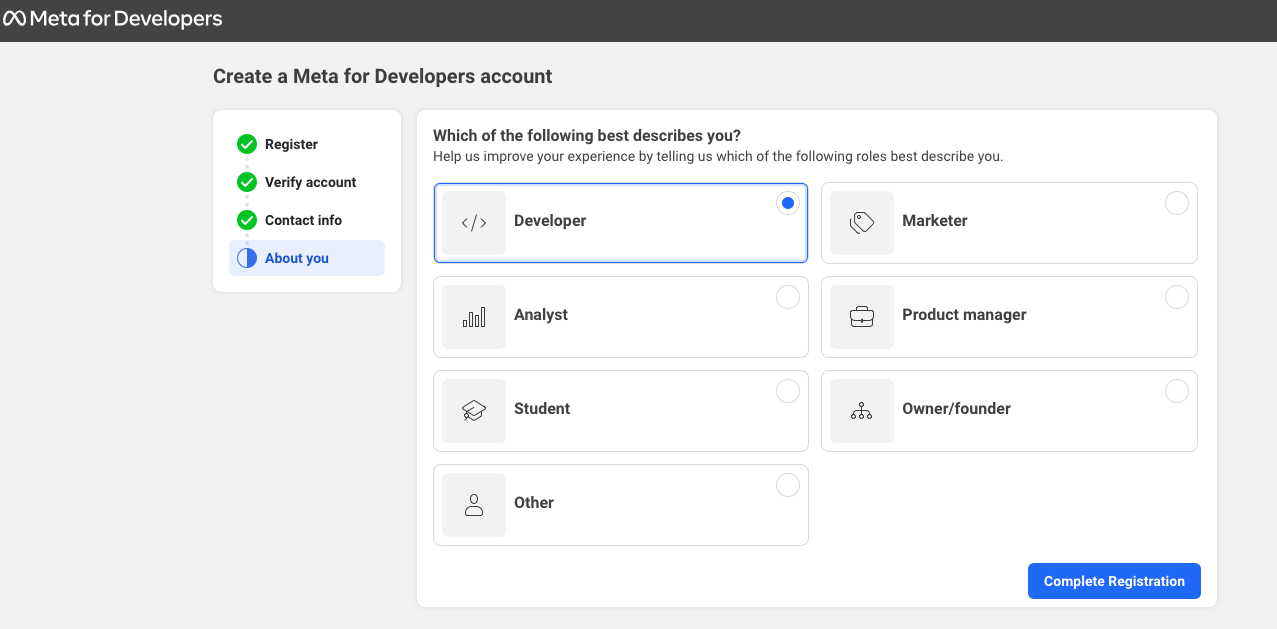
This will redirect to the user dashboard to create a Facebook developer app.
Section 1: Create Facebook App
To create a new Facebook application, go to the link https://developers.facebook.com/apps or https://developers.facebook.com/
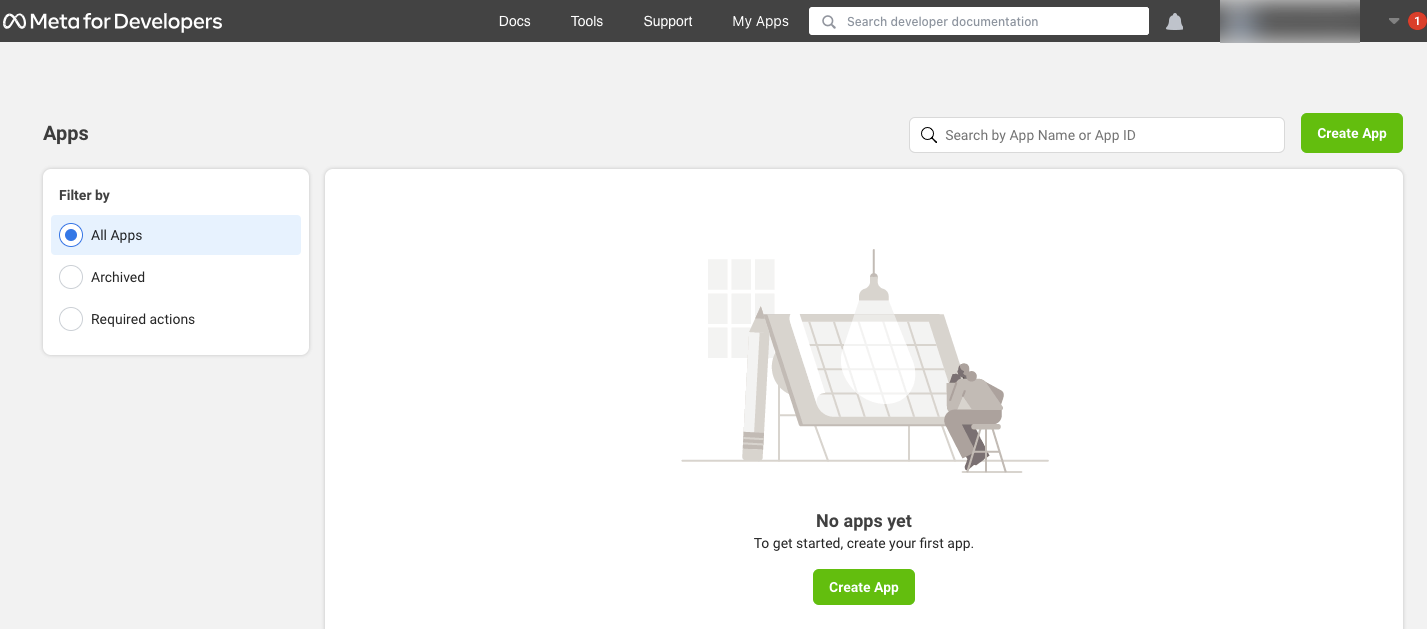
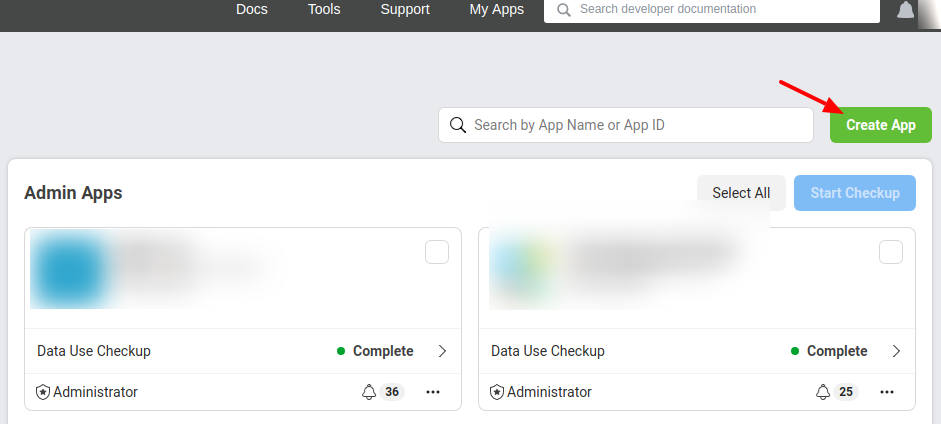
Step 1:
Click on the “Create App” link.
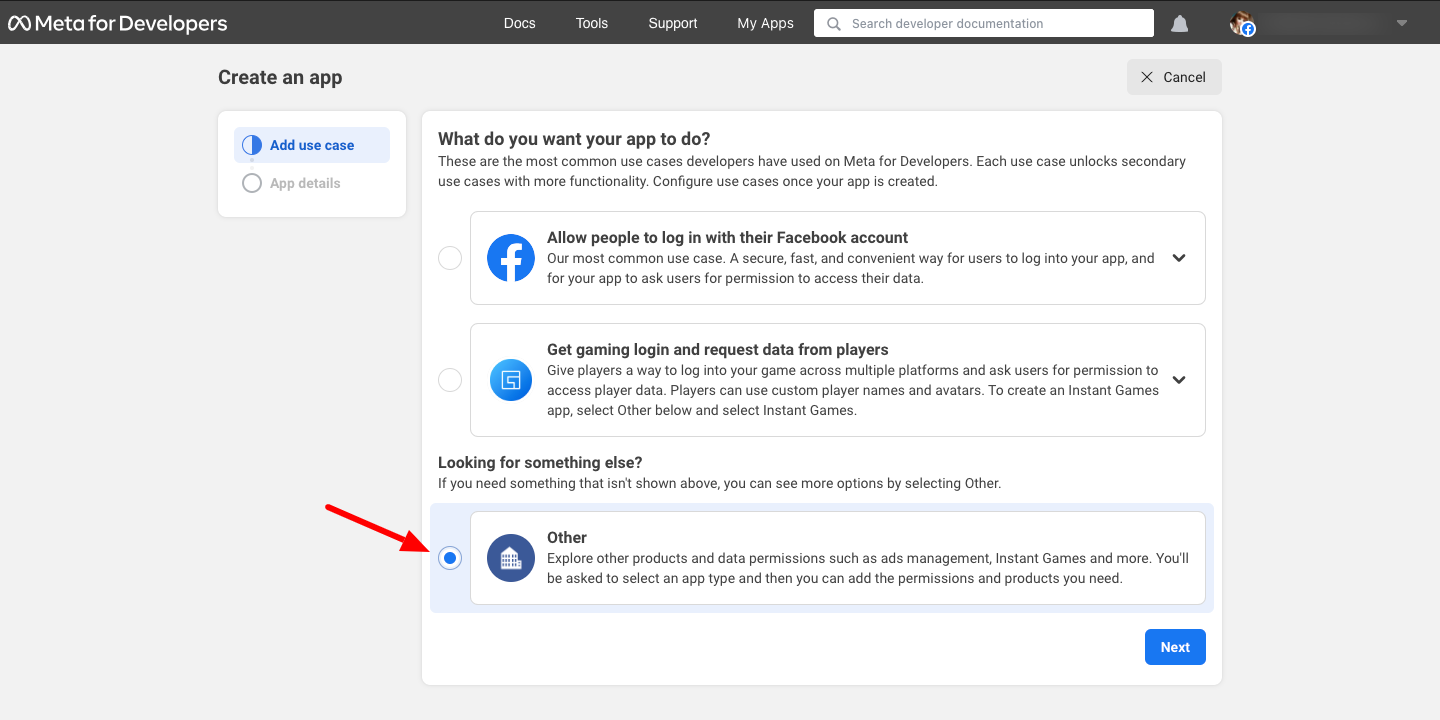
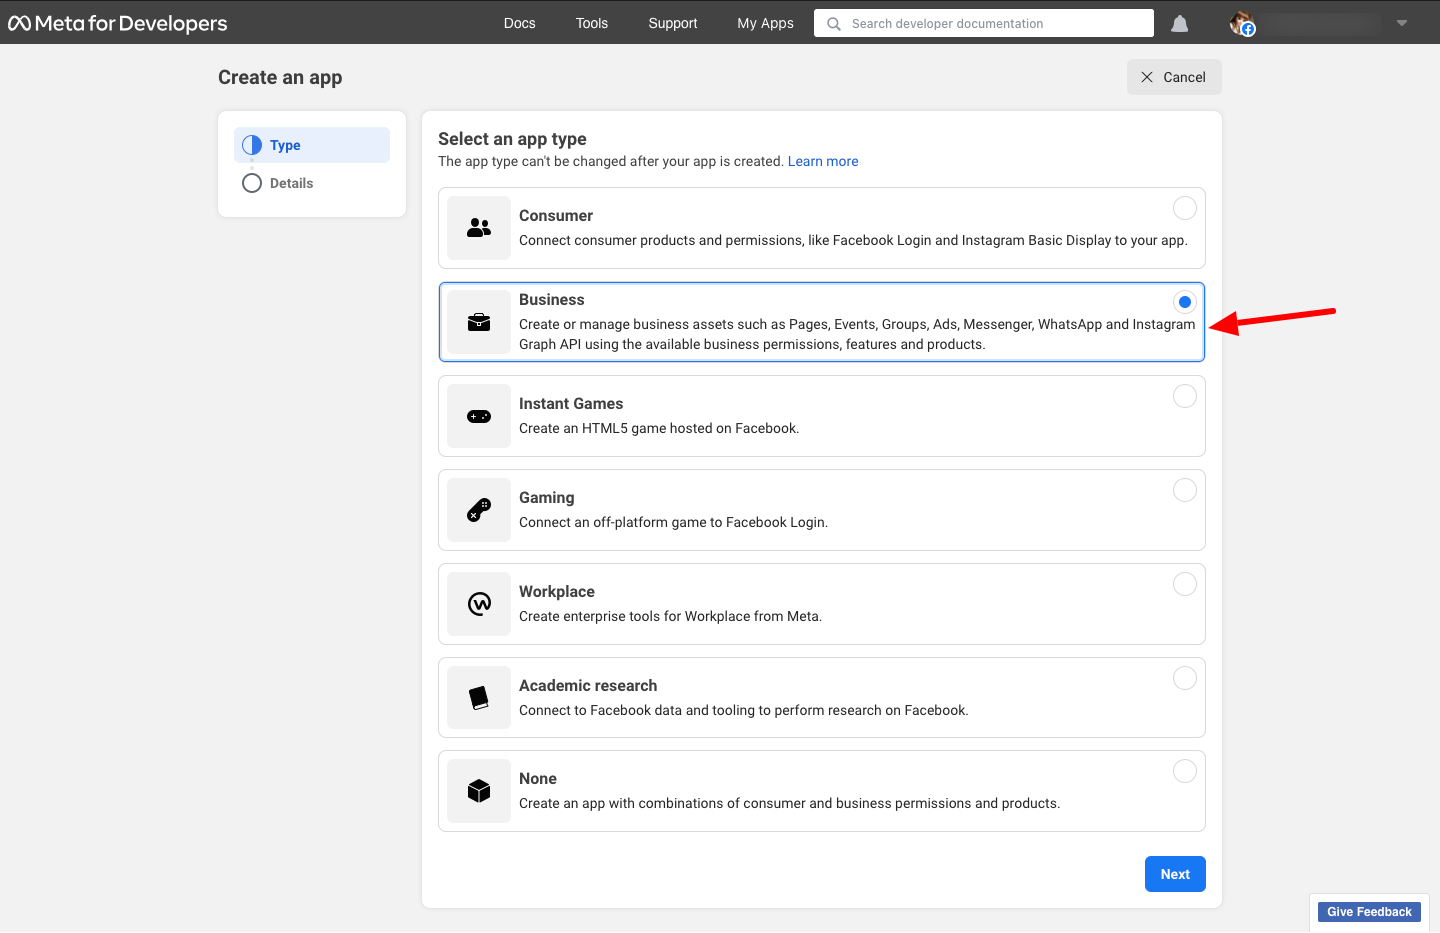
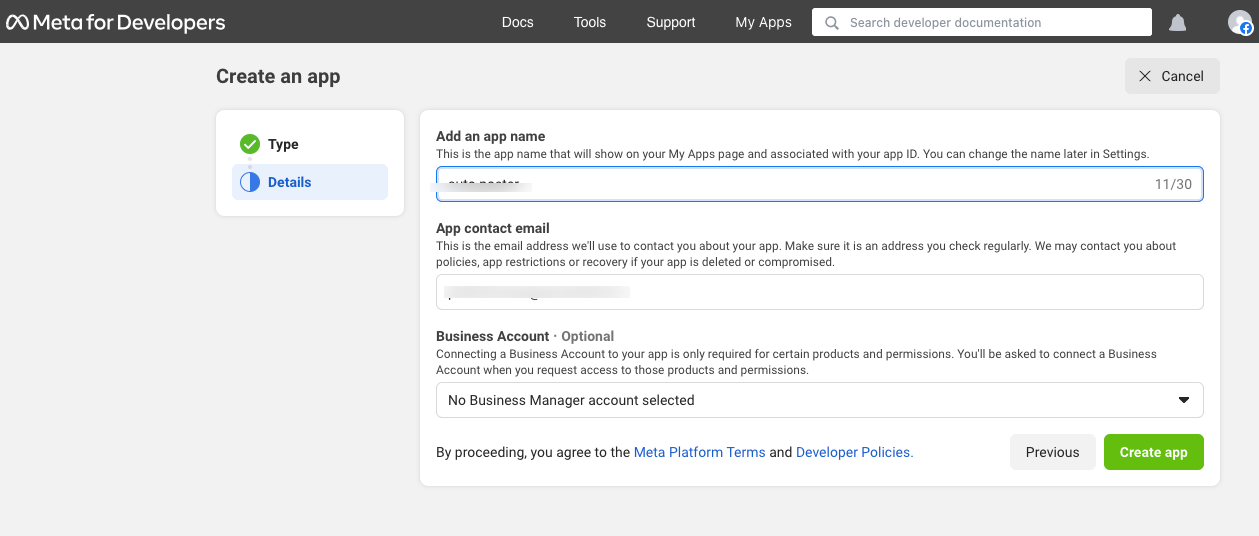
Step 2:
Now select the purpose of the app. Here you can select Business and click on the “Next” button.
Now enter App Display Name, App contact email, etc. and click on the “Create App” button.
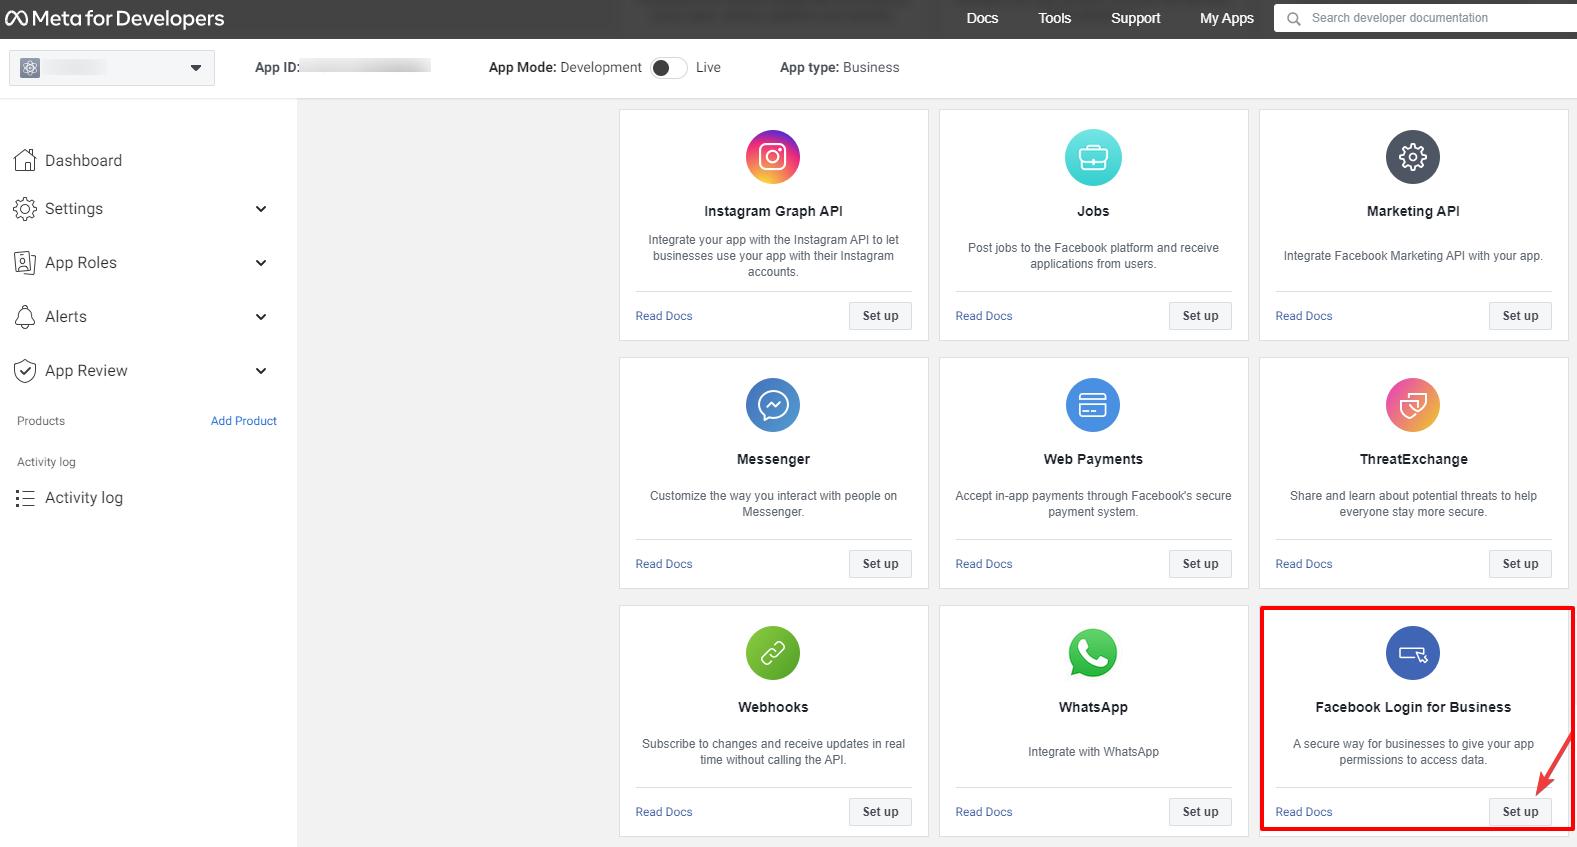
Step 3:
Now it will redirect to the “Add products to your app” page and on this page click the “Setup” button in the “Facebook Login for Business”.
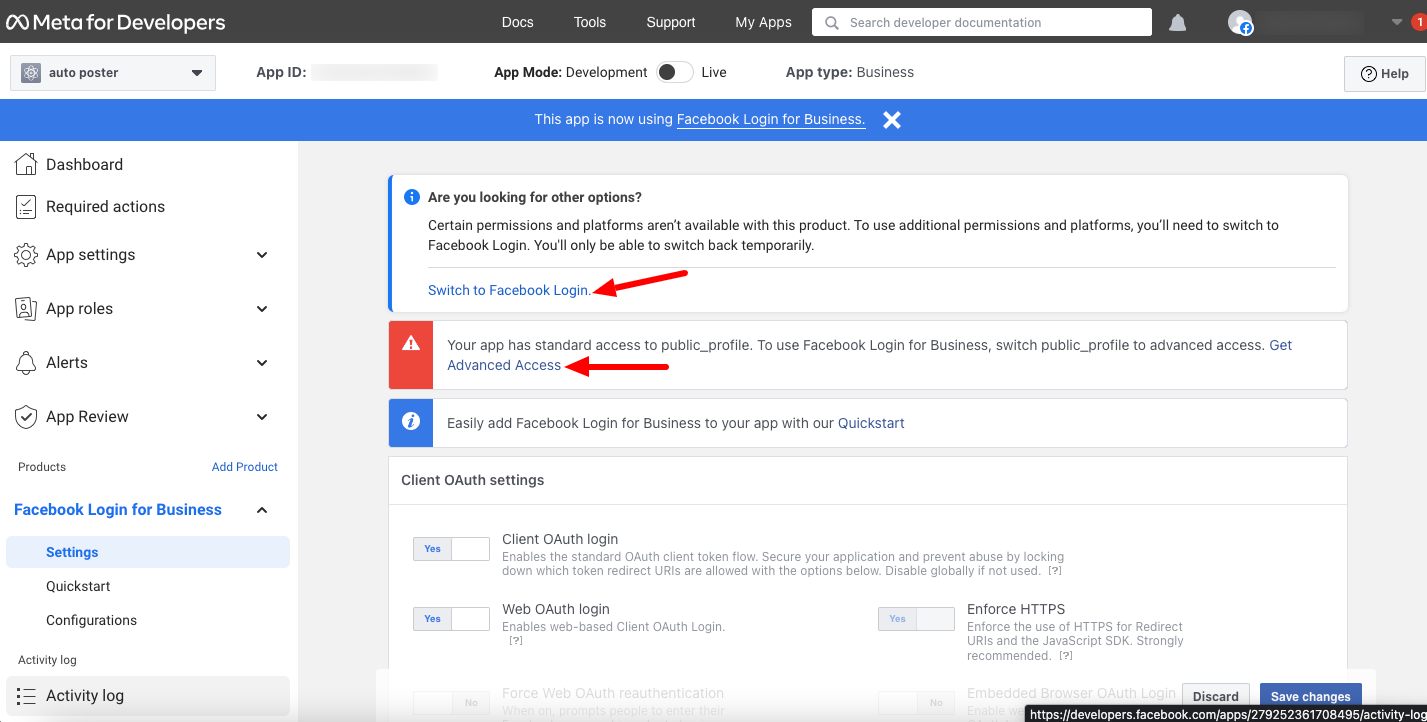
Then switch to Facebook Login.
Select “Other” and add more info as “‘Facebook login for business is not required. I can manage Facebook Business Pages using a regular Facebook login, which fulfils the system requirement”.
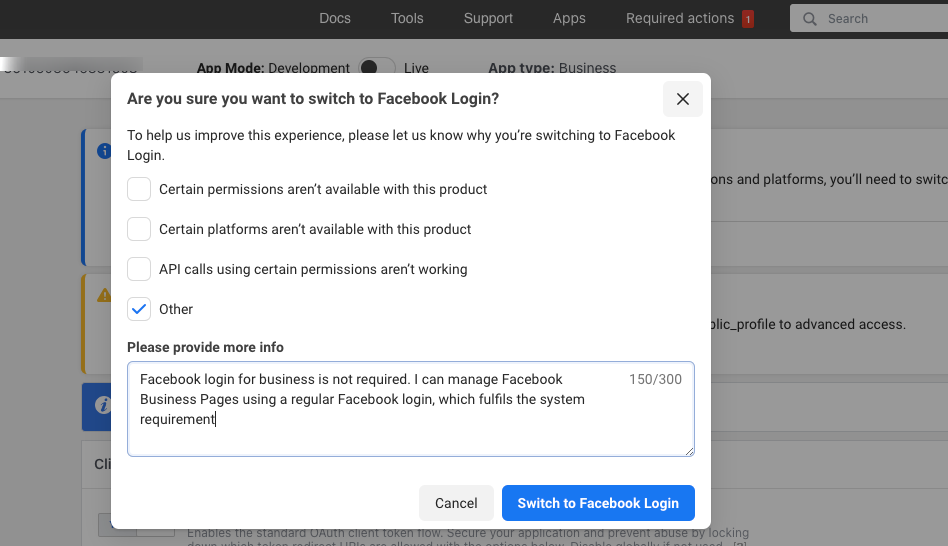
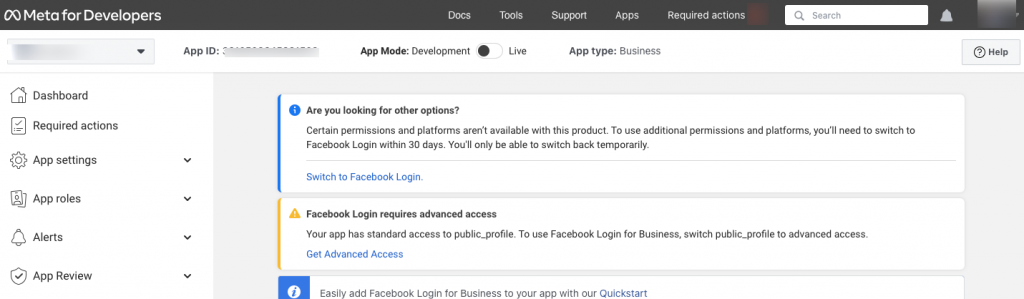
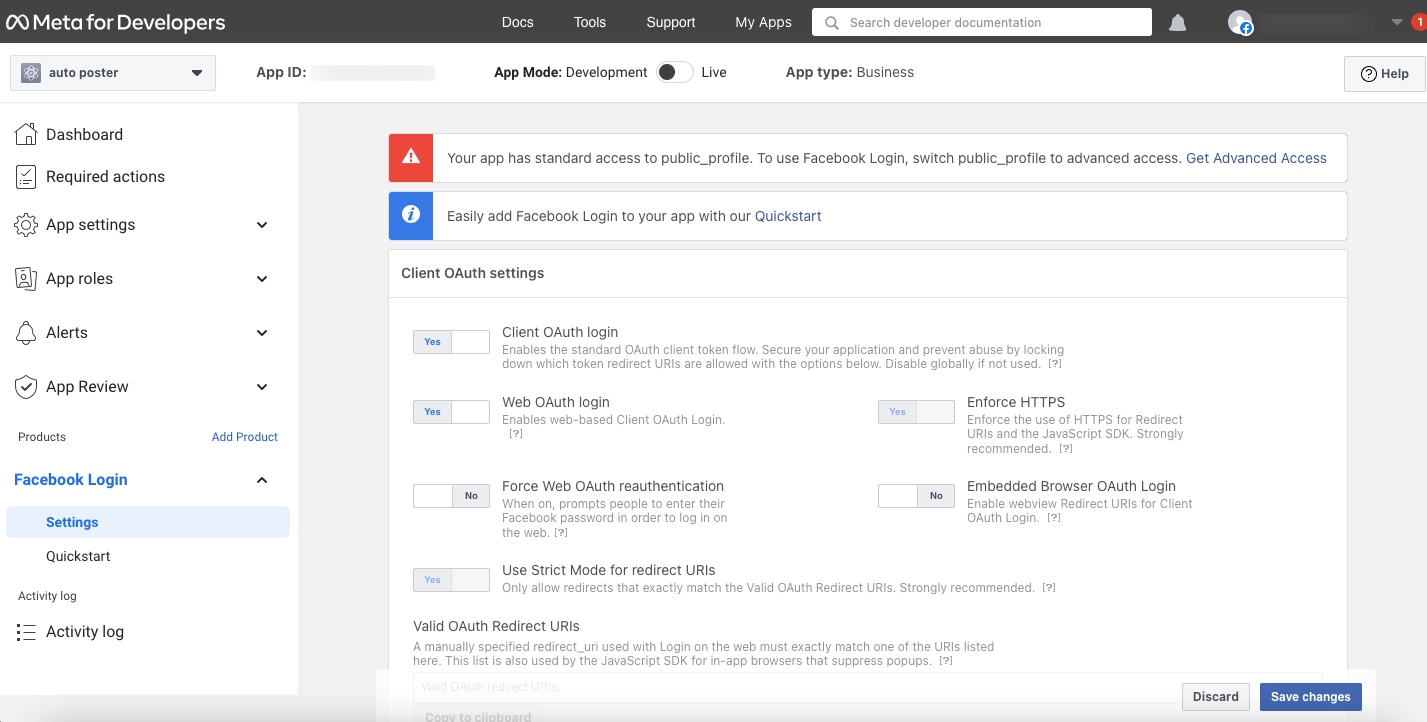
Additionally , Facebook Login requires advanced access , so to use Facebook Login, switch public_profile to advanced access.Get Advanced Access

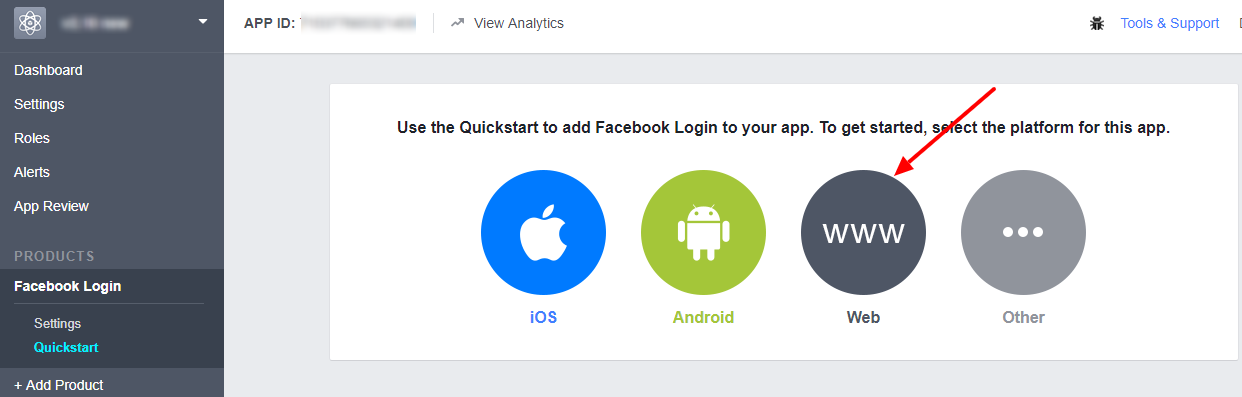
Step 4:
In the setup page, click the “Web” button.
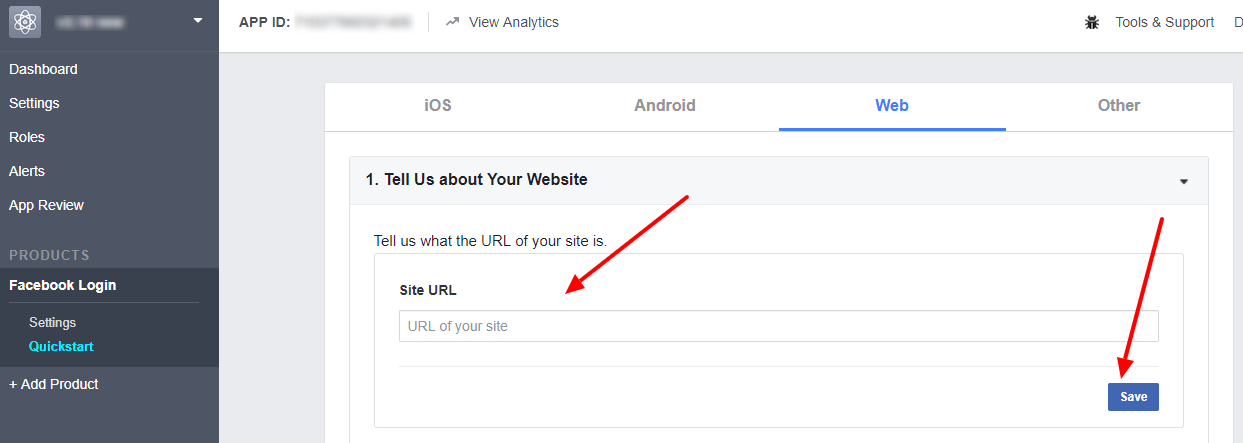
Step 5:
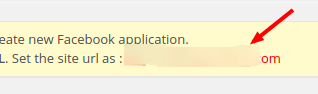
In the “Site URL” section add your site URL and save it.
(Note: You can see your site URL at the top of the plugin Facebook settings. See the below image)
Step 6:
Click on the “Facebook Login >Settings” link as shown below.
Here enter the “Valid OAuth redirect URIs”.
Note: You can see the OAuth redirect URI at the top of the account settings in the plugin.

Please use this OAuth redirect URI in the Facebook settings.
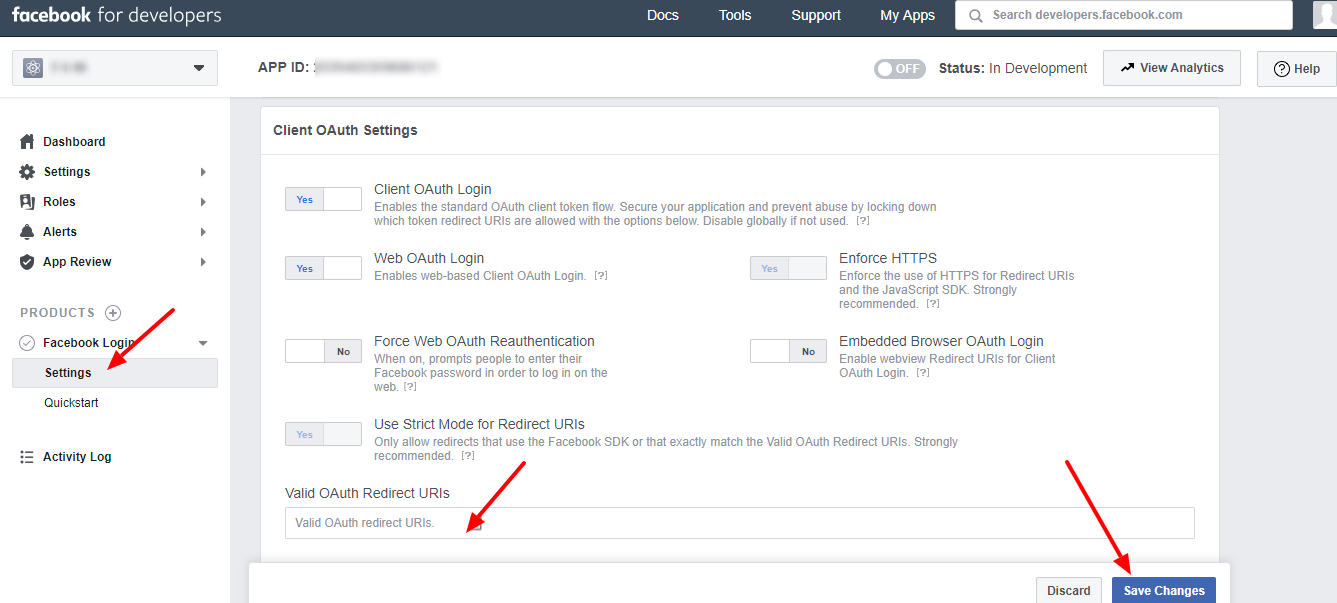
Please note that Client OAuth Login and Web OAuth Login should be in the YES position.
After entering the redirect URIs, please save the changes.
Step 7:
The app is created now but we need to add some more parameters to submit the app for approval. Click the “Settings > Basic” link in the menu to see the app id and secret.
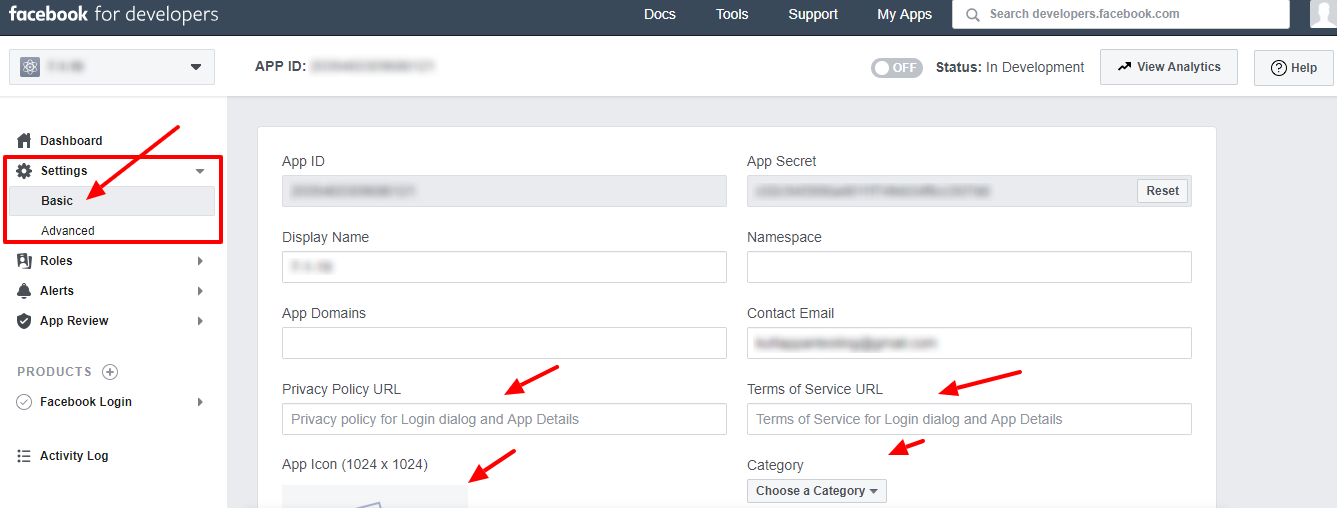
On this page, we can see the App ID and App Secret.
Click the “Show” button to see the App Secret. (The app secret is alphanumeric and DON’T use ******* as App Secret.)
We also need to add the privacy policy URL, terms of service URL, select category, etc. in this section.
For the option “Business Use”, please select “Support my own business”.
Section 2: Facebook App Review
Note:If your app will only be used by individuals with a role on it, Standard Access for permissions and features is sufficient.
Starting from February 1, 2023, apps requesting advanced access to permissions may be required to be connected to a verified business. You can find more information in this blog post.
Please note that Instagram and Facebook Groups will not function with Standard Access. If your intention is to use Facebook Pages solely for auto-posting, Standard Access with the app in Live mode will be adequate.
Step 8:
Here the app is in development mode. Only the developer can view the posts now.
As of February 1, 2023 apps requesting advanced access for permissions may have to be connected to a verified business according to Facebook policy updates.
You need to complete business verification to get advanced access and submit for review.
For this you need to select the business manager account and complete the business verification
Click on Get Advanced Access.
or request Advanced Access from the review section.
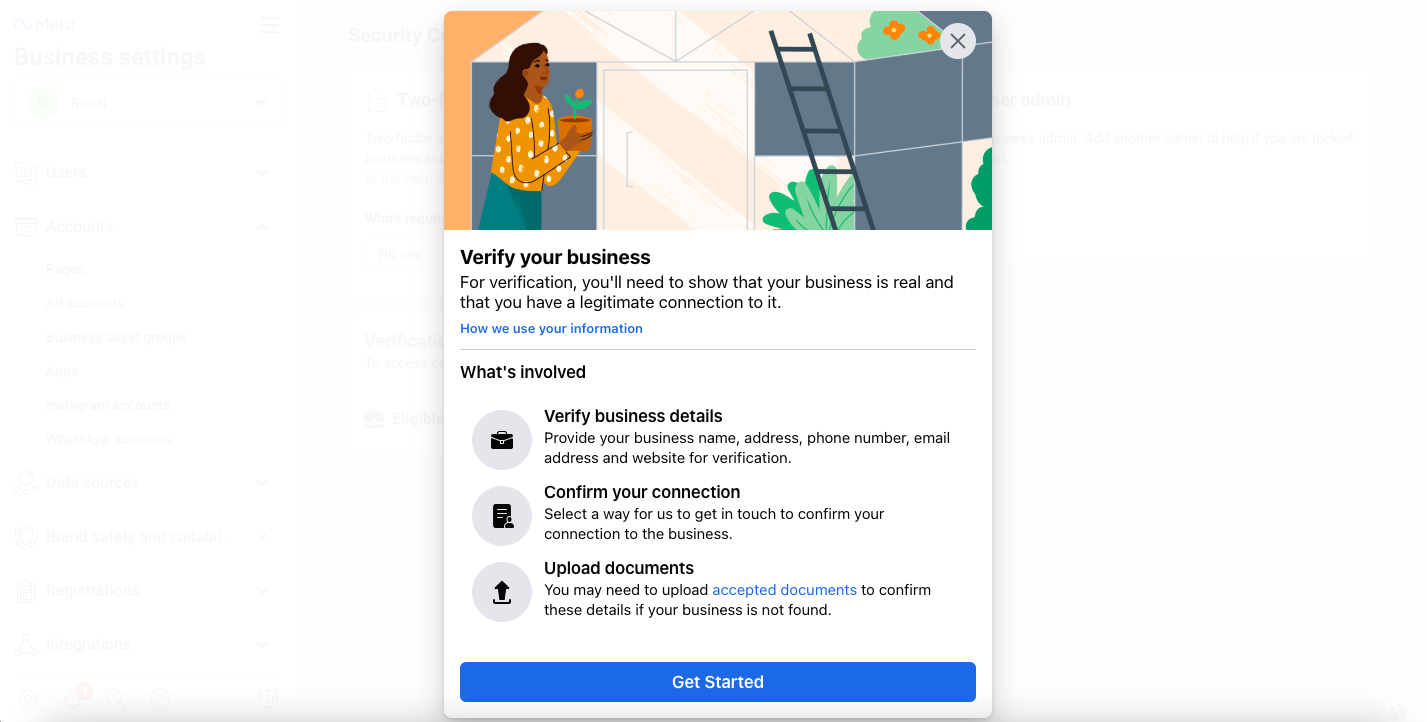
This will display Business verification prompt.
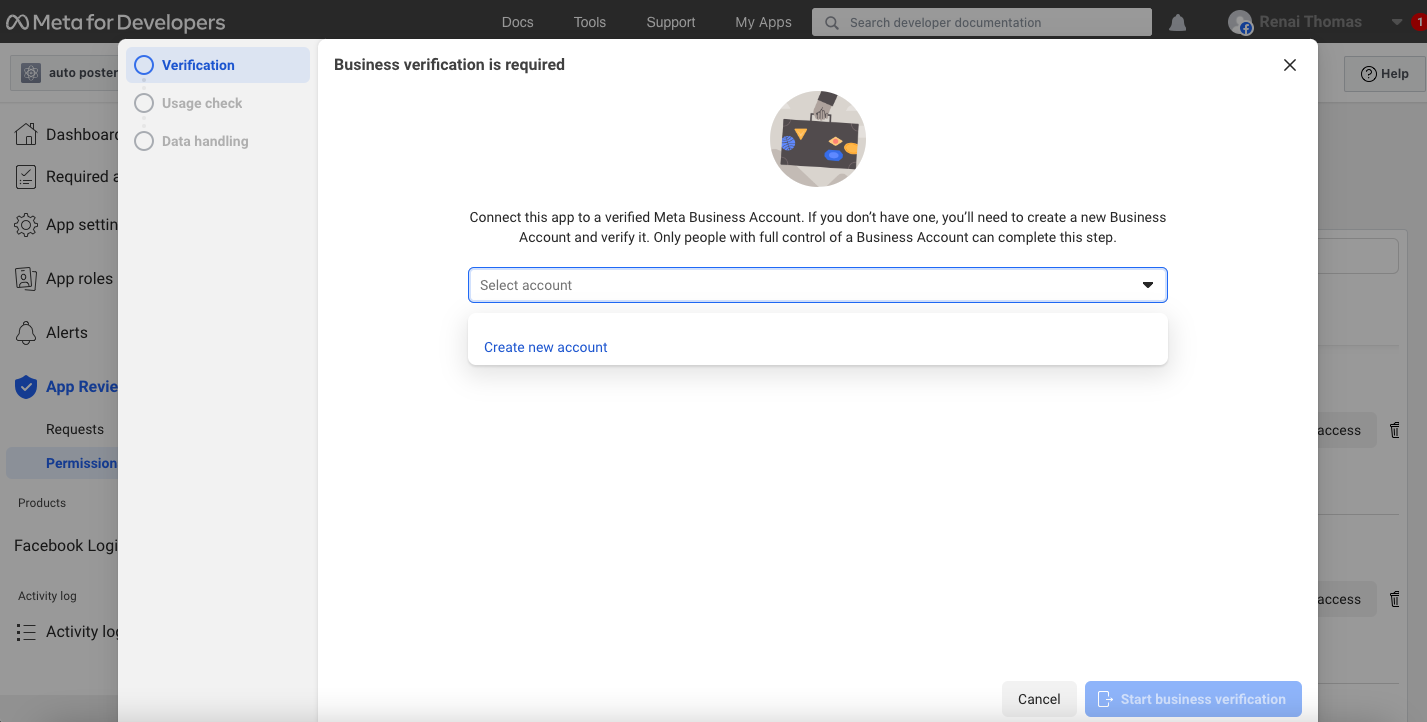
Enter details :
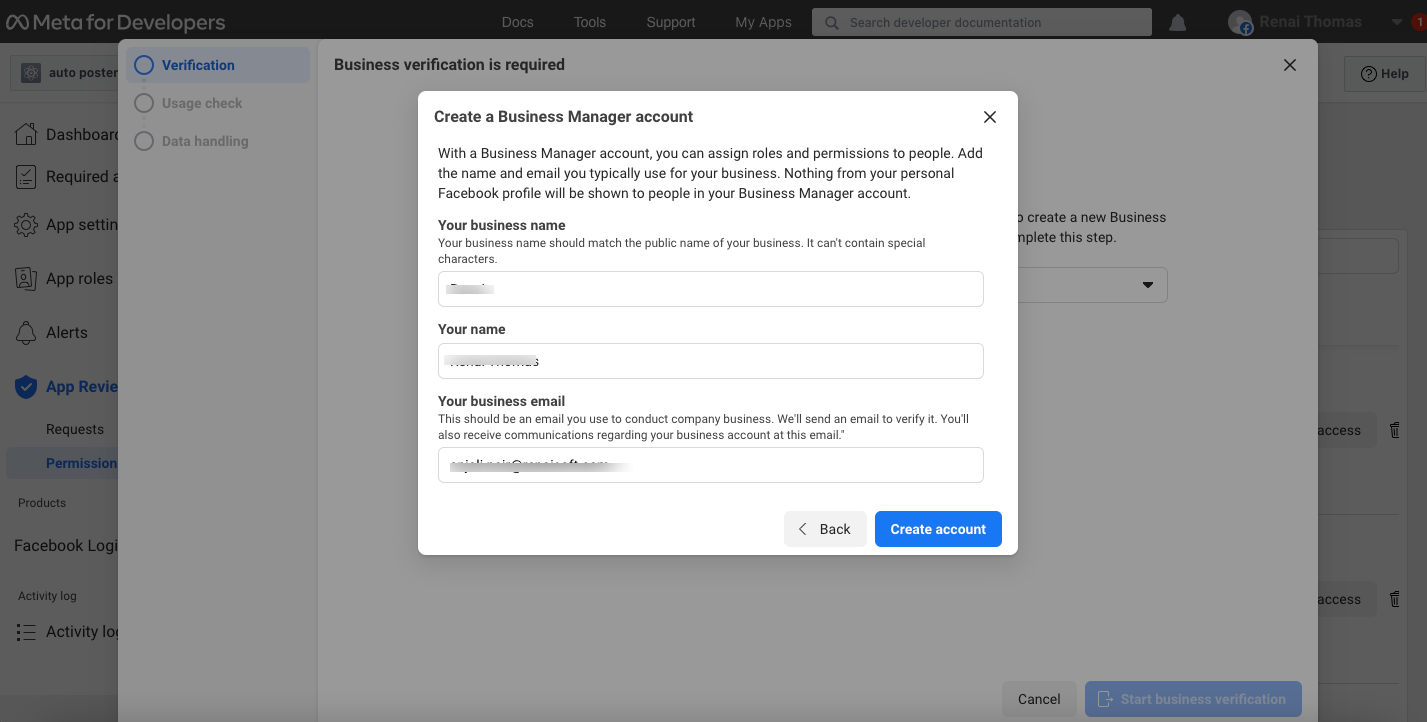
Start verification.
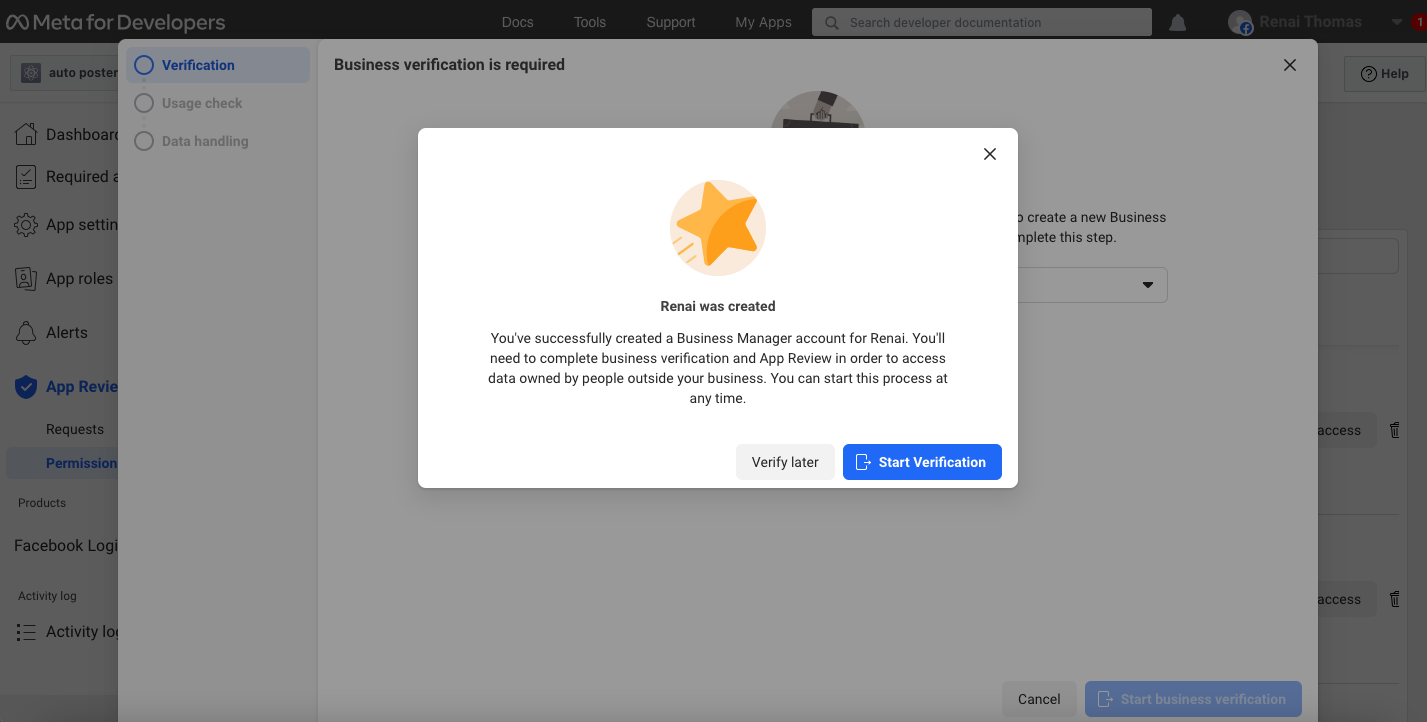
This will redirect to verification section at https://business.facebook.com/settings/security/
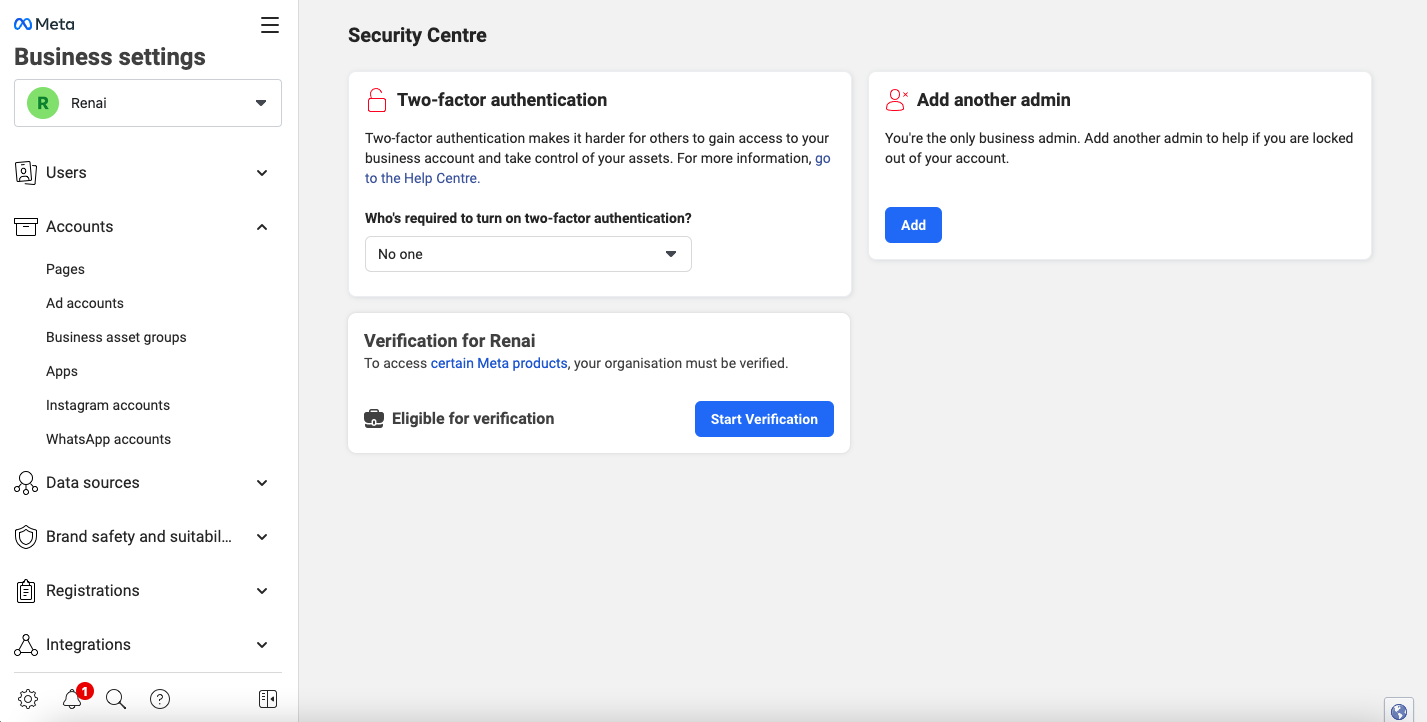
Click on start verification.
Step by step instructions to complete business verification is available at : https://help.xyzscripts.com/docs/social-media-auto-publish/faq/how-can-i-submit-the-business-details-to-facebook-for-app-review/
We need to “submit the app for approval” and after the app gets approved, we can make the app public and the users can see the posts on Facebook.
The App Review Process Submission is given below.
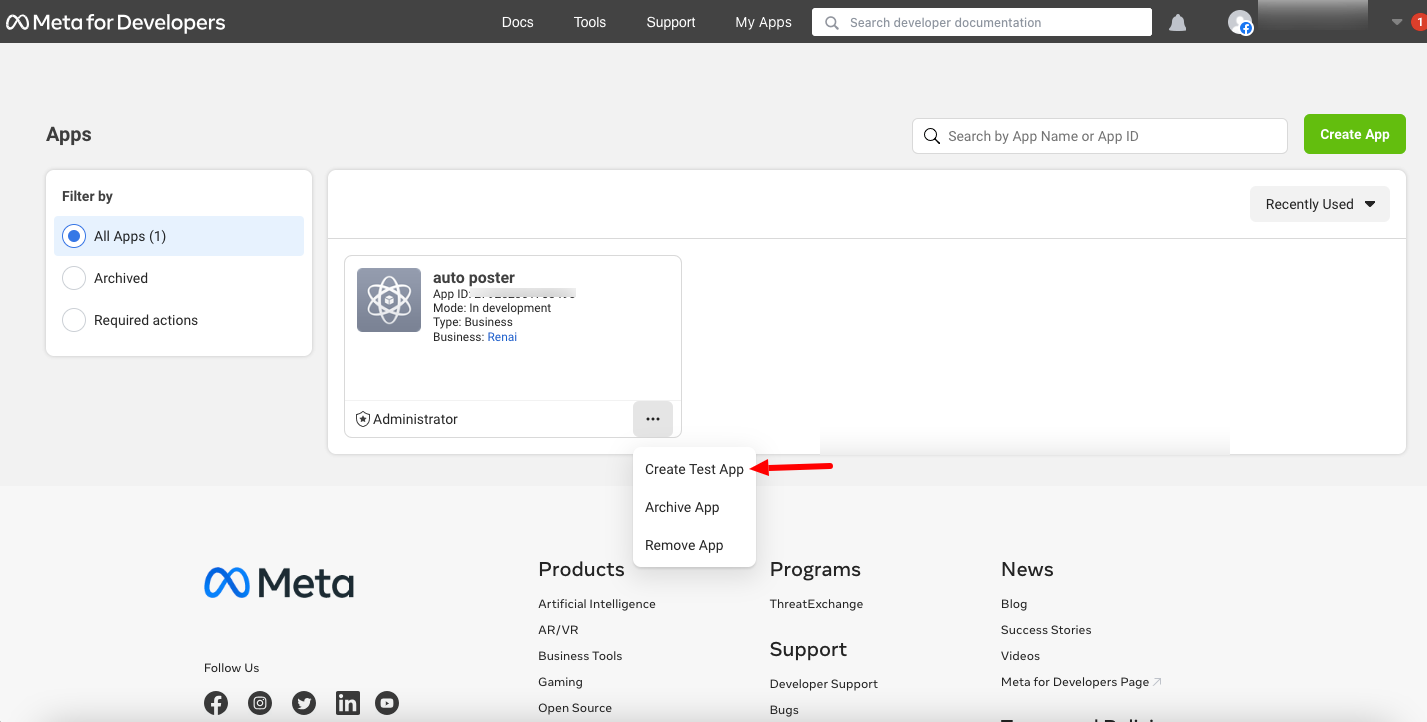
NOTE : We need to submit screencast of app usage including Login with Facebook and publishing action ,In order to take this screen-cast for review, create a test app of the app that is being submitted for review and use it at plugin settings(only for taking the screencast of work flow) .
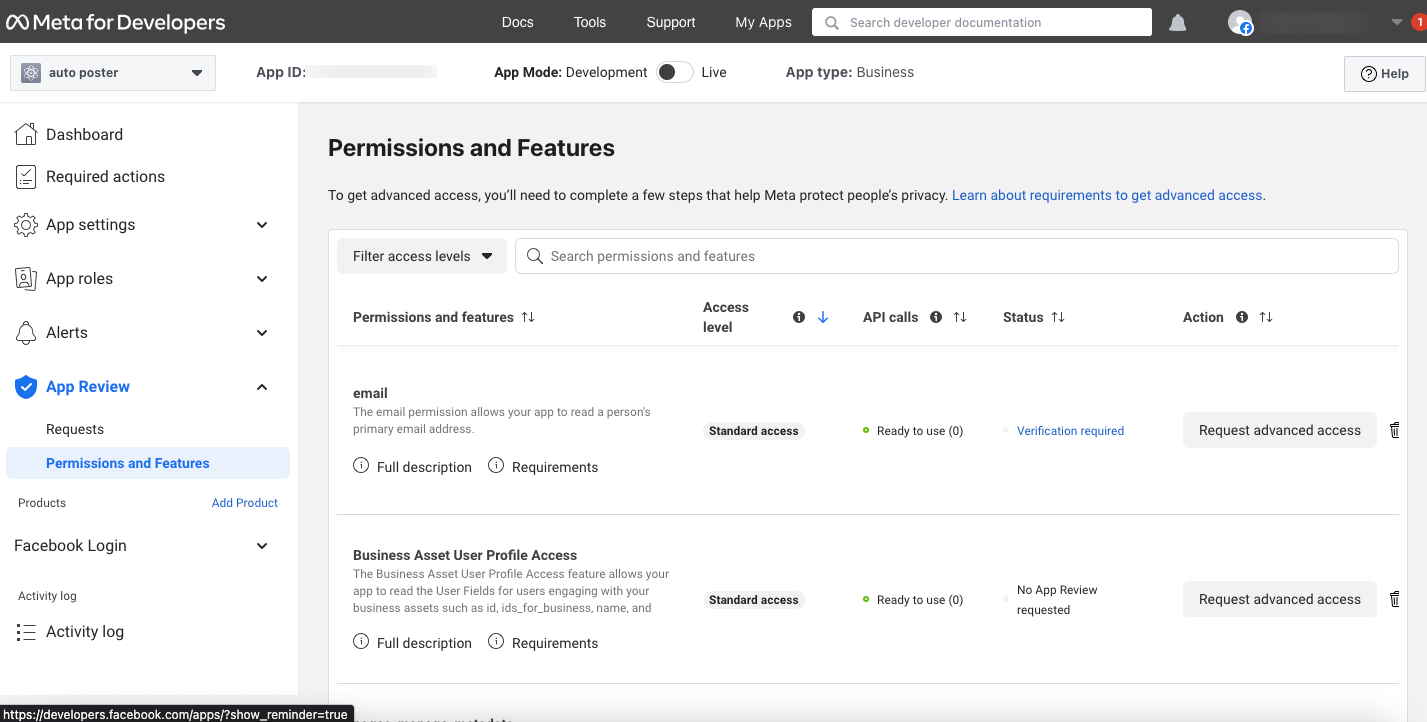
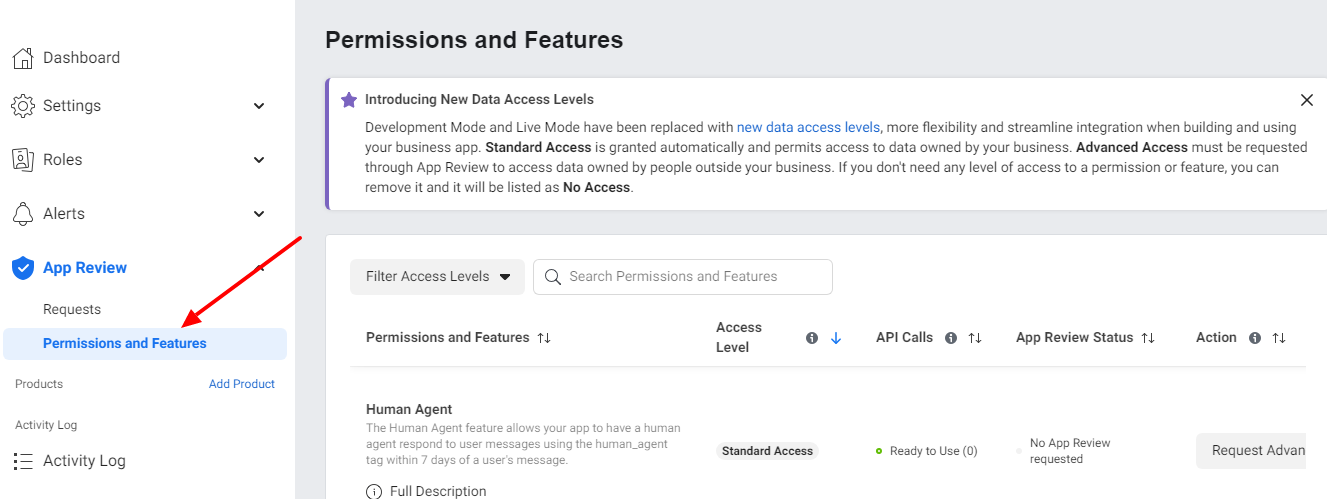
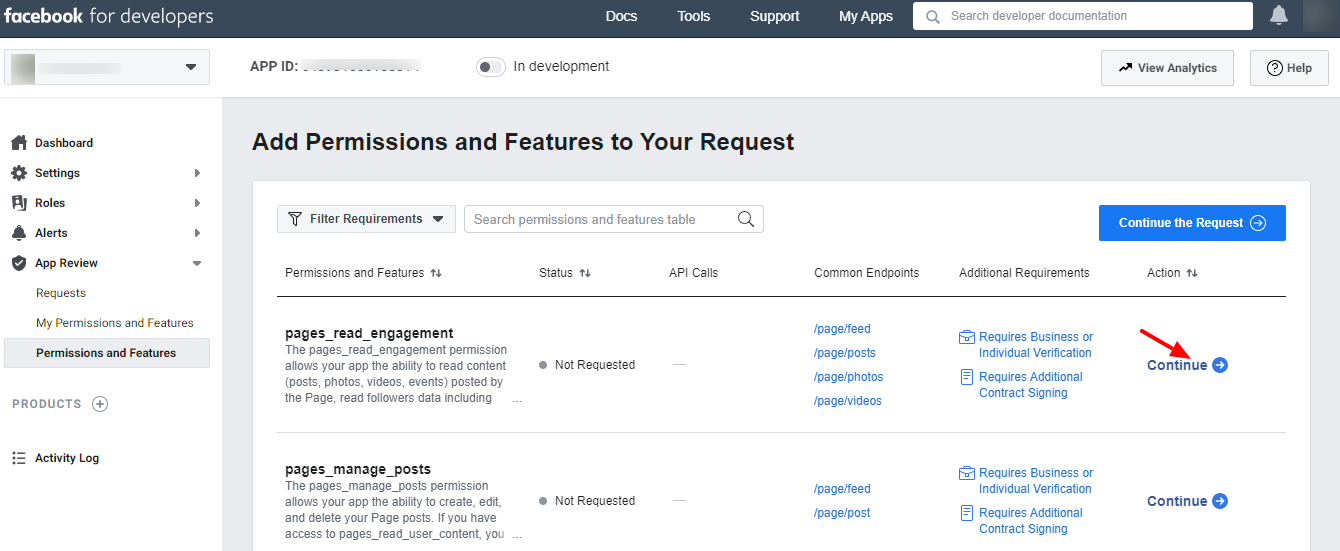
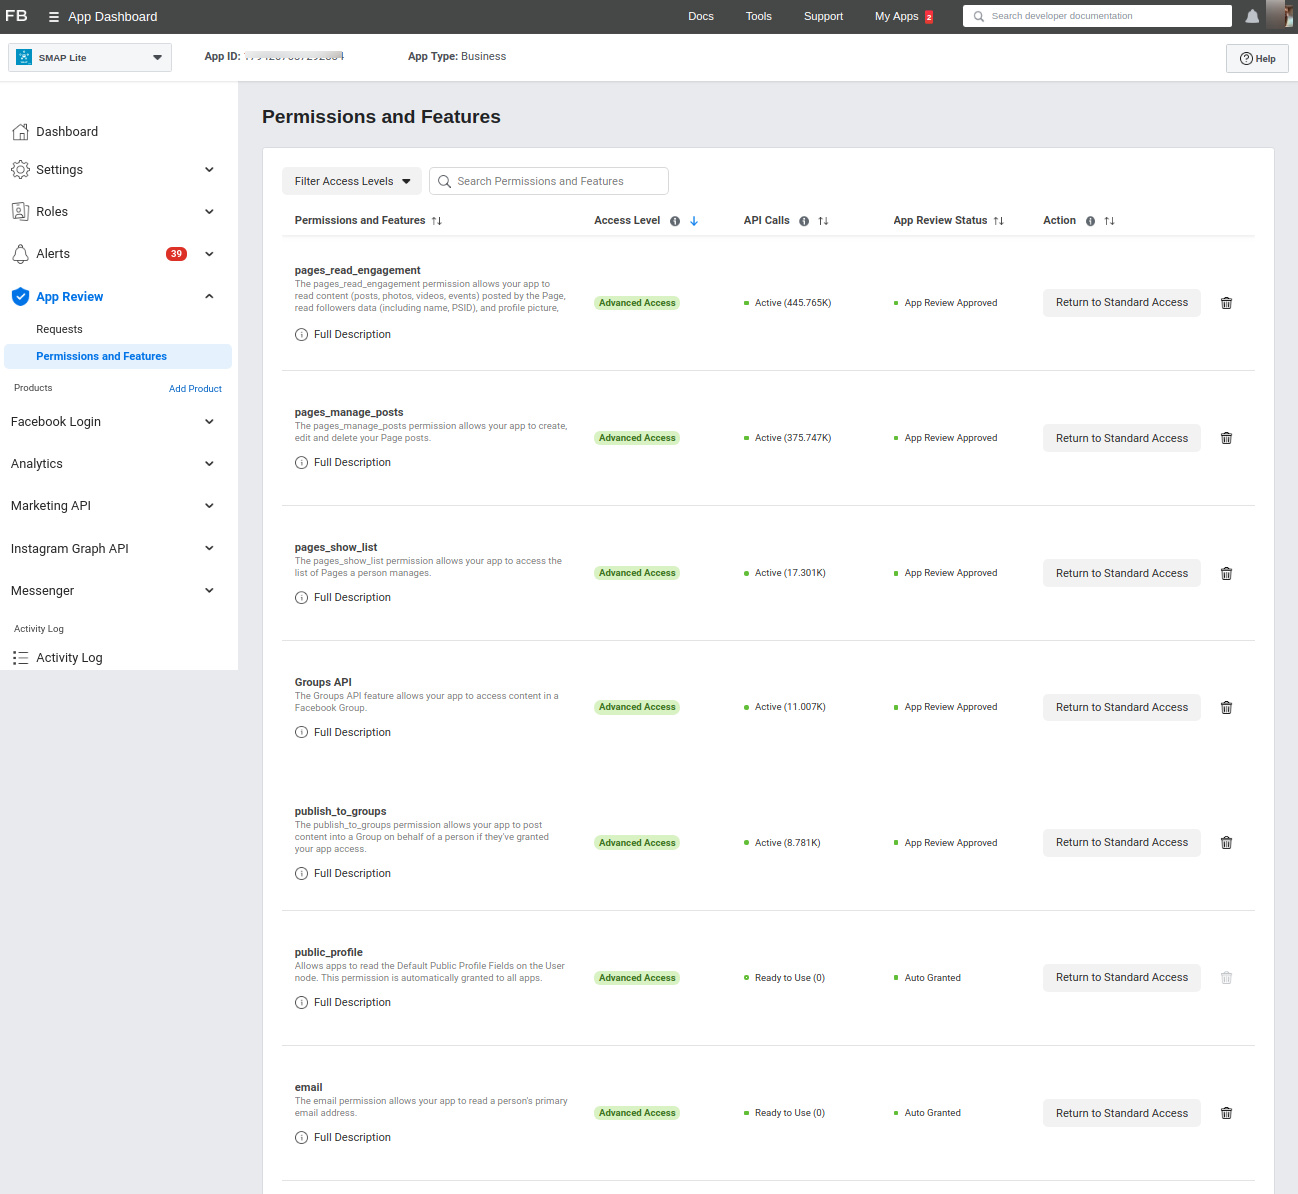
1: Click on the “App Review > Permissions and Features“.
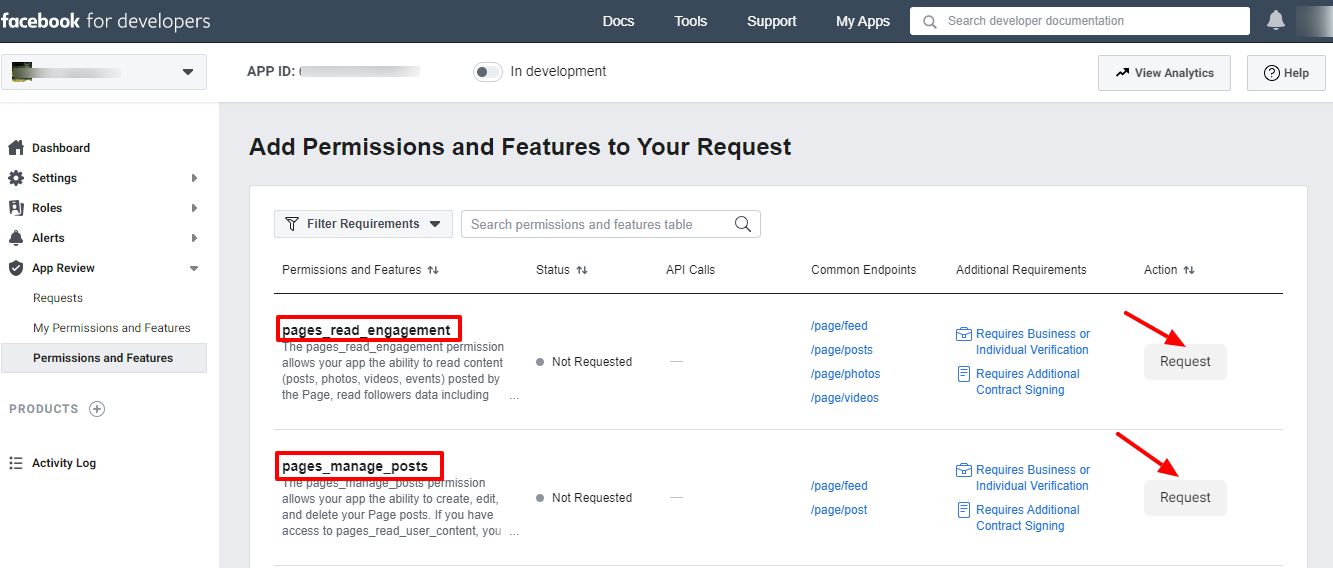
2: Now it will redirect to the all permissions and features page and in this, we can select the pages_read_engagement, pages_manage_posts, business_management and pages_show_list permissions and click on the “Request” button. (For the PREMIUM plugin we need 2 additional permissions for publishing the posts to groups – publish_to_groups and Groups API)
3: Now you can see the continue button after the request and click on it.
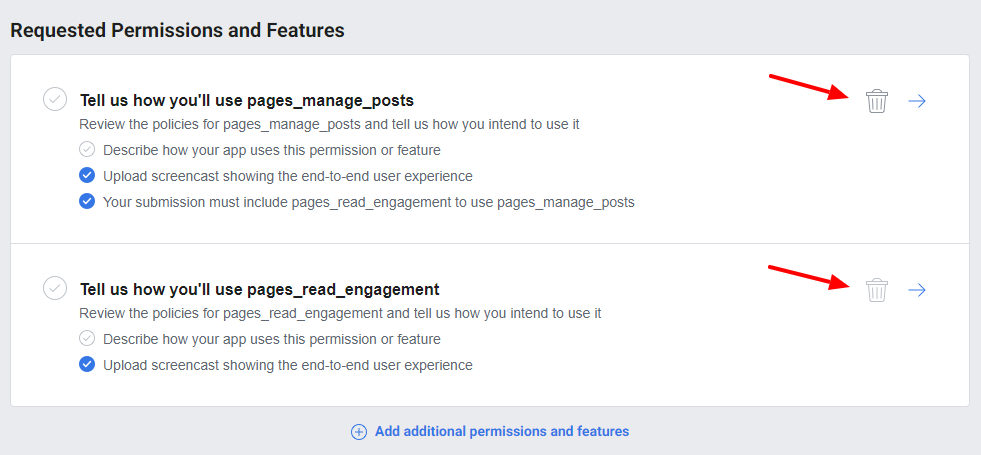
4. Click on each permission and you can add the details of each item.
4 A: Details for pages_read_engagement
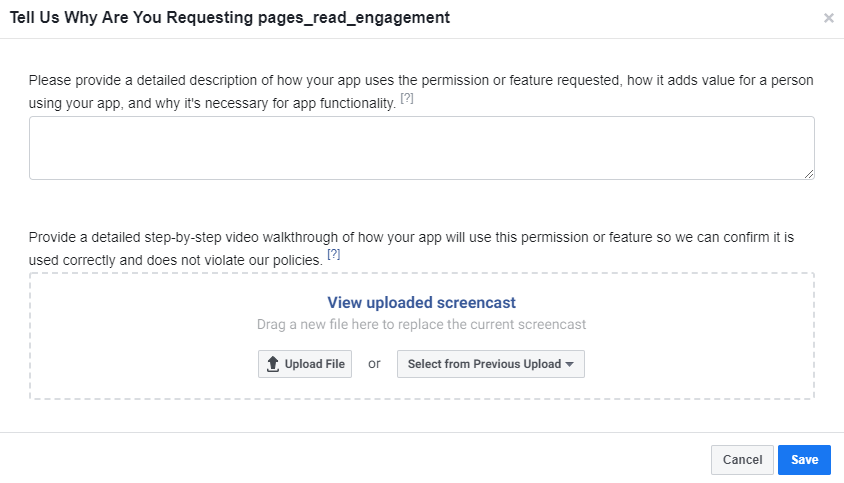
- For the question “Please provide a detailed description of how your app uses the permission or feature requested, how it adds value for a person using your app, and why it’s necessary for app functionality.”, please use the answer “The app uses this permission to get the metadata about the page managed by the user(such as page ids, publicly available page content such as post id, content posted by page, page name and PSIDs ). Once the app is authorized to use then we would be able to publish content to Pages owned by the admin from the authorized user’s WordPress site and track the auto-published post. This will reduce the time required to publish each post content manually to the admin’s Facebook pages ”.
- Now upload a video screencast of the procedure.
A sample video screencast is given in https://youtu.be/EuA8BTzW-B0. - After adding the details click on the Save button.
4 B: Details for pages_manage_posts
- For the question “Please provide a detailed description of how your app uses the permission or feature requested, how it adds value for a person using your app, and why it’s necessary for app functionality.”, please use the answer “The app uses this permission to Publish a post, photo, or video to your Page. Once the app is authorized to use then we would be able to publish content to Pages owned by the admin from the authorized user’s WordPress site and track the auto-published post. This will reduce the time required to publish each post content manually to the admin’s Facebook pages ”
- Now upload a video screencast of the procedure.
A sample video screencast is given in https://youtu.be/EuA8BTzW-B0. - After adding the details click on the Save button.
4 C: Details for pages_show_list
- For the question “Please provide a detailed description of how your app uses the permission or feature requested, how it adds value for a person using your app, and why it’s necessary for app functionality.”, please use the answer “The app uses this permission to Publish a post, photo, or video to your Page. Once the app is authorized to use then we would be able to publish content to Pages owned by the admin from the authorized user’s WordPress site and track the auto-published post. This will reduce the time required to publish each post content manually to the admin’s Facebook pages ”
- Now upload a video screencast of the procedure.
A sample video screencast is given in https://youtu.be/EuA8BTzW-B0. - After adding the details click on the Save button.
4D: Details for publish_to_groups (Only for premium plugin – for publishing to groups)
- For the question “Please provide a detailed description of how your app uses the permission or feature requested, how it adds value for a person using your app, and why it’s necessary for app functionality”, use the answer “To publish WordPress blog posts to Facebook groups managed by the app’s admin. And allows apps to post content into a group on behalf of a person if they’ve granted your app access. This will help people manage the content published to their group.”
- Now upload a video screencast of the procedure.
A sample video screencast is given in https://youtu.be/sjrTFF9uElc - After adding the details click on the Save button.
4E: Details for Groups API (Only for premium plugin – for publishing to groups)
- For the question “Tell us how you’re using this permission or feature” use the answer “To get the group’s details and publish WordPress blog posts to Facebook groups managed by the app’s admin using the plugin. Groups API is required to access content in a Facebook Group. This will help to manage the posts and content published to the group or to get information about content posted to in their group. It can also be used to let admin publish content from the app to their Facebook group. The app uses the Group API feature with the publish_to_groups permission.”
- Now upload a video screencast of the procedure.
A sample video screencast is given in https://youtu.be/sjrTFF9uElc - After adding the details click on the Save button.
4 F: Details for business_management
- For the question “Please provide a detailed description of how your app uses the permission or feature requested, how it adds value for a person using your app, and why it’s necessary for app functionality.”, please use the answer “The app utilizes this permission to list the connected Facebook Pages. Once authorized, the app can display a list of pages, allowing users to select the appropriate pages to publish content. This functionality is particularly beneficial for admins who wish to automatically publish posts from their WordPress site to their Facebook pages and track these auto-published posts. Implementing this feature reduces the time required for manual publication of each post to the admin’s Facebook pages.”
- Now upload a video screencast of the procedure.
A sample video screencast is given in https://youtu.be/EuA8BTzW-B0. - After adding the details click on the Save button.
4 G: Complete App Verification and Settings
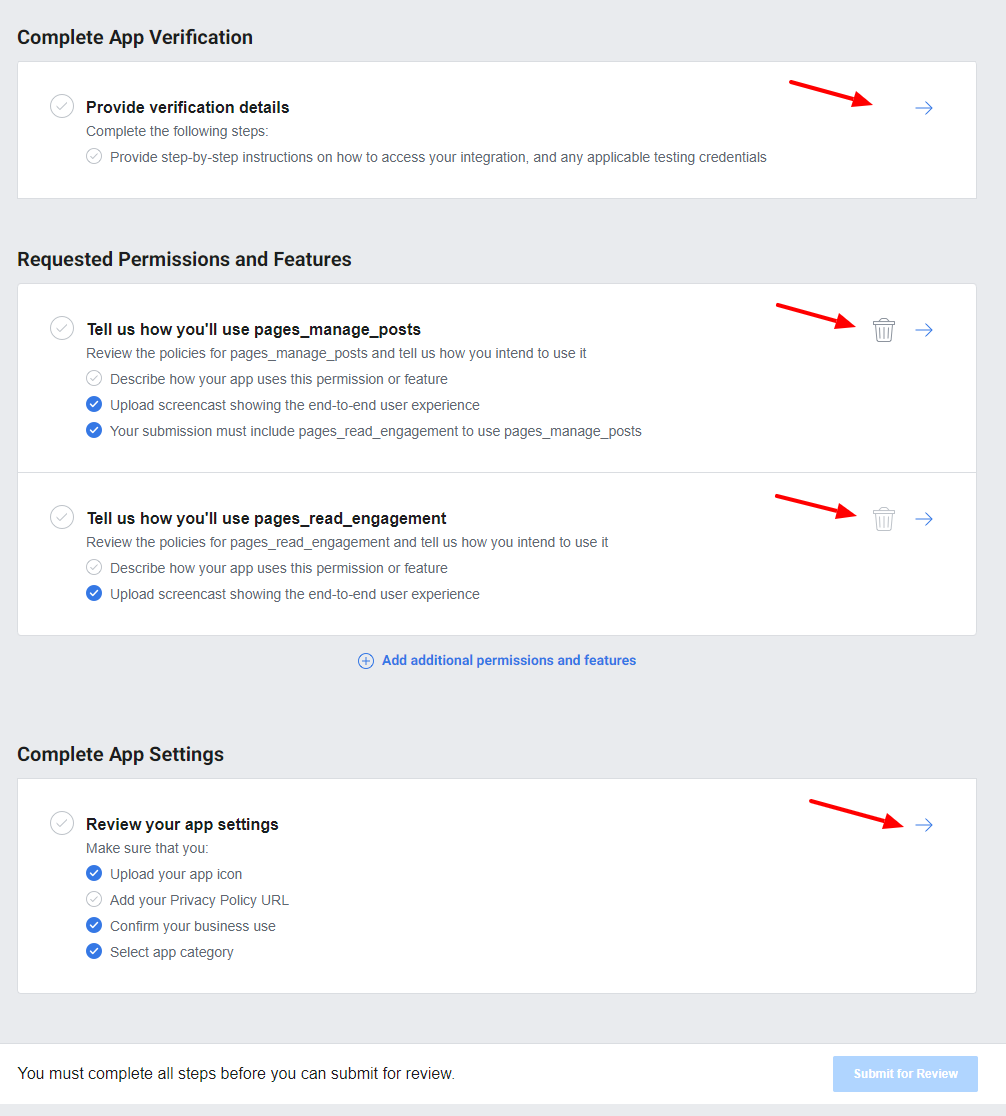
In the section ’Provide verification details’ we can provide verification details and review the app settings.
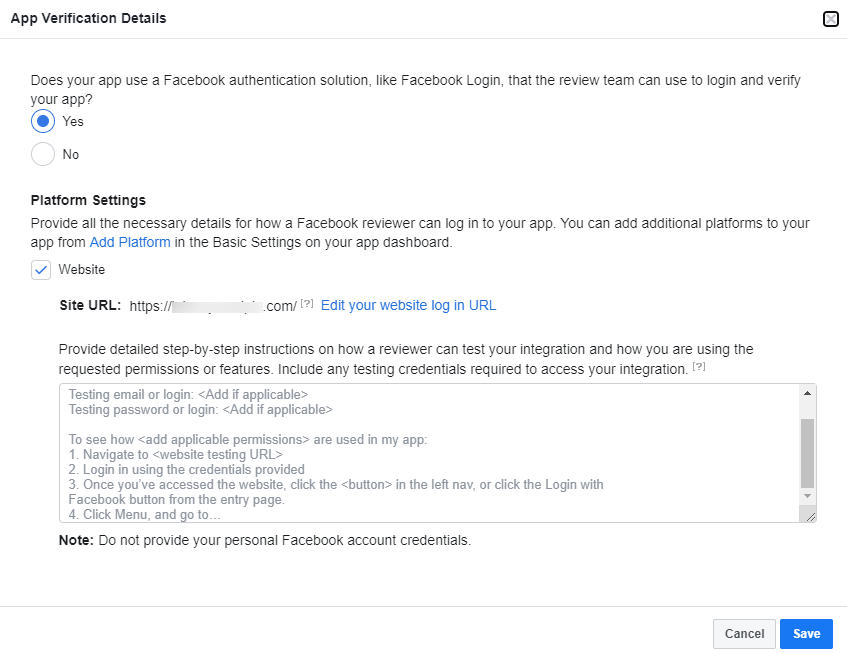
In the detailed step-by-step instructions, please use the detailed steps.
Sample detailed step-by-step instructions are given below:
- Go to https://sampledomain.com/wp-login.php
- Log in as an administrator with password: <password>.
user name: <user name>
- Go to https://sampledomain.com/wp-admin/admin.php?page=social-media-auto-publish-manageaccounts&action=add-account&type=1 where the user has to enter the required settings and authorize the application from the plugin’s settings page.
- Enter the application name and settings, then click on the button ‘Save and Authenticate’. The “Facebook login” is renamed as authorization here.
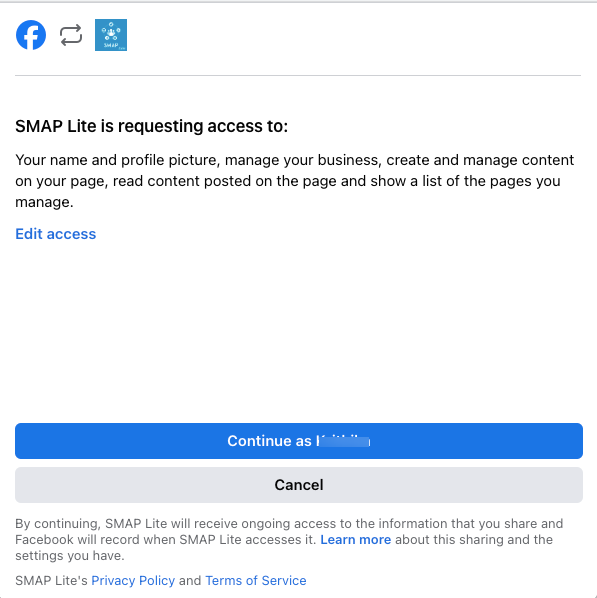
- It will take you to the Facebook authorization procedure.
- Upon successful authorization, if you manage Facebook pages/groups, you will be prompted to select the Facebook pages/groups to which you need updates to be published.
- After selecting Facebook pages/groups, you will be returned to the website.
- After the authorization is complete, make a post on the website by following the below steps,
8.1: Go to https://sampledomain.com/wp-admin/post-new.php
8.2: Fill in some title and content, and image to post, then click the ‘publish’ button on the right side. The new post will be published on the website as well as on Facebook Group.
In this section ’Review Your App Settings’, you can review the app settings by adding App Icon, Privacy Policy URL, Category, etc.
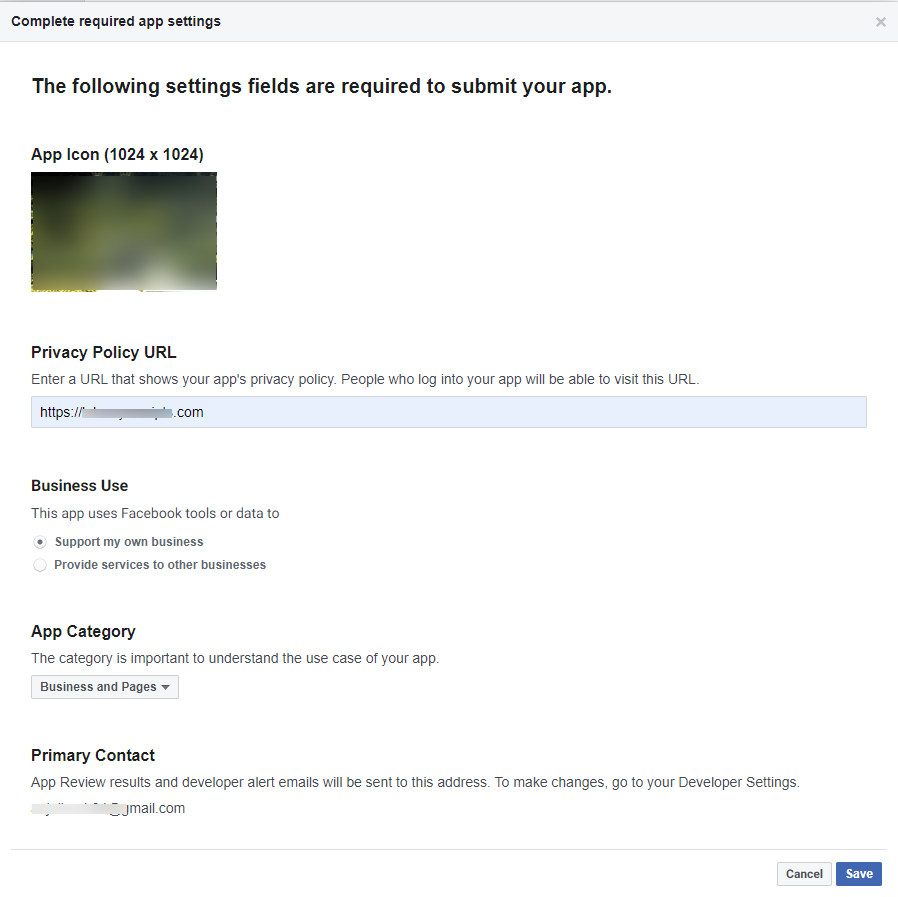
After entering the details, please save them. Now we can submit the app for review.
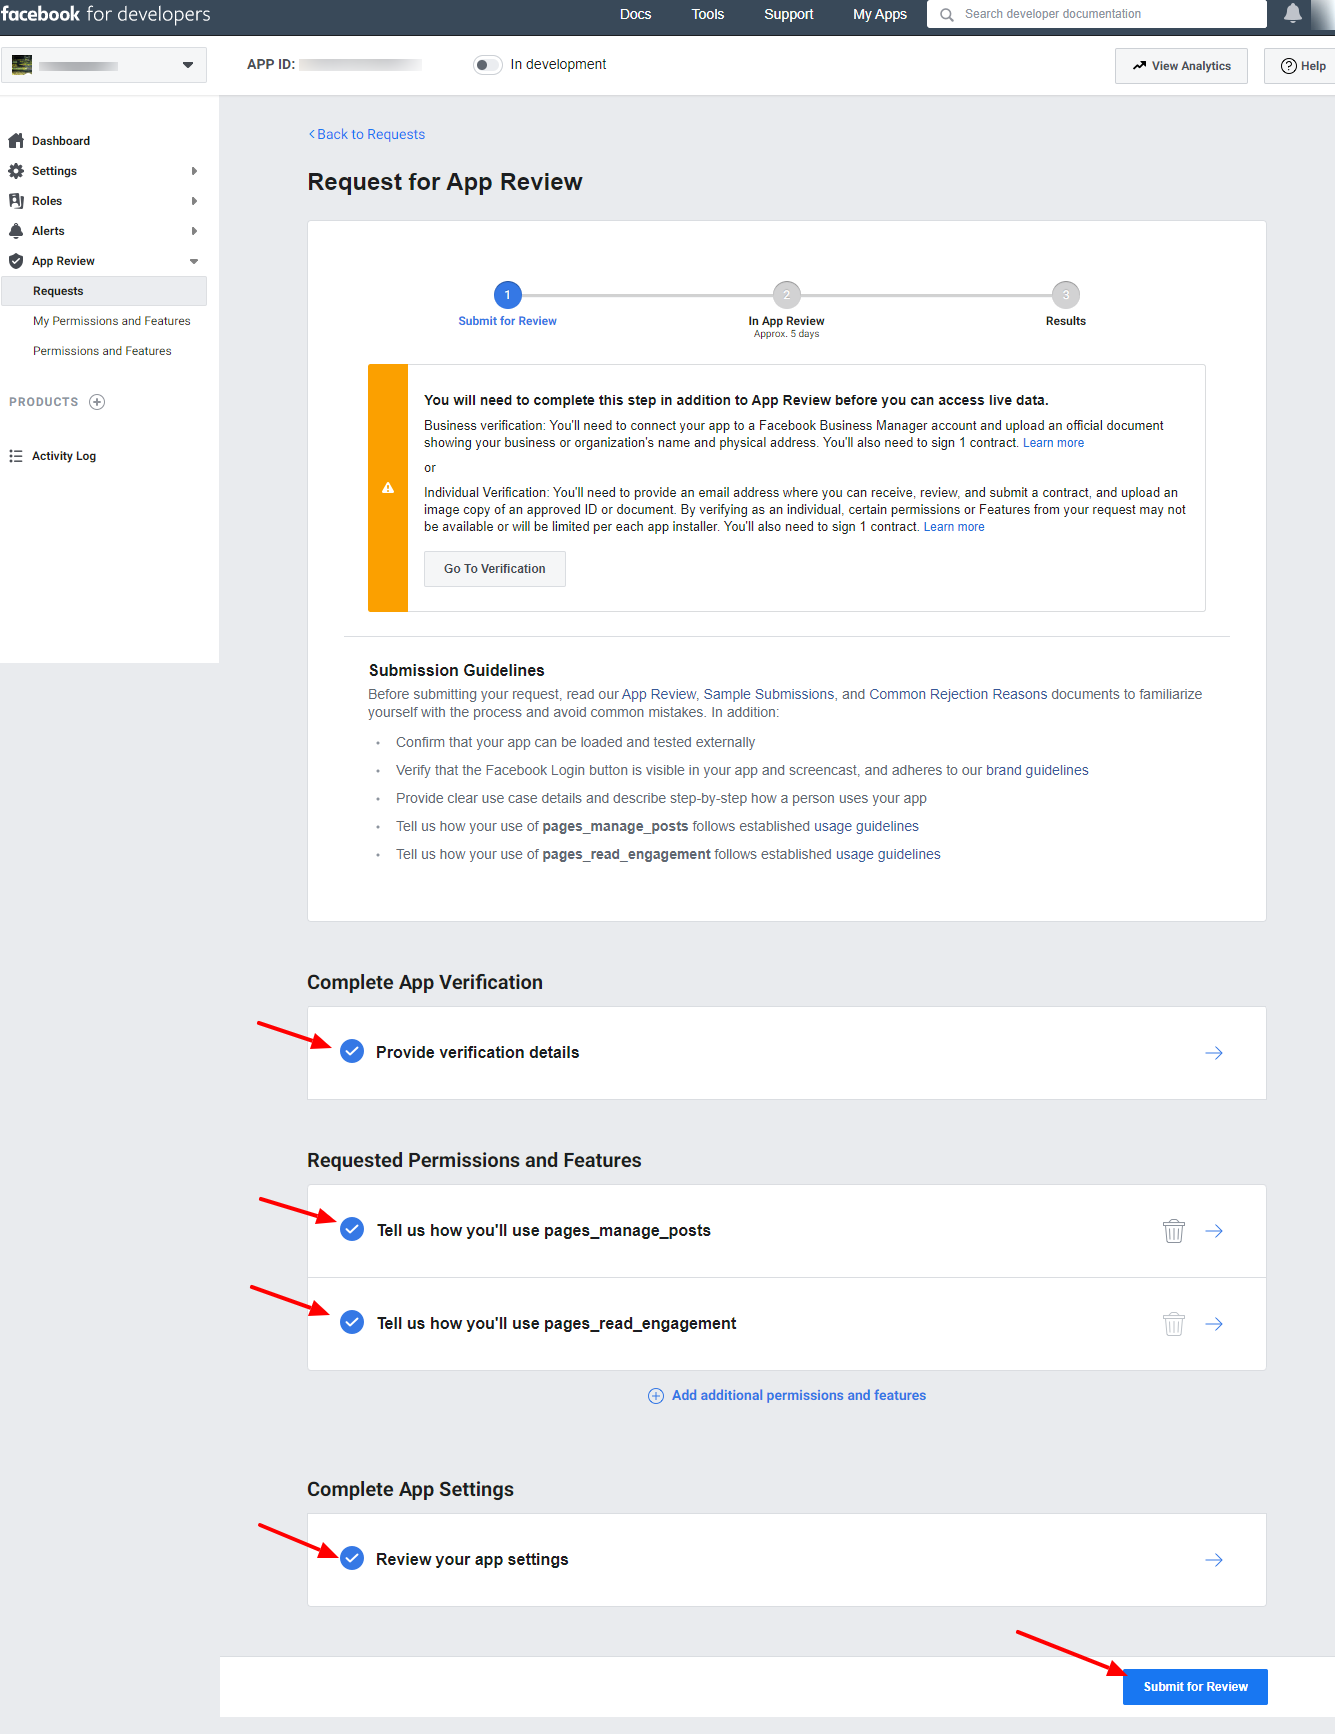
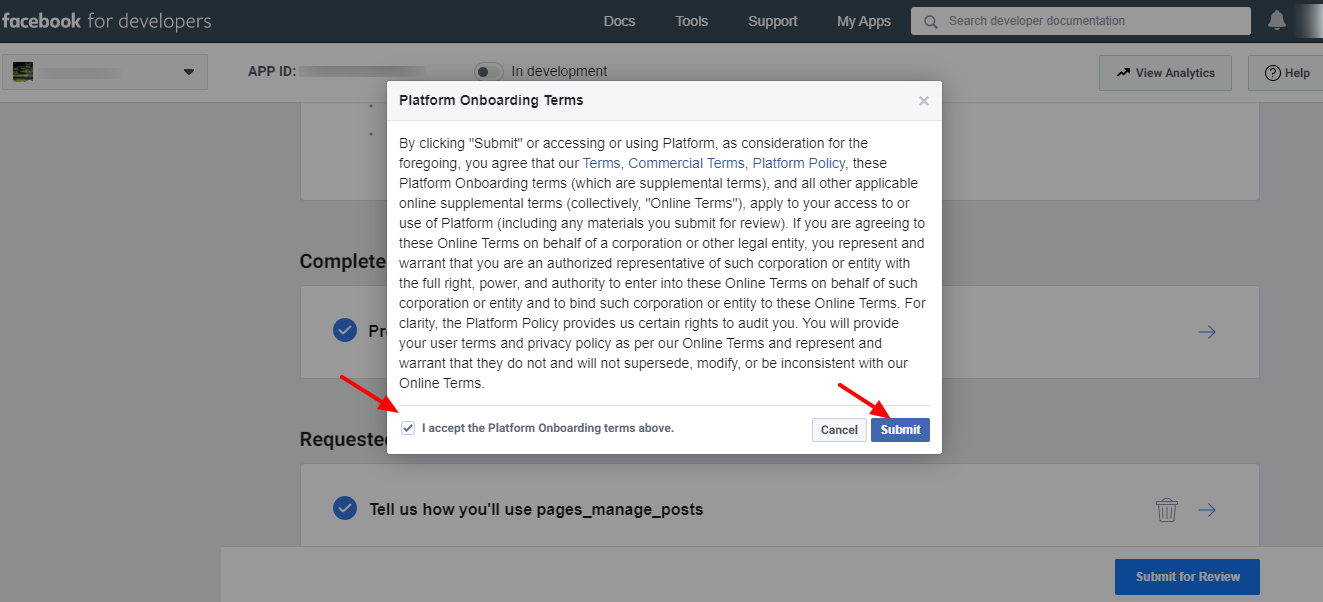
Accept the terms and submit. The app is now submitted for approval.
Note 1: It may take some to get the app approved by Facebook. (5 days – 3 months).
Note 2: If you are getting any response from Facebook saying that the “Facebook Login” option is not present on the page, please tell them the “Facebook login” is renamed as authorization here and then click on the authorize button, the Facebook login is executing.
Step 9:
After review by Facebook, they will ask to enter the business details. (At the time of app submission this option is not available. We can see this after the review of Facebook)
You can see the details in
If you find it difficult to submit the app for approval, you can opt for an alternate paid solution and the details are available in
Once the app gets approved, you can see the permissions approved with a green bubble under the “App Review > My Permissions and Features”.
You can now use the Facebook app keys in the plugin.
Now enter these keys in the plugin settings on your site.
After entering the keys on the Facebook settings page, you need to “Authorize” the account. (The authorization section is present in the WordPress plugin section).
You can see the FB pages on the settings page only after authorizing your FB account.
Note: To publish the posts to groups you need to connect the app to the group and you can see the details in How can I add or remove an app from a group that I manage?
When you click on the “Authorize” button, it will redirect to a Facebook popup dialog box.
Step A:
Note: If you find it difficult to submit the app for approval, you can opt for an alternate paid solution and the details are available in